How to replace a clutch on a lifan 140

Mini Dirt Bikes & Pit Bikes Forum

Help Support Mini Dirt Bikes & Pit Bikes Forum:

This site may earn a commission from merchant affiliate links, including eBay, Amazon, and others.

Kingers

Well-Known Member
Joined
Jul 15, 2008
Messages
425
Reaction score
6
Location
Seville, Vic
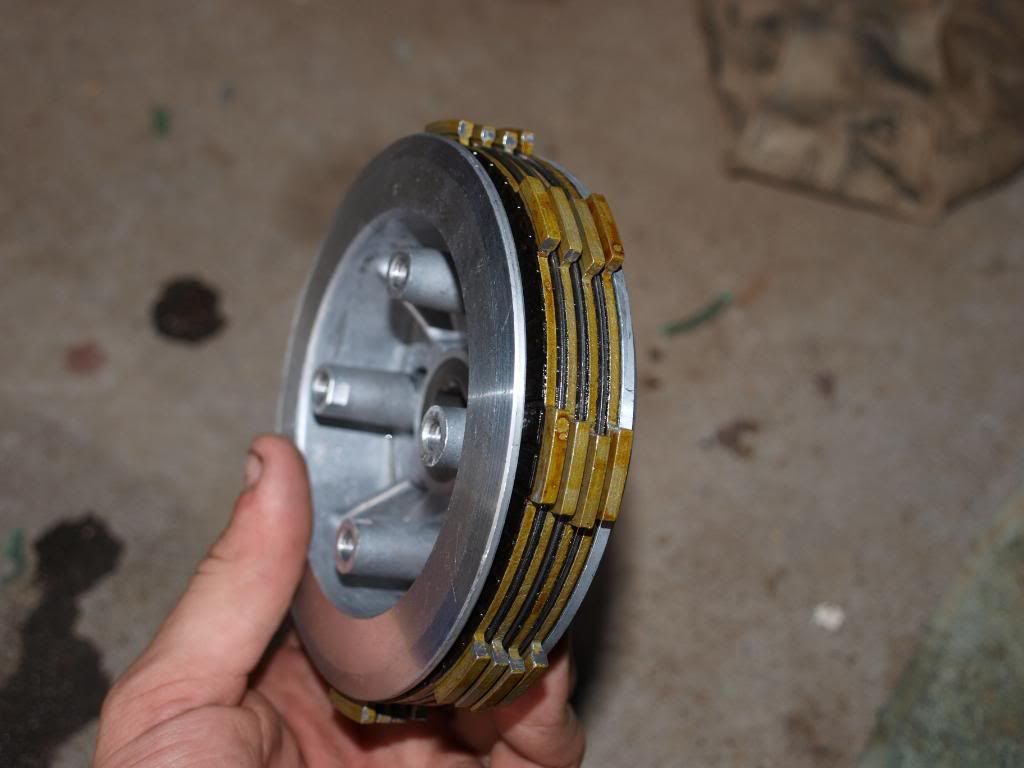
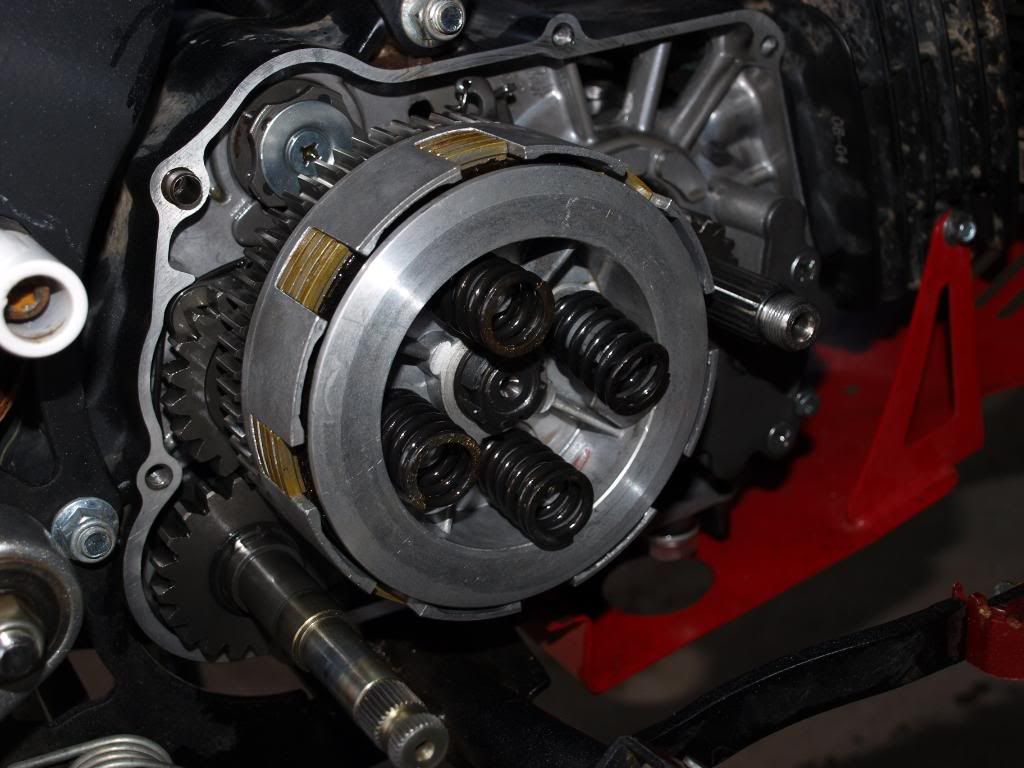
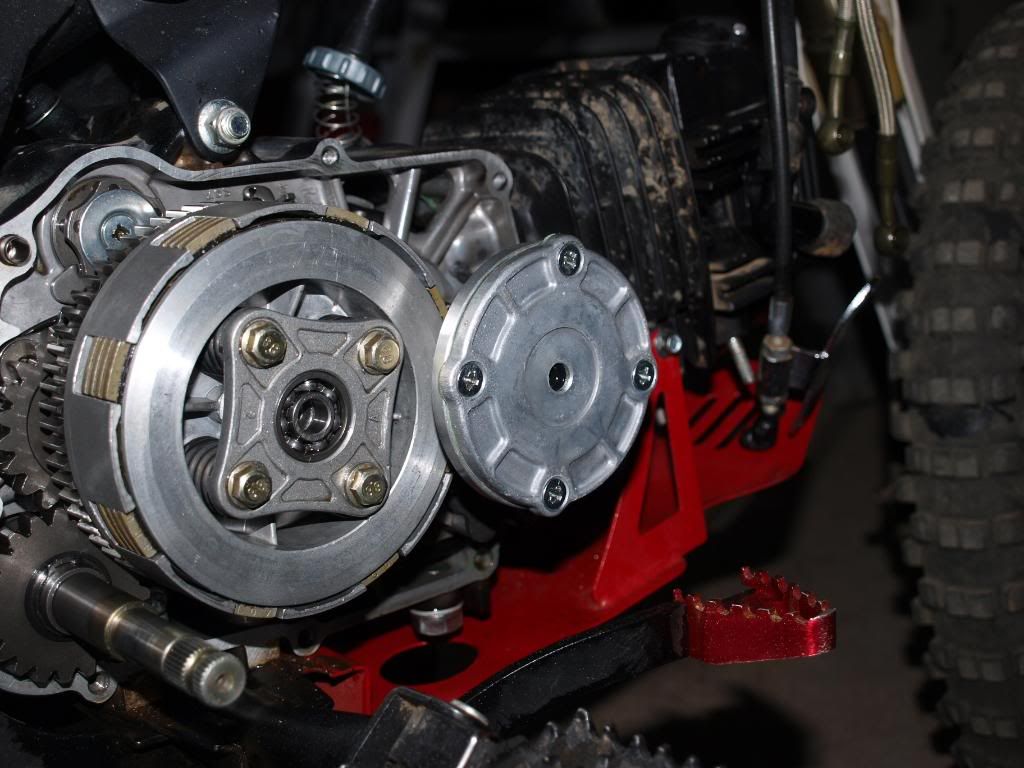
Ok well I’ve had to replace my clutch so I thought whilst I got everything apart I might as well do a tutorial on it, This is how to put the clutch back on once the old clutch has been removed but I will also tell you how it is removed as well, This is my first tutorial so be nice, lol

P3192590.jpg


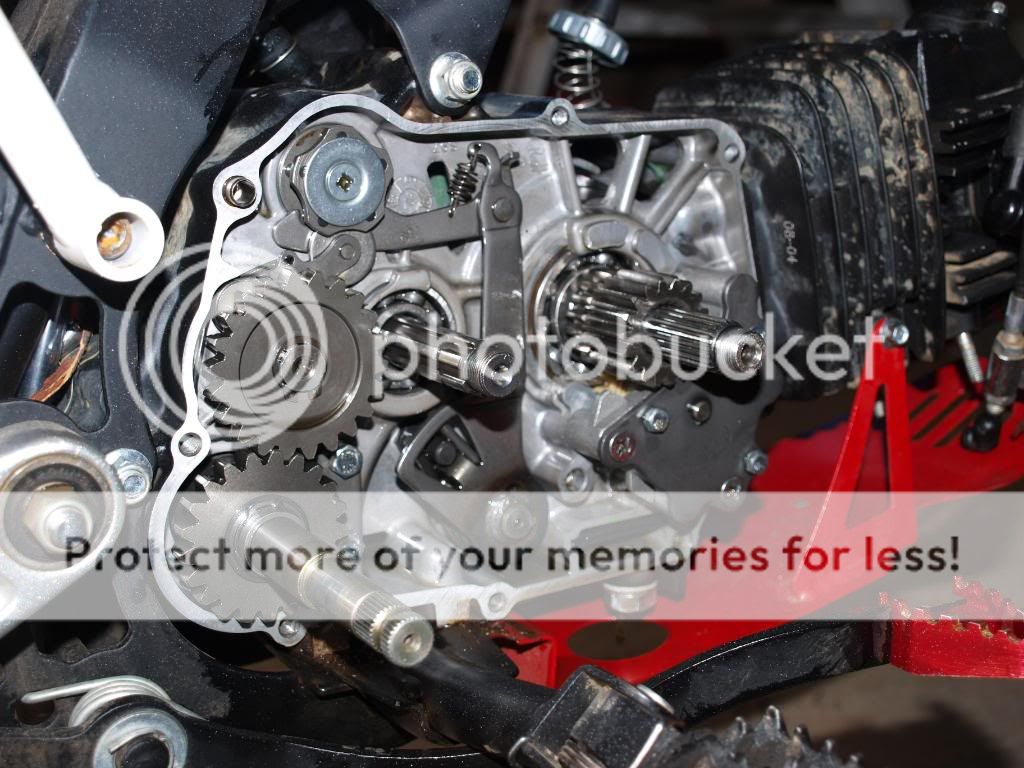
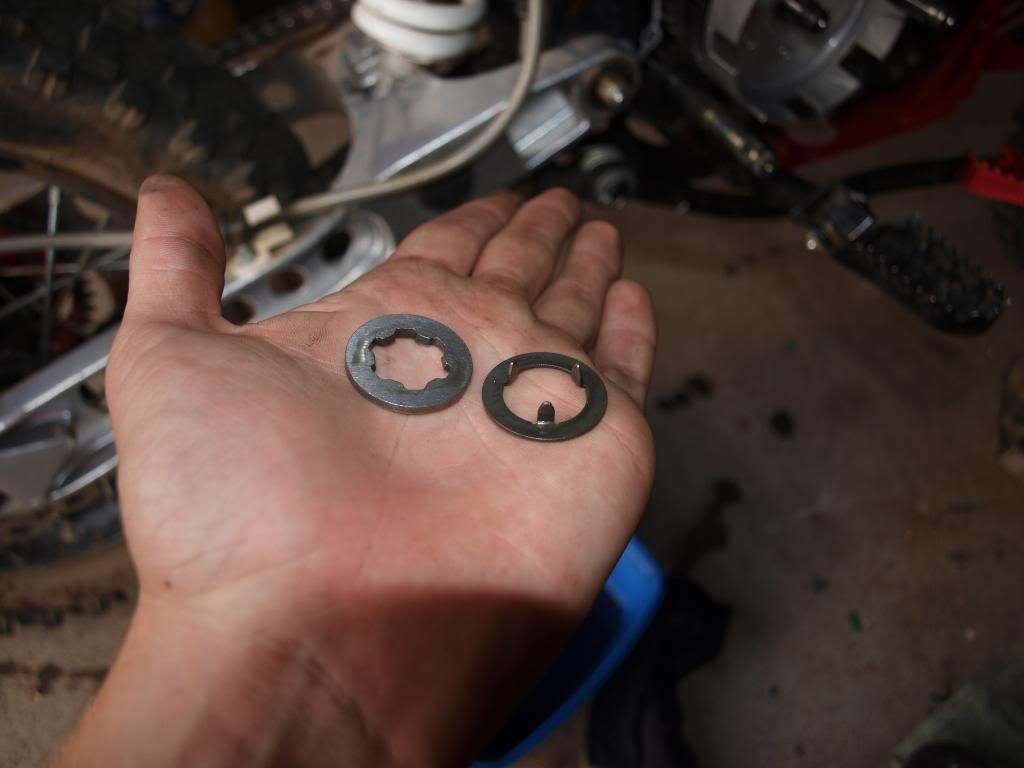
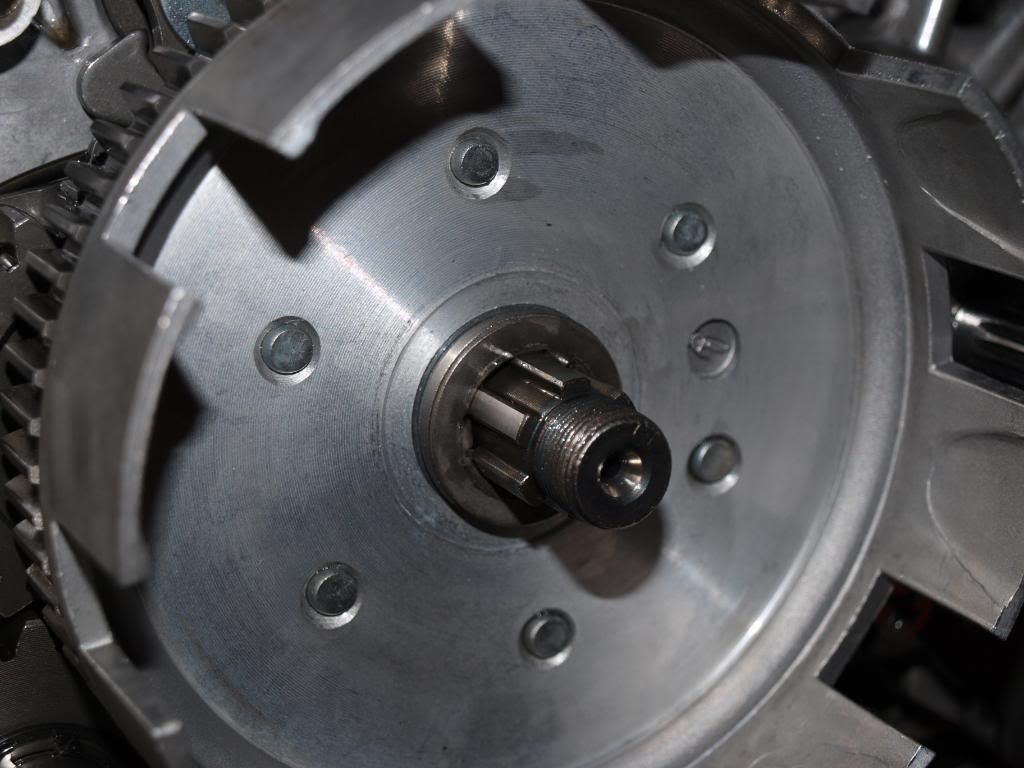
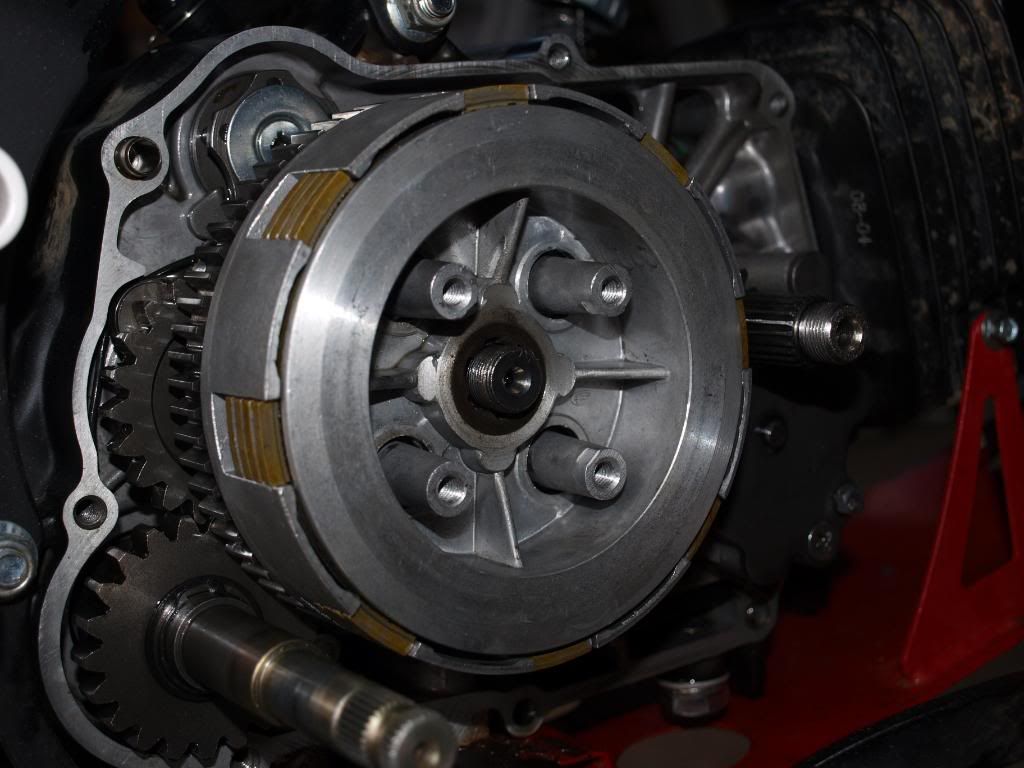
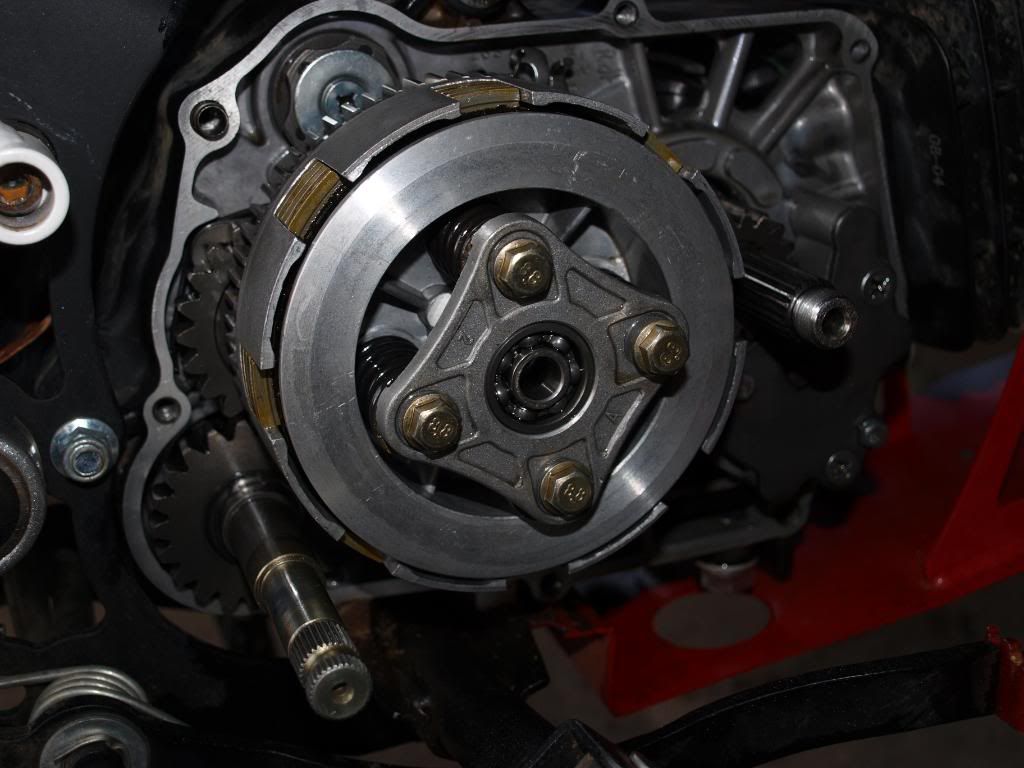
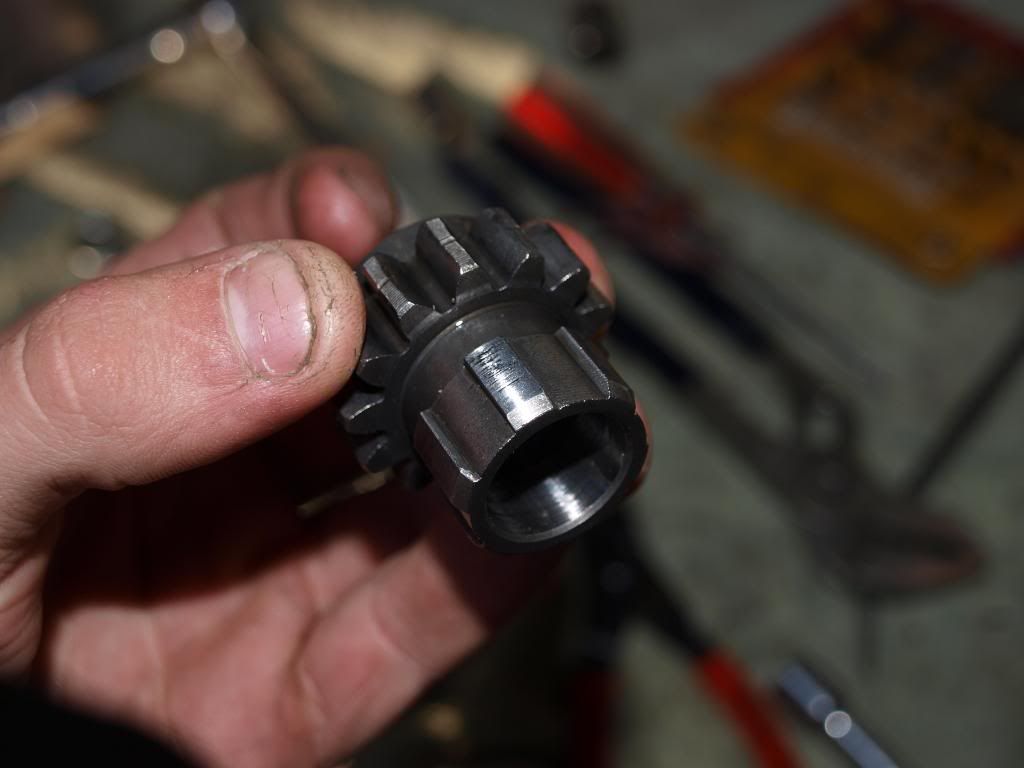
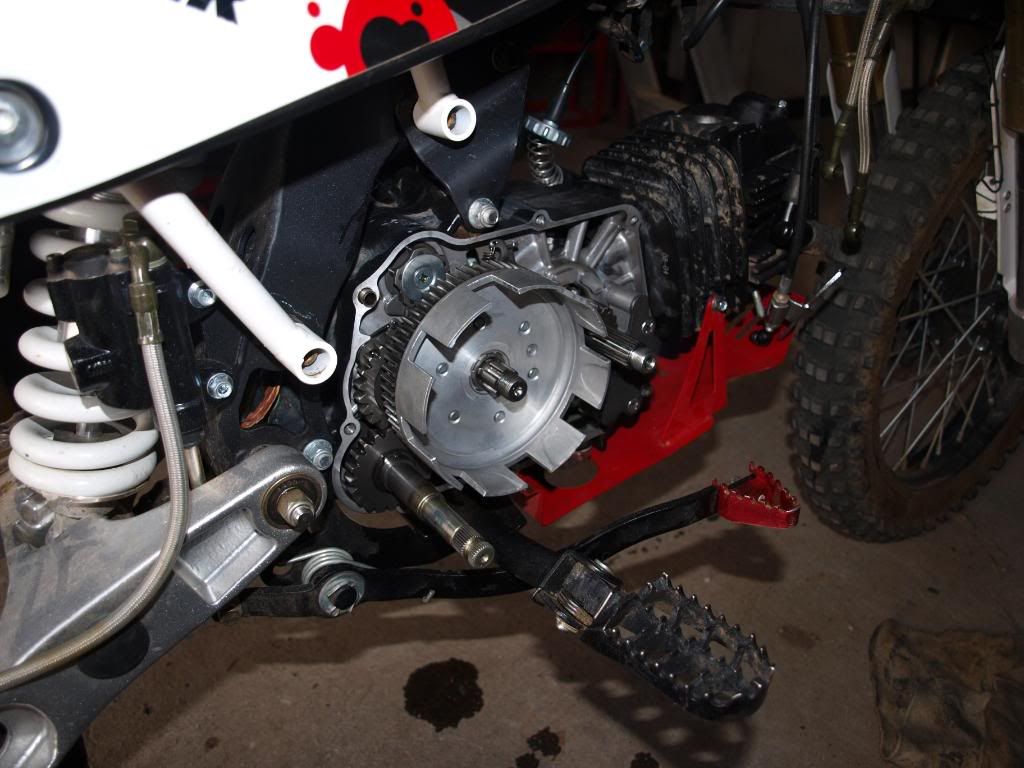
Ok well this is what you have left once the clutch and the oil slinger has been removed. The rod on the right is the crank, those two gears on the end just slide off. In the middle is the drive for the gear and the one on the end is the kick start gear. Do not try to pull the kick start rod out because the rod is on a spring and it’s a pain to have to get it back in again so it springs back. To remove the kick start gears its just a matter of removing the clip that sits in front of the gear


P3162583.jpg


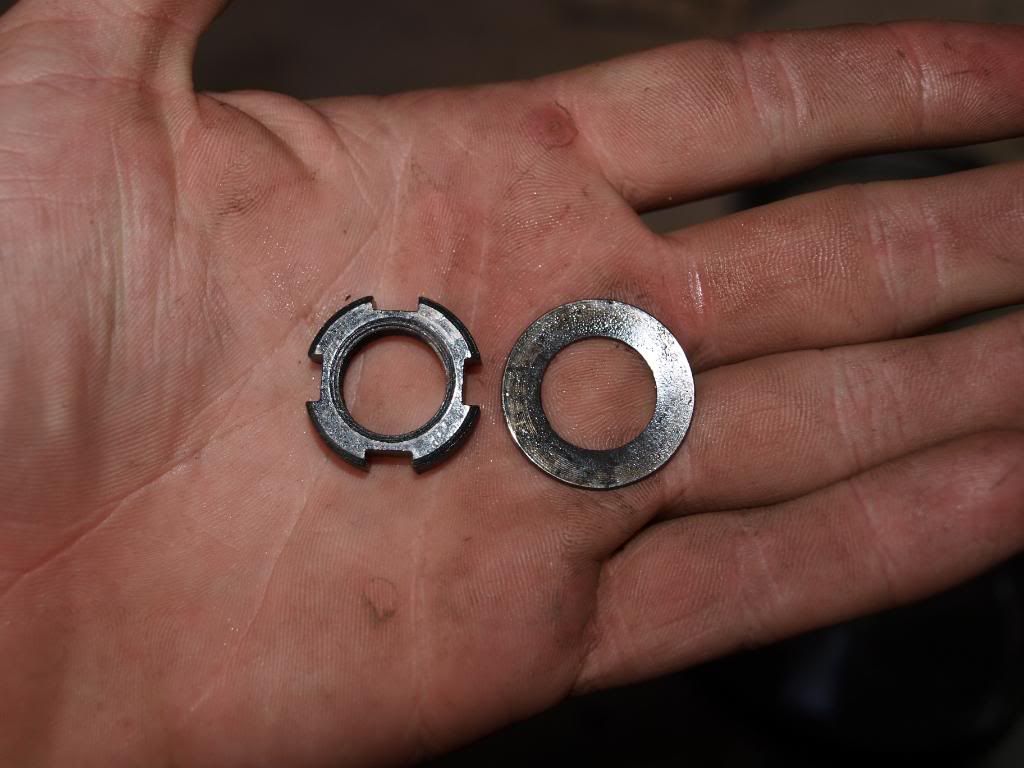
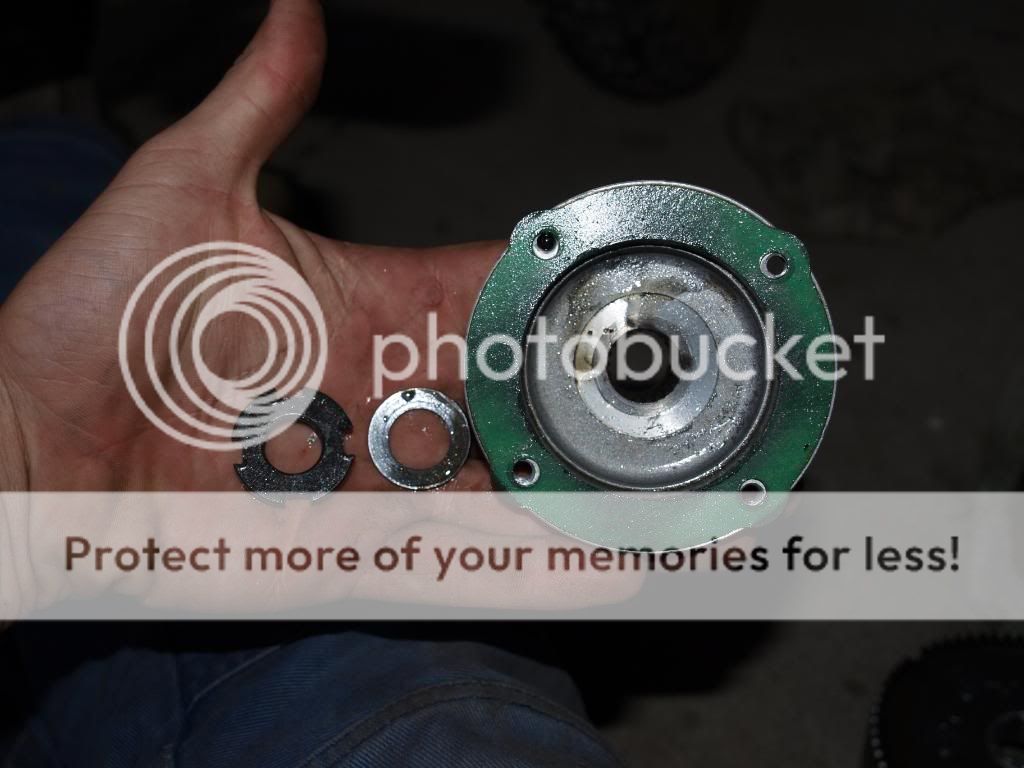
This slides over the top of the gear shaft


P3192591.jpg


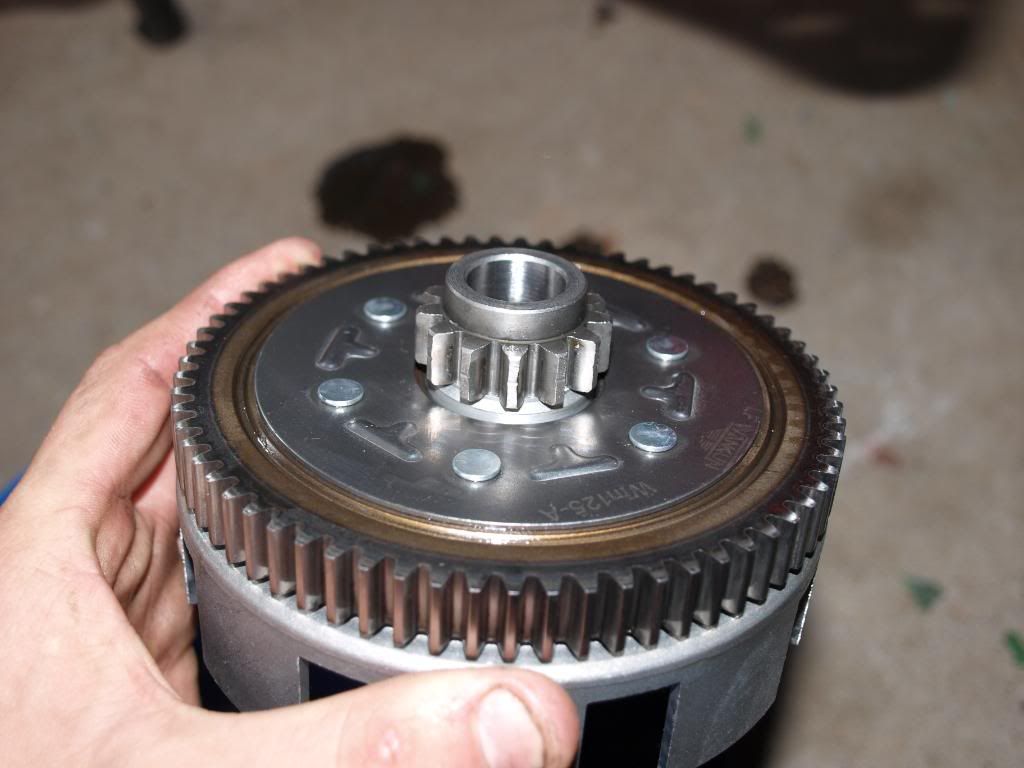
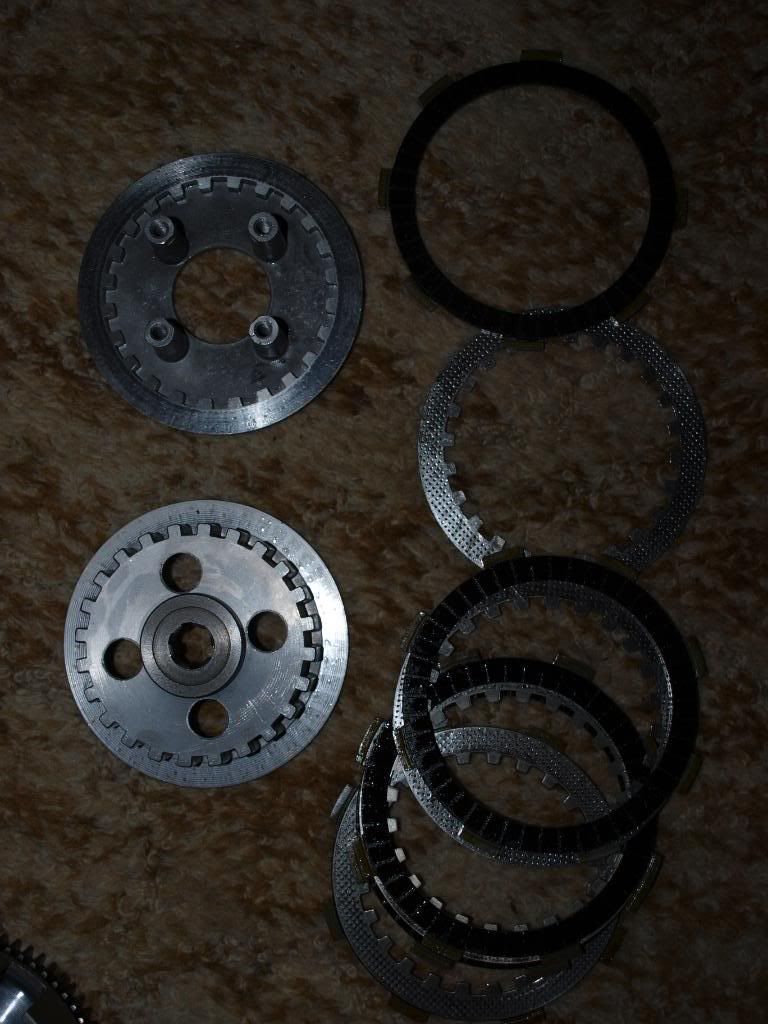
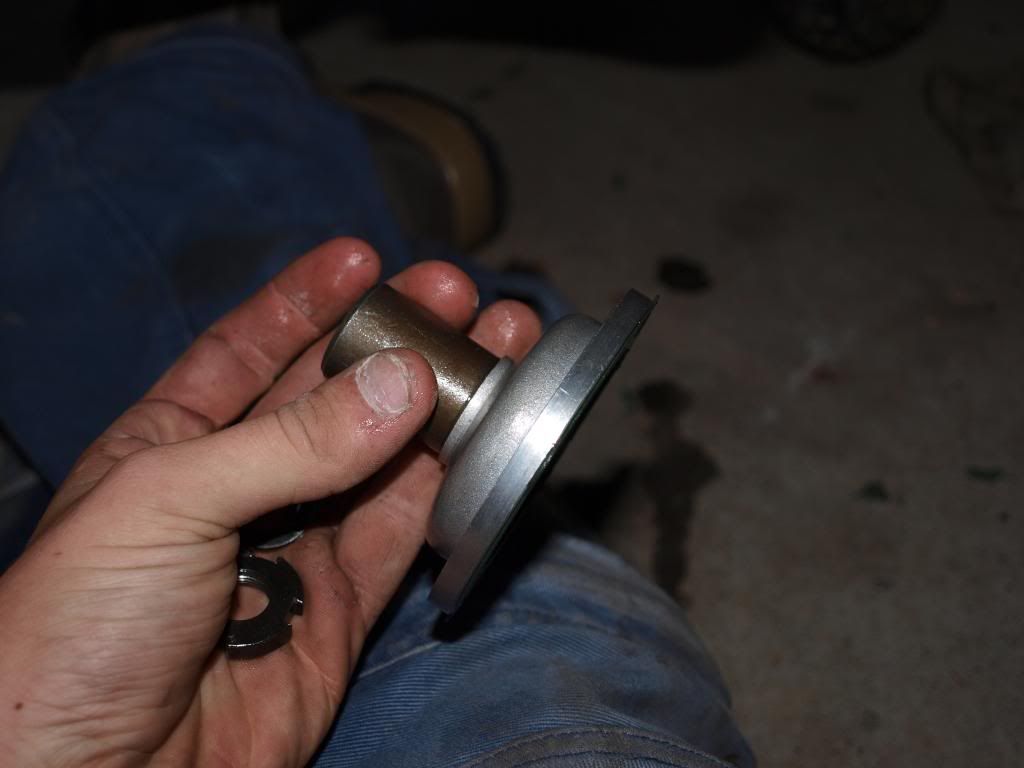
The side with the splines slides into the end of the outer clutch basket like so.


P3192592.jpg


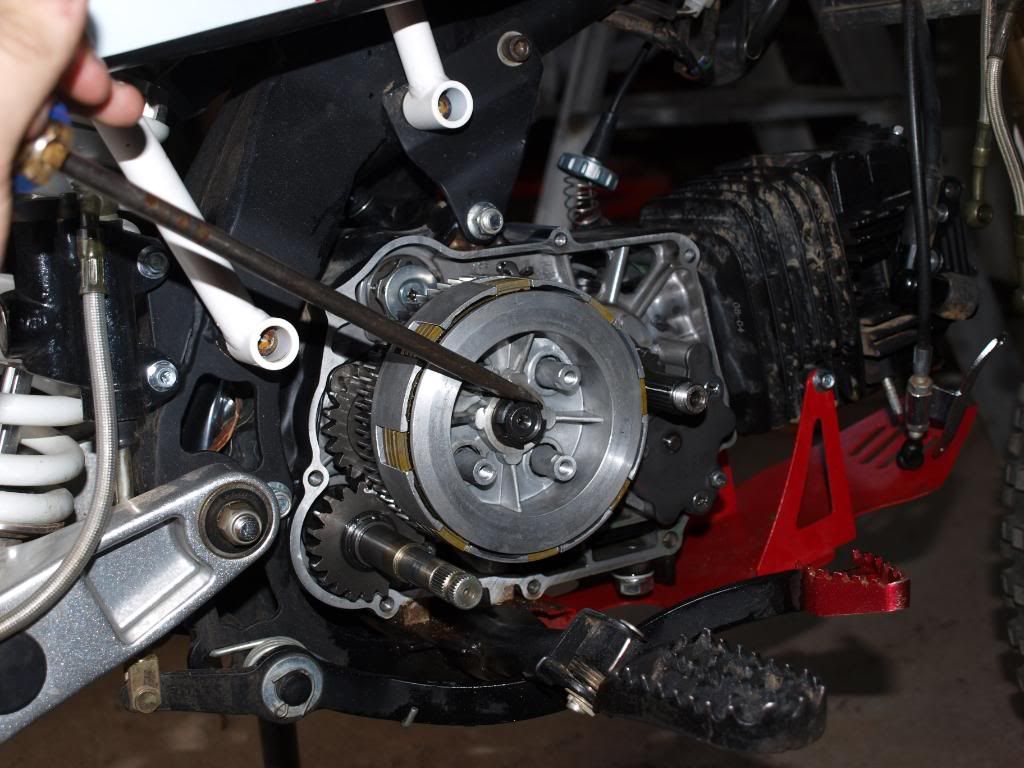
Then its just a matter of sliding it on or off if you want to remove it. Make sure it sits all the way back, you might need to slightly turn it so that it meshes with the other gears and slides back on.


Continued next post
 
Last edited:
P3192594.jpg


Ok what we have here is a lock washer and a three pronged washer that holds the clutch basket on, to get it on its basically the same as the front sprocket of the bike slide it on the shaft the once it reaches the grove rotate it slightly so it locks in and wont come off, then slide the three pronged washer on so that it locks the other washer in place, Pronged side towards the motor


P3192595.jpg


This is what it looks like, to remove it take the three pronged washer out the slightly rotate the other then slide it off.


P3192611.jpg


Ok now we have the inner basket and friction plates and plates. If you are changing plates or make sure the order of the plates starts with a friction plate and ends with a friction plate. So it goes friction plate, steel plate, friction plate etc.


P3192612.jpg


Place the friction plates and plates onto one half of the inner basket


Continued next post
 
P3192596.jpg


Then place the other piece inside the plates and rotate the plates so all the notches line up and let the two halves come together like this


P3192598.jpg


Then its just a matter of sliding the inner basket inside of the outer basket


P3192599.jpg


Ok well here we have a washer and a lock nut. The washer goes on first then the the lock nut goes onto the shaft. To either undo this or do it up there is a special too you could buy but its just as easy to use a big flat screw driver and a hammer do do it up


P3192601.jpg


Continued next post
 
P3192602.jpg


Now place the springs on


P3192603.jpg


Then place the pressure plate on and do up the bolts to hold it all together

Ok well that’s the clutch all done but now the oil slinger needs to be put back on, to get the clutch of you will need to remove the oil slinger


P3192605.jpg


Front view, there is anther lock nut and washer with this


P3192606.jpg


Side view

Place the oil slinger on to the end of the crank,

There are splines on the end of the crank that this slides onto and then place the washer then the lock nut on and do them up, same way as the clutch was don’t with a hammer and a screw driver. It may also help to click the bike into gear so it doesn’t move when trying to do it up.


Continued next post
 
P3192607.jpg


Then place the front cover on the oil slinger. You will need a impact driver to do the screws up, some people say you can use a hammer and a big screw driver but I find it easier and safer to use an impact driver, they only cost $20 from a hardware store or and automotive store


P3192608.jpg


Impact driver and a hammer best option to do the screws up with

To remove slinger just reverse what was done, also make sure the impact drive is set to undo the screws


P3192609.jpg


On the kick start rod there should be a washer there that will slide half way up the rod BEFORE placing the case back on

Then place the case back on and so up the bolts, making sure the correct bolts are in the correct holes, it is also a good time to connect up the clutch cable back to the the puller at the top of the case.

I found to make it easier to get the bolt down the bottom out to wedge a screwdriver under the brake to hold it out of the way


P3192610.jpg


Then place the kick start back on and place the oil drain bolt and oil dip stick back in and that’s it, also remember to fill it back up with oil.

To remove case make sure to drain the oil then do the reverse of what has just been written.


I am not a mechanic, this is only a guide to show you what I did and if you follow this guide and somehow manage to stuff your engine up I take no responsibitly, check the manual of your bike for any torque settings that need to be set to any bolts.


ps anyone that notices anything wrong in this feel free to tell me and i'll fix it up
 
Last edited:
excellent pics and walk through on the clutch thanx mate made things abit clearer
 

Latest posts

Back
Top