You are using an out of date browser. It may not display this or other websites correctly.
You should upgrade or use an alternative browser.
You should upgrade or use an alternative browser.
My 2002 WR426 Project (In bits)


Help Support Mini Dirt Bikes & Pit Bikes Forum:
This site may earn a commission from merchant affiliate
links, including eBay, Amazon, and others.


gottagetacheaperhobby
Moderator
will be a good project, what does it need?
ouch..... did it drop a valve?
but thats not a bad score!
whats your plans for the head and the crank....?? ie; how ya gunna fix it?
but thats not a bad score!
whats your plans for the head and the crank....?? ie; how ya gunna fix it?
So far, head (maybe can repair this one but dont want to depends on $$)will be a good project, what does it need?
Will buy new camchain, valves for replacement head.. maybe re-coat the bore(s) one for a spare.. Needs fork seals Maybe some missalanious parts for the engine but nothing major.. Going to buy all new bearings seals etc and rod kit.
The one crank thats mangled (assume piston skirt gave way) has a good cam gear sprocket
The spare one thats not mangled has a slightly warn rod (wont use it but could) but the cam gear is quite shagged..
Also need a new tank, have been looking at Yamaha WR250 & WR450 26 litres | 7-Yamaha | Safari Tanks - Safari Tanks
Dont mind waiting a few pay checks and will be living off rations to make it all work

Needs a seat, front tyre and some tlc all round would like to get the frame powdercoated (not sure what colour) but will see...
Dont mind tipping money into this bike as i see no better one in the world
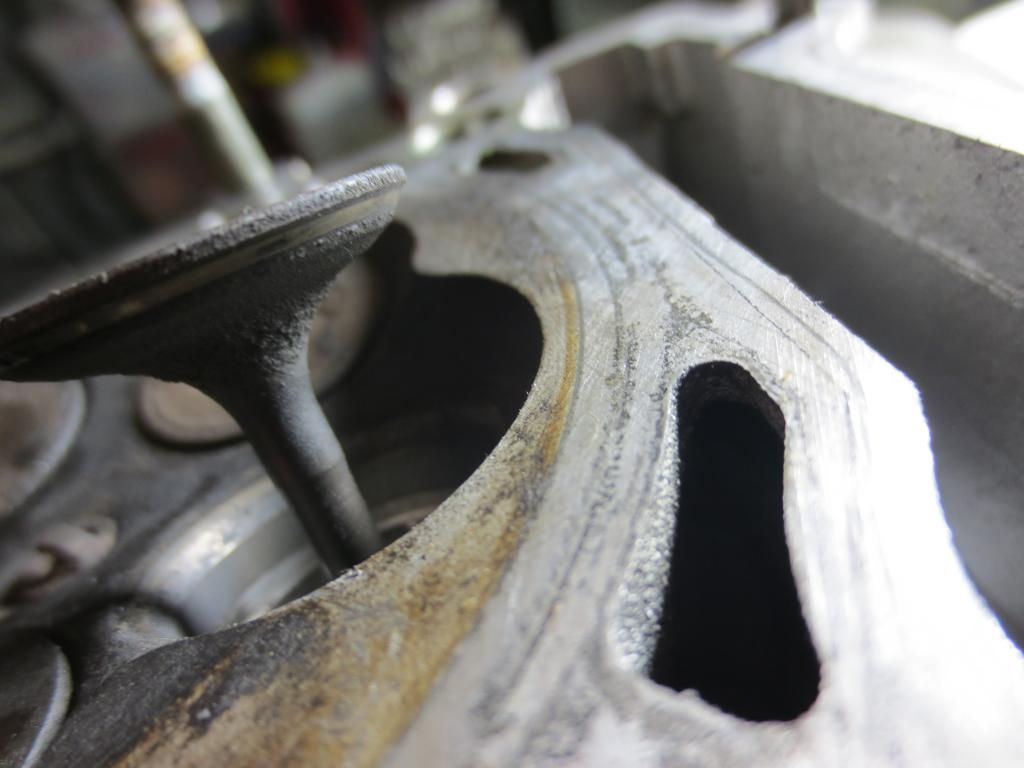
(okay maybe the 2012 model would be nice with efi and alloy frame and better front end grip etc.. For now id prefer to live out of debt as much as possible... stress is not my thing and if i cant get work for a week, **** it i will go out and ride Head im not sure yet, could replace the valve seat and re-use it after smoothing out the dent as because its not on the gasket surface..ouch..... did it drop a valve?
but thats not a bad score!
whats your plans for the head and the crank....?? ie; how ya gunna fix it?
Crank i think i will go a new one.. if i can afford it or just use the better (not munted one) for a while till i have the funds up because the cam chain sprocket is on its way out *Just usable*
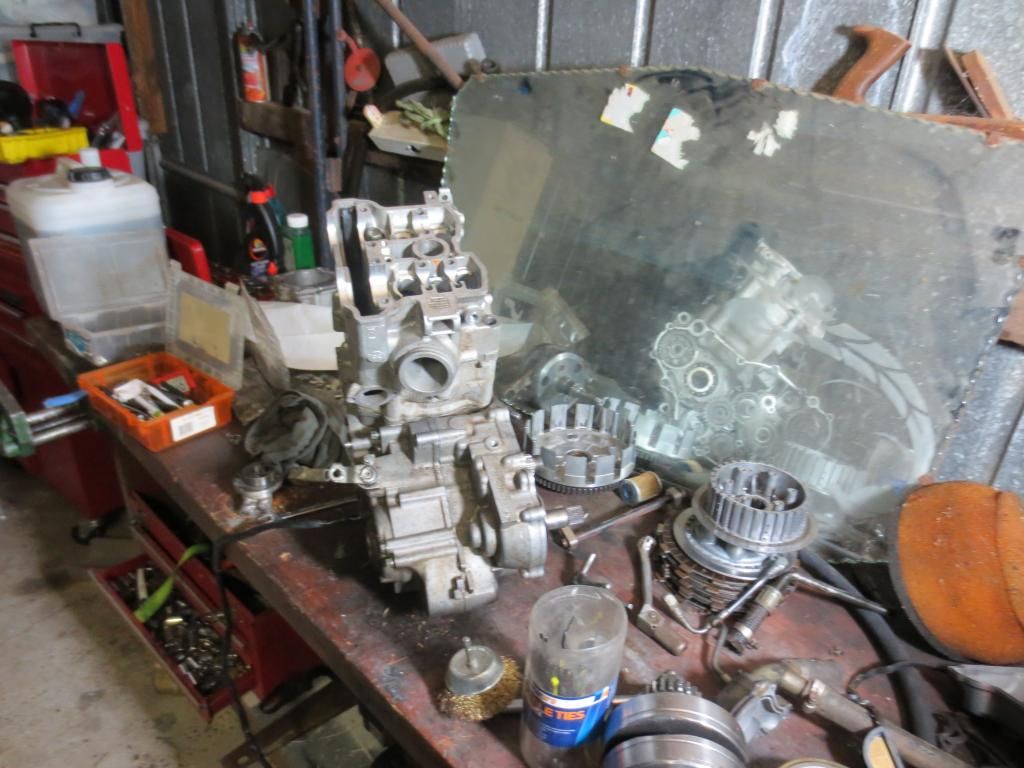
More pics to come fellas
gottagetacheaperhobby
Moderator
good score then really, i will be watching this one


Blender
Well-Known Member
A good score there, bit of work involved too, would be a fun project
hey, what is the linkage attachment on the shock? is it the fork type, or the other one ? Sorry if I am being a bit intrusive, I just cant find anything on any shocks anywhere...
hey, what is the linkage attachment on the shock? is it the fork type, or the other one ? Sorry if I am being a bit intrusive, I just cant find anything on any shocks anywhere...
Not intrusive at allA good score there, bit of work involved too, would be a fun project
hey, what is the linkage attachment on the shock? is it the fork type, or the other one ? Sorry if I am being a bit intrusive, I just cant find anything on any shocks anywhere...
Here is a shot of the linkages:


And the plot thickens..

I also need the secondary shaft anyway.. Also missing one gear..
May aswell pull the whole gearset apart and back cut..
The rest are all in fine, usable condition
Parts list so Far:
Head (or repair)
Countershaft and 3 gears
Gasket kit
All bearings
Waterpump seal kit
Front/rear tyre
wheel bearings and seals
Linkage bearing kit
new chain/sprockets
Rod kit (current one usable but not good enough)
Tank
Seat
Better hand grips
Hotcams auto de-comp cam
maybe some rgv rims
Last edited:
GooseMan
Well-Known Member
its the fork type blender^^, Thats gonna be a great project zwebx, look forward to see its progression.
 Aha a problem, Someone must of hated life at one stage lol.. No problem for me, heres a picture of the solution
 A six point socket, tapped on with a hammer and i was bound to get it off
 Much to my relief, the threads are okay... Time to add a magnetic drain bolt to my list
Assembled the kicker, and shifter assembly today (just a little mock up) Heres a pic of the crank im going to use and that i believe was with the bike originally.

New rod and she will be fine
im a little worried about the cam sprocket wear: Buut looks like i will keep an eye out on it and watch ebay for a good one
Sussed out all the gears i need, waiting on payday now..
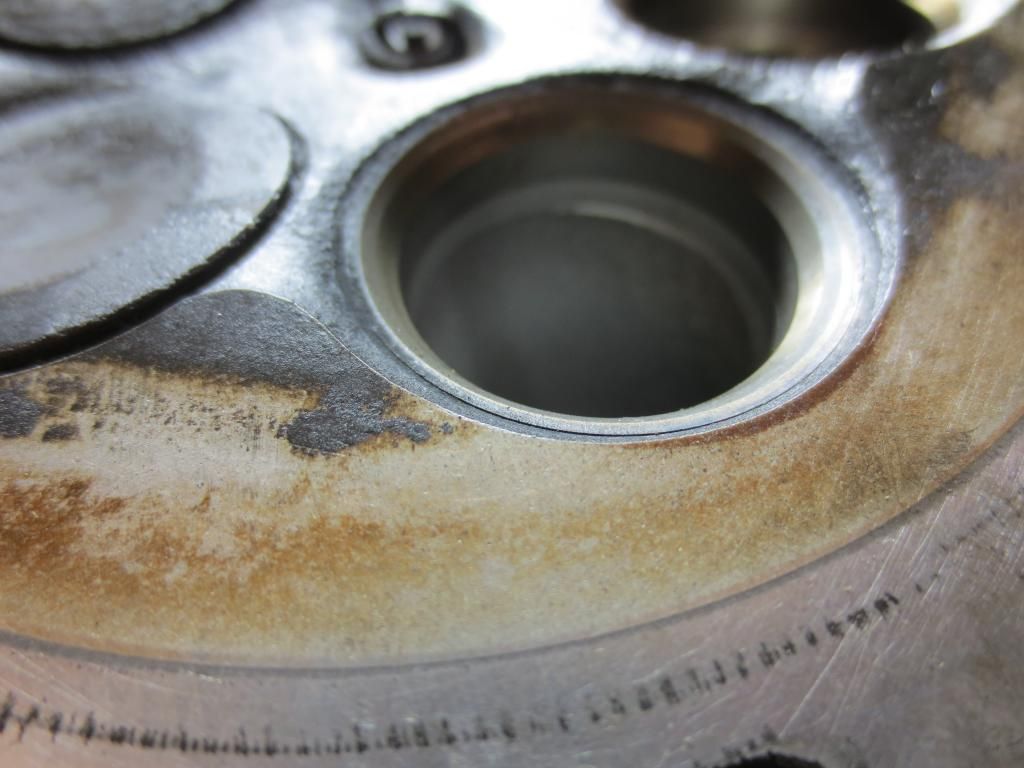
Cylinder head in the mail, Not that thats the part thats holding me up but its nice to have one ready to go..
To get list re-coat the bore ! going to cost too much i think but dont want to go bigbore either..
To get list re-coat the bore ! going to cost too much i think but dont want to go bigbore either..
gottagetacheaperhobby
Moderator
why not big bore? surely the bottom end would handle it?
its 450 for the recoat locally and 500 for the bigbore = 130 sending in my old cylinder to america and receiving my new one..
and i already have a piston for the std bore i may aswell use.. maybe i will go for the 444 kit..
don't want to lower my service life too much this is going to be a adventure bike and the skirts on the lukes racing bigbore kit are pretty small
and i already have a piston for the std bore i may aswell use.. maybe i will go for the 444 kit..
don't want to lower my service life too much this is going to be a adventure bike and the skirts on the lukes racing bigbore kit are pretty small
gottagetacheaperhobby
Moderator
ah fair enough then, the increased torque would be handy on the trails but then again i doubt a 426 is exactly lacking in torque lol
Yeah lol Maybe i will build this current motor with the better looking bore for now with the new piston after measuring it.. Ring life doesnt bother me for the moment and i will send the other bore out to be re-plated and then chuck another set of rings on her.. or if they last long enough a new piston..ah fair enough then, the increased torque would be handy on the trails but then again i doubt a 426 is exactly lacking in torque lol
Looking at sleeves and there quite cheap i need to look more into them though and to a machinist
Still gotta save up for my bulk buy from partzilla
Yeah lol Maybe i will build this current motor with the better looking bore for now with the new piston after measuring it.. Ring life doesnt bother me for the moment and i will send the other bore out to be re-plated and then chuck another set of rings on her.. or if they last long enough a new piston..
Looking at sleeves and there quite cheap i need to look more into them though and to a machinist
Still gotta save up for my bulk buy from partzilla
i could machine it i guess.... lol
I Do know someone with the equiptment.. may just cost me a couple of beers lol (not while working on my shiney new parts thoughi could machine it i guess.... lol
)How the motor is sitting at the moment (test jigging it all up)
Parts finally arrived in the mail (well the most $$ heavy one)
New head (used of course) But great condition for its age
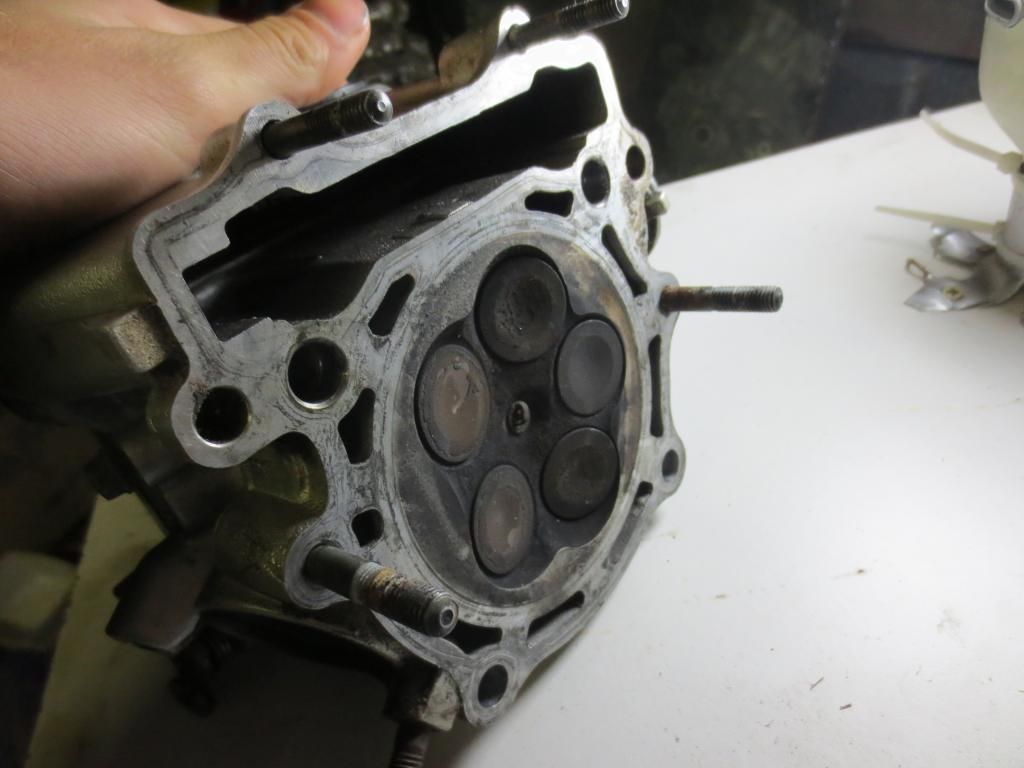
Okay, looks good from the outside..
How do i know its sound mechanically..
Step One: Remove cam caps (remember cross pattern)
And inspect the rear cam bearing for wear, scores etc
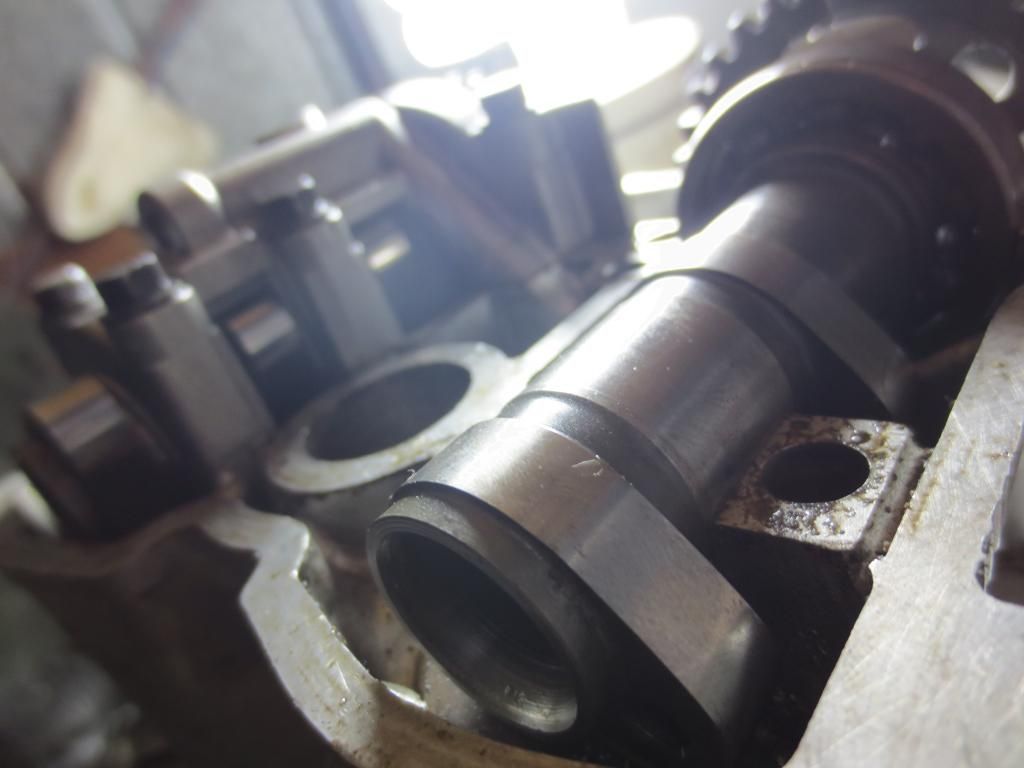
Step two: Remove cams and inspect the cam lobes for damage..
Now remove the shim buckets and including shims (also inspect for side to side play)
You can see, i just used magnets.. dont want to scratch up the sides.. also inspect the sides for damage/wear mainly just scratches etc.. gives you a good idea how many hrs your head has run
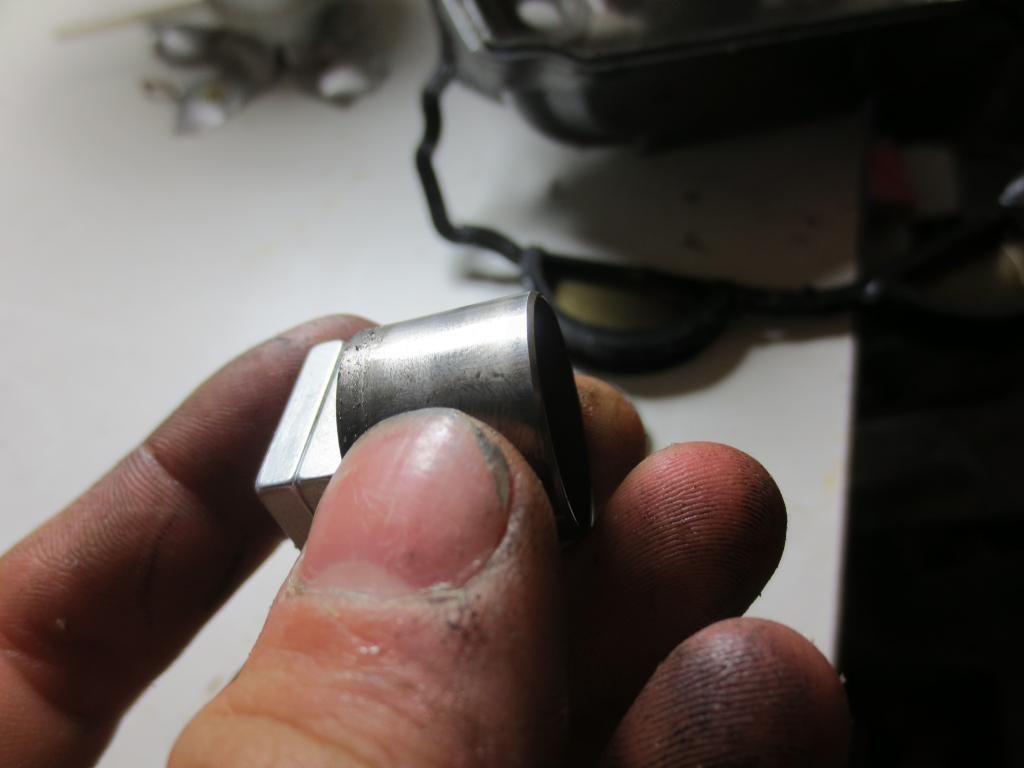
Step Three: Remove the valve springs +collets.. I found the easiest way to do this is to use a long socket that sits on the edge of the spring retainer
eg.in this case my spark plug socket was a perfect fit
And then pull the valve down approx to where the cam would lift it too And then wriggle it from side to side all ways.. there should be little play this is also a good indicator of the condition of your valve guides/valve stems.

I should be using a dial gauge and a magnetic base, but these are fine and i believe are in spec. (also dont have one ) Pretty much if either of these are too warn then replace them. You dont want to cause wear of the valve head from having it been forced into place each rotation. then eventually failing.
Step Four:
Inspect the valve seats
You can see.. Mine have a little carbon built up on them (causes sealing problems) So i will clean them thoroughly.
Focus on the 45deg angle that is the only one that seals
also clean up the rest of your head if you feel up to it... may end up polishing mine to get rid of the buildup.
You can see my valve seats look like they will have no issue sealing (as checked so far)
Next up (in progress) How to check the life left in your valves and guides (black marker trick)
Parts finally arrived in the mail (well the most $$ heavy one)
New head (used of course) But great condition for its age
Okay, looks good from the outside..
How do i know its sound mechanically..
Step One: Remove cam caps (remember cross pattern)
And inspect the rear cam bearing for wear, scores etc
Step two: Remove cams and inspect the cam lobes for damage..
Now remove the shim buckets and including shims (also inspect for side to side play)
You can see, i just used magnets.. dont want to scratch up the sides.. also inspect the sides for damage/wear mainly just scratches etc.. gives you a good idea how many hrs your head has run
Step Three: Remove the valve springs +collets.. I found the easiest way to do this is to use a long socket that sits on the edge of the spring retainer
eg.in this case my spark plug socket was a perfect fit
And then pull the valve down approx to where the cam would lift it too And then wriggle it from side to side all ways.. there should be little play this is also a good indicator of the condition of your valve guides/valve stems.
I should be using a dial gauge and a magnetic base, but these are fine and i believe are in spec. (also dont have one
) Pretty much if either of these are too warn then replace them. You dont want to cause wear of the valve head from having it been forced into place each rotation. then eventually failing.Step Four:
Inspect the valve seats
You can see.. Mine have a little carbon built up on them (causes sealing problems) So i will clean them thoroughly.
Focus on the 45deg angle that is the only one that seals
also clean up the rest of your head if you feel up to it... may end up polishing mine to get rid of the buildup.
You can see my valve seats look like they will have no issue sealing (as checked so far)
Next up (in progress) How to check the life left in your valves and guides (black marker trick)
Last edited: