Mini Dirt Bikes & Pit Bikes Forum

Help Support Mini Dirt Bikes & Pit Bikes Forum:

This site may earn a commission from merchant affiliate links, including eBay, Amazon, and others.
I blasted the foot peg's today, it's so much easier than using paint stripper or the wire wheel.
But i will defiantely have to make up a dryer for the air line's to the blasting cabinet, the humidity is high today and i'm constantly having to drain off the condensation/water from 2 water trap's in the air line.
You can see the moisture on the peg to the right after i took it out the cabinet.
Just primed the peg's a little while ago, now waiting for them to dry and the rain and wind to stop so i can paint them metallic blue


I have the pipe from the expansion chamber to the silencer made and welded on now, silencer has been shortened 35mm too.
I'm just waiting now for the paint to dry then i can pack the silencer


I also made a brake pedal for it today, still have to adjust the cable mount's etc
This new frame already had the mount there, so i thought i'd use it.
Cj really need's to get used to a foot brake, ready for when he move's up a bike which won't be too long


I got the mig out again today and finished off the welding on the frame.
I did a bit of trimming to the peg mount's and rewelded them.
Also was looking at the brake pedal mount, the 3mm steel bracket looked a bit flimsy so i cut it all off and remade a new piece out of 5mm steel plate for the pedal to swing from.
Then welded some tube on to the rear section of the frame to act as brake cable guide's.
I've relocated the rear fender/seat mount's on top of the bar at the back like the other frame was too.
It's slowly getting there now, i had to keep packing up and move the tool's and bike under cover due to the rain today.

Looking at it now with it back together i could have made the pedal a bit different and done an over the top version, oh well maybe next time?


Last edited:
I welded on a slip joint onto the silencer pipe today and repacked the silencer, so the exhaust is all finished now.


Then relocated the coil so the lead isn't hitting on the tank


Welded on a new fuel tap mount


Now i just need to modify the wiring harness and modify a Suzuki JR50 throttle then i can start it up and Cj can try it out.
If it's all good i can strip it down sandblast the frame and repaint it.


The P Dub got a new harness today, i made it to delete the original Off, Start, Run switch on the throttle housing.
The new loom look's tiny compared to the original, lol
I fitted a 1/4 turn throttle, with some new Troy Lee Design's / ODI grips
Had to use a pit bike throttle cable with the 1/4 throttle, was too hard to adapt the old one.
And i added a KTM style kill switch.
1 more thing left to do before a frame respray, add a front brake lever and it's done.
I gave it a kick over a few minute's ago and it started pretty easy too, it's a bit too late to run it and make a video of the new sound.


Last edited:
I solved the front brake lever problem,
i made my own pivot and welded it to the bar's like the original 19mm PW bar's have.
One of the smallest part's on the bike took the longest to make, i reckon about 4 hour's all up !!


Thank's,
Loco would be proud of all the home made bling too
 
I cleaned up the head today, gave it a blast with grit then a blast with soda.
Washed it off and dried it but my dirty hand's kept marking it, so i gave them a quick soda blast too, lol
Then i resprayed the head with engine enamel, shouldn't discolour this time

I had a look at the piston crown too just to check on how the engine's running,
it looked a bit rich so i gave the carby a bit of a tune after refitting the head.
I found that there's a vacuum leak where the carby slide's onto the manifold.
I tried turning the tube in the carby but that only helped a little.
Still need to sort it.

A couple of the pic's come out blurry for some reason ?


I removed and rebuilt the carby this morning, blasted it and then blew it out well after degreasing it.
Check all the jet's that the hole's were open, fitted a smaller main (#60 now) and reassembled it .
The vacuum leak where it join's to the manifold i ended up grinding back the face of the carby so it fit's tighter to the manifold and added a little fuel safe silicon to the bakelite sleeve to help it seal.
Started it up and it ran and idled with the mixture screw out 2 turn's, gave it a warm up and tune it to suit.
It start's pretty easy and rev's smooth when you open it up
Now i just need Cj to give it a try to see how it goes.
I need to replace the throttle cable too due to the insulation outer layer cracking.

Wife was whinging that it's too loud when i was revving it, but it wouldn't be much louder than a decent chainsaw at full noise, and it's during the day too, geez !


Cheer's Damian and Stu,
I think the home made bling came out really good, and only cost me a bit of time and a tin of paint.

A couple of quick video's to show how it sound's now.
I reckon the modified clutch spring's and shoe's work a lot better with this exhaust, the clutch start's to grab just as the powerband come's on.


[video=youtube;ZpmYGl5YPXs]https://www.youtube.com/watch?v=ZpmYGl5YPXs&feature=youtu.be[/video]


I thought using 2 part's off a KTM was a bit much (killswitch and exhaust), so i swapped the KTM style kill switch for a genuine Yamaha one.
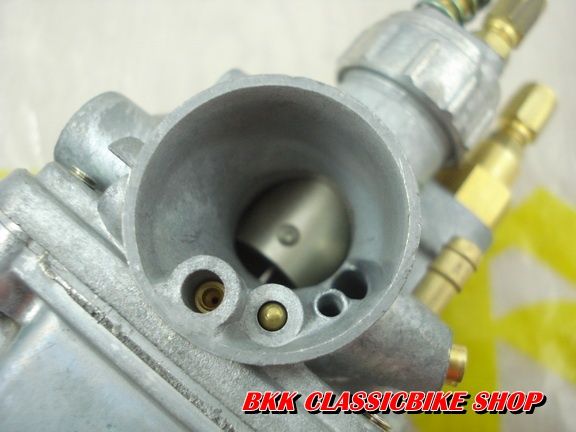
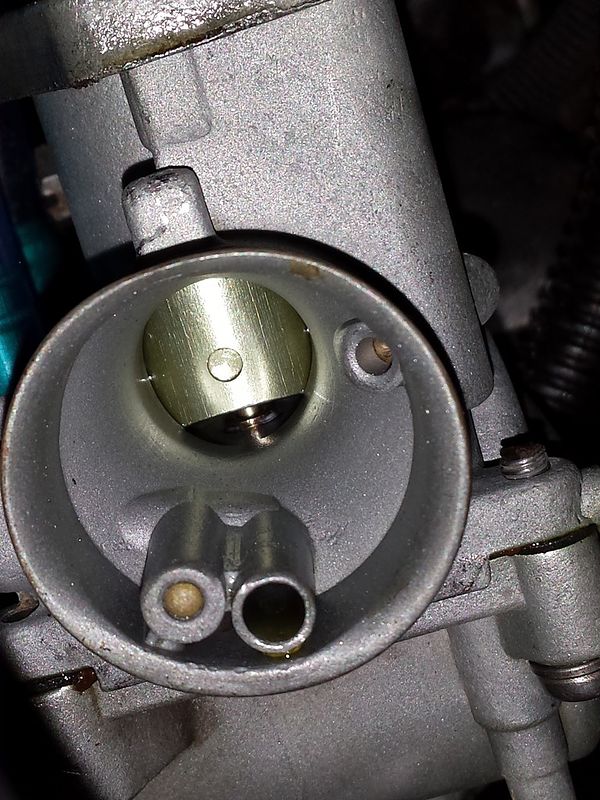
And i forgot to mention in that last post that i smoothed out the intake side of the carby, got rid of a ridge up the top, and rounded off the casting of the choke and pilot/main jet port's with a grinding burr, then some 180g sandpaper roll's in the die grinder before i blasted it, that should help out the flow

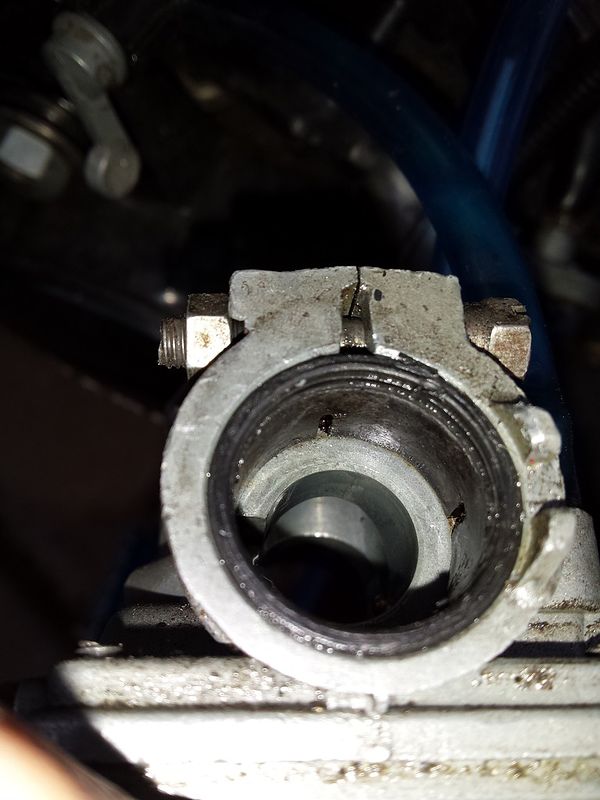
This is the front mounting face of the carby, i machined it back 1.5mm to allow the carby to sit onto the manifold pipe a bit more to help solve the vacuum leak problem
The dark bakelite sleeve is slotted so the carby can be clamped down onto it securing it to the manifold.
But it was fitted with the orientation of the slot's in the wrong place.
They should have been at 2, 4 8 and 10 o'clock so they won't let air in from the slot in the carby above it where the clamping bolt does up.
I also fitted new o'ring's to the mixture screw and idle speed screw while it was apart.


Standard carby intake side

RH9Q_53.jpg


PW / Suzuki FR70 carby after opening it up / smoothing it out.

 
Last edited:
Spent the last 1 1/2 hour's modifying the l/h tank scoop to clear the expansion chamber
I had to trim 10mm off the bottom, and plastic weld the bottom scallop to fill it in, then welded a ridge back around the bottom section to make it look like it's factory
1st pic is standard/blasted with 4 scallop's, 2nd pic it's been shortened and welded, 3rd pic back of modified scoop, and last pic it's been primed and has it's 1st coat of blue


I bought some Exhaust heat wrap today for the expansion chamber, it's 2" wide and 25ft long, and picked up a secondhand heat shield off a DT200 exp chamber and used Maier Universal Pipe Guard.
I'll see what work's best on the pipe
Throttle cable is a spare for my bike

 
I lengthened and reworked the centre kick stand yesterday morning, and got it etch primed, then painted it late last night.
It is now 50mm longer.
While the mig was out, i also welded on some spacer's to the frame where the tank mount's, i had previously used rubber spacer's but got sick of dropping them etc when taking the tank off and refitting it.
The cdi had to be relocated due to the deeper backbone of the frame, it now sit's directly below the coil/front of the seat
And drilled and tapped the frame in front of the coil so i could screw a rubber spacer to the frame, this support's the rear of the tank.
And last thing i made up a new choke cable for it, i had to shorten it as it's factory fitted to the handlebar's, and make up a new right angle tube to fit the Suzuki FR carby.
I relocated it under the front of the tank so it's semi hidden.
More pic's to come.


Latest posts

Back
Top