Postie bike conversion, lifan 125 help with wiring?

Mini Dirt Bikes & Pit Bikes Forum

Help Support Mini Dirt Bikes & Pit Bikes Forum:

This site may earn a commission from merchant affiliate links, including eBay, Amazon, and others.

Red23

Active Member
Joined
Apr 23, 2013
Messages
36
Reaction score
0
Hi all

I've just recieved a lifan 125 in the post today from DHZ. Came with coil, harness and CDI. I've got the wires sussed from the stator to the old postie wires (its a 12V 2007) but with the coil,harness and cdi I have NFI how to plumb them all in. I've got my postie manual to match up the wires but mine isn't a CDI, it has a Ignition control module, rectifier and turn signal relay. The harness that comes with the DHZ motor has a whole heap of wires I can't really guess what they are the diagram comes in chinese lol.

My bike needs to be street legal and registered with the 125, its easy to see where all the lighting wires go its just this harness and cdi that is making me squirm. Doesn't help I've got no real electrical experience.

Anyone done this mod or know how to work around it?

Cheers
 
welcome to Miniriders,

are there 5 wires coming from the stator?

black w/yellow stripe goes to the + on the coil
green w/red stripe is a neutral indicator
black w/white stripe goes to the kill switch
black w/red stripe is the power to the cdi
blue w/white stripe is the fire signal from the crank to the cdi
green is earth.
yellow is lighting , white is the same, both go to the 4 pin voltage regulator
 
the postie is the same. you will remove the "ignition control module" which makes a handy spare, actually. in fact, im pretty sure it was the same plug and everything. the wires were all the same colours, everything. even the plug from engine to bike was the same...

if you cant physically plug the motor in, then work on the "match colours" idea. red/black is the same as red/white. blue/black is the same as white/blue...etc. green is earth, but solid black is also earth. there are actually certain "conventions" used across the majority of manufacturers.

only five are important for spark. yellow/black to coil. black/white kill. redblack "coilcharge". blueblack "trigger". green or black, earth.

the coils the same. its still a CDI system.

the wirings all the same, just that the two yellow or the yellow and white wires from the motor will go to the voltage regulator, which should still be the same plug!

if my memory is correct, there isnt a problem at all! it isnt like you got an iphone5 and trying to get it to talk to the old 486 running windows 95! this should be plug and play technology!


unless its a pre 1984 postie with points ignition, in which case, order some terminals, lots of brightly coloured wire and start using your head! the wiring diagrams look complicated but the wiring loom on a postie can be figured out on a piece of paper in ten minutes.... power comes in, switches,then everything returns to earth. the blinkers can be a bit of a head trip, i admit.

blinkers, left/right(orange and light blue?). headlight hi/low(white/blue). horn(pale green?). tail/park(brown). brake(red).
 
Last edited:
Thanks for the replies guys.

I've just had another look, and there are 5 wires going to the old ignition module (which I now believe is CDI) and 5 to the new. Most colours match except there is a blue/yellow on the old and blue/white on the new. I'll check the wiring diagrams to make sure they both do the same thing.

Only question now I guess, is regarding the coils. My old plug lead is busted, so I need to use the new coil. The old one only had a single black/yellow wire plugging in, otherwise it was bolted to the body (I assume earthing) The new one has a two attachment points, one light green and one black. I assume one of these is an earth that I'll just need to put to the body or another earth somewhere? Is that right?

OLD
8703847940_7965f10933_z.jpg

NEW
8703850878_62b2b6f9d1_z.jpg


Thanks again, I think I've got it sussed aside from that particular question.

Cheers
 
yeah that's it,
the green terminal on the coil needs to go to a decent earth point

the new loom should have 2 wires, a black w/yellow stripe, and a green wire, running off together and going to a plug, this is for the coil wiring.
make sure the frame has a decent earth wire running to the engine too.
 
Last edited:
Ok so I've rewired the CDI no problems, put down an earth to the body for the coil no worries. Just doing the cables from the engine to the wiring harness.

Three of the six are a colour match. The other three are kinda.

I have a blue/white which I guess matches the blue/yellow
I have two yellow's on the lifan, but the old postie harness has one yellow and one white.

How do I tell which yellow is which in the lifan? I guess one of them will match with the White, but I cannot tell how to do it

Thanks for all the help
 
i'm guessing the blue w/white will go to the blue w/yellow
the 2x yellows wont matter which one goes to the white, either way will work.
 
awesome, thanks.

Just need a new front sprocket as they sent me the wrong one, and then I'll have to have to figure out which way best to reduce the size of the fuel line, either clamp or a large to small adapter.
 
Maybe a cheap way to do it (if its not a massive difference) is to get the smaller dia fuel line heat it up and work it over the larger nozzle (or make it larger by pushing it on a screwdriver will work) and it will have the best flow of fuel that way also
 
the generator outputs are AC. yellow and yellow or yellow and white. so yup, polarity doesnt matter. slong as you get 12vdc after the regulator, all is swell. and yup, that blue yellow will be blue white or whatever it is for the cdi. should be in the same position on the plug...

sounds like youre almost to the registry!

how did you mount the engine?
 
Thanks for the help

I got engine mounts locally second hand but they are the ones available on DrATV
http://www.dratv.com/bofoadplb.html

Just waiting on the clutch cable because I ordered the wrong one.
Bloody 20mm shaft 428 sprockets are hard to find. I ended up at some shop comparing sprockets on the shelf to get what I wanted.

I'll run the engine in before I go for the roadworthy cert, I don't want someone at the shop to give it a hiding without it being run in properly.

I'll start a new thread later with all the work gone into her.

Cheers
 
run it hard to break it in, just try to keep to the lower end of the rpm and let it cool off ever 30 minutes or so the 1st ride
 
So I got her going today, after a long wait on a clutch cable.

my headlight doesn't really work though, it kinda flickers. That wouldn't be in the CDI would it? More likely in the connections from the engine I think.

I just need to tinker with the accelerator and the clutch cables to get them fine tuned, and once I've got the headlight sorted I'll be riding her daily.

Another question, can you quieten them down a bit? I got a Braaap silencer but its still fairly loud.

Also where do I find the engine number? Is it on the stickers or is there one stamped somewhere?

Cheers
 
the lights flickering, sounds like a broken or almost broken through wire somewhere?
is there an earth near the back of the headlight? is it going to clean/bare metal?
otherwise check any plugs and sockets, spray them with wd/spray,
with the bike running and lights on wiggle each join, see if the lights stop flickering.

the engine number is down below the front sprocket, stamped into the case
 
thanks for that.

There is no visible earth, I pulled down all the connections I did for the harness and nothing seems to be an issue there. Is there a lighting wire on the CDI?

Cheers
 
mounting kit huh? only postie ive seen around here with a lifan he had the holes welded up and redrilled. hence my reasons for already having a c50 in the shed. no new mounts required!

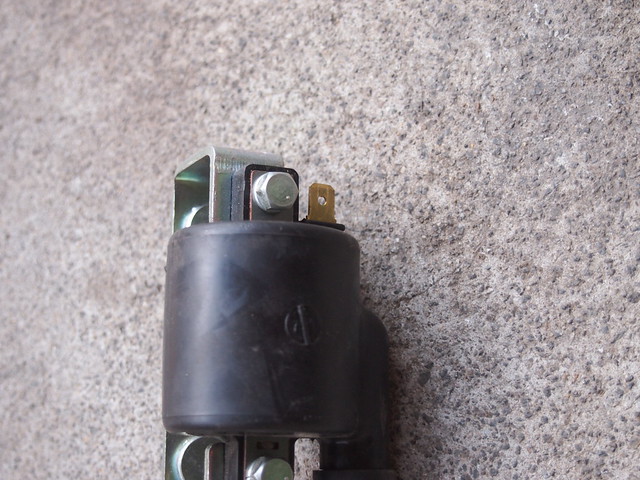
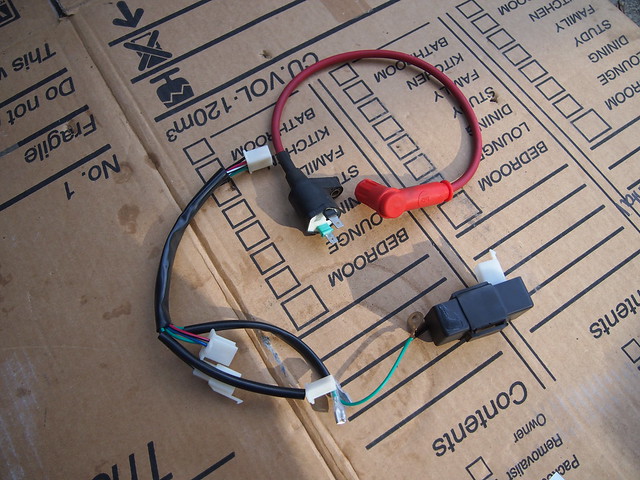
has it got a battery? and is it wired up properly, and the fuse is intact? and yep, check all the wiring, earths, etc. contact cleaner!

lights will flicker a little bit at idle but should be fine with some revs. a battery does help. but isnt necessary for running or rego. even try a few big 25v rated caps(30,000uF etc) tied in parallel. 16v will work but wont tolerate any spikes. 12v caps will result in large aluminium cans full of fluff and foil.

do NOT USE HID headlights on momo bikes with single headlights! whereas LEDs are brilliant for all auxillary lights :D


(whilst some will disagree) it seems the best "break-in" for longevity is to

a, warm up at a SLOW idle. heats the oil up, heats the metal up, heats everything up. always warm up!

b, when hot, THRASH IT! for a few minutes at a time. i always liked 3rd gear takeoffs, full throttle with some brakes for a km or two. then you can be a bit more gentle.

c, change the oil at least every 100km until it stops getting "sparkles".

d, ignore everything that says not to rev the motor for the first 1000km or so.

why? in the factory of, say, honda, when a bike is rolled off the line, some guy gets the delightful job of revving the things out to redline, and running up through the gears. under load. the final test. almost every single vehicle, car bike or truck, that is made to be sold, undergoes this "abuse".

single motors purchased seperately arent.

bearings dont "break in". plain bearings are supported by a film of oil under pressure. they NEVER touch unless the engine is having issues. ball bearings, even cheap chinese ones, are finished to the limit of commercially practical tolerances. they cant get any better or precise, and once again, all metal is seperated by a film of oil unless somethings gone wrong. like starting em up and flooring them straight away.

even the rockers on the cams are protected by this oil film. when thats broken through, things are really bad.

do it properly and you wont believe that oil can stay "golden" for 3000km or so... no ring blowby!

the rings, cylinder and gears are about the only parts that "break-in". the gears lose microscopic imperfections, giving the oil that glitter effect. the cylinder honing smooths down to small grooves and lands. grooves supply/retain oil, the lands provide the wear surface. the rings only get one chance to bed in properly before the hone marks lose their "sharp" edges. its why we (should) always replace rings and hone cylinders on tear downs. and never reuse rings except in an emergency!


noise? um... try finding the "hanger" pipes on the c50/70/90 and changing the header pipe to suit the 110. the tube from the back of a bus seat has just the right bend, the right diameter, the right length and is stainless to boot :D you can grind the seams off the muffler section, remove or replace baffles, reweld and tada!

i used to just use lil straight through "bombs" on the bus seat header. loud but only for the people behind it!


theres software out there that does a good job at designing good silencers. theres more to it than a pipe with lots of holes drilled in it! less holes is better? wtf? but tis true.
 
Last edited:
good reply mate, thanks for that.

Its got a battery, all those wires look good. All I tampered with was the CDI plugs (cut and joined to match the postie one) and the wires from the engine to the harness. Everything else (aside from engine and exhaust) are postie items. I've got a multimeter coming in to work tomorrow so I'll have a look and see if I've got 12v going to the headlight, and if I do I'll start looking at the earths. All my other gear works, horn has full blast, indicators buzz obnoxiously, brake lights and even the neutral light works. Just gotta get the headlight working.

noise wise its just so I don't bug the neighbors too much, Its not that loud but its heaps louder than the original. Not that bad I guess people will know I'm next to them
 
you can get a plug that goes in the rear of the pipe, will help to reduce the base of the noise...

you could pull the pipe apart and weld or pop rivet washers in there to force the gasses through the baffle (may redice flow a bit) makes the bike sound a little pingier (so to speak) and redices noise quite alot
 
ok so I've still got problems. I couldn't get the headlights/tail lights working, just barely getting a glow out of them. After advice from the mechanics who gave me a roadworthy I wired them into the ignition switch so they come on with the key.

Now that worked for about two rides, I was just coming home from work when my battery failed and had no lights/indicators etc. So it tells me that all the other stuff was running off the battery before, just not the head/tail lights.

I've matched the colours where they belong, and there is an earth going to the body (there is one in the system already) and I even tried switching the two yellows around (one is a white on the old harness) but still nothing.

How do I test if my alternator is putting out enough charge? I'm wondering if there is something wrong with my regulator/rectifier?

I'm really trying to avoid $110/hr for a pro to fix, but I'm just not a sparky so I can only follow a diagram so far.

Cheers
 

Latest posts

Back
Top