Tear down bike and parts COMPLETLY

Mini Dirt Bikes & Pit Bikes Forum

Help Support Mini Dirt Bikes & Pit Bikes Forum:

This site may earn a commission from merchant affiliate links, including eBay, Amazon, and others.

bulldog93

Well-Known Member
Joined
Dec 16, 2008
Messages
2,971
Reaction score
76
Location
2330 Singleton
Well after being on the forum for nearly a year i thought I'ld do something with my POS bike. I have decide to make a tut on "How to pull your bike apart from bolt to bolt" this thread is hopefully going to help some one. I'll be pulling the engine down, carbi, forks & shock pretty much everything on the bike and engine.

All well lets get started hay?

The Bear Bones

This section will be just striping the frame till its bear.
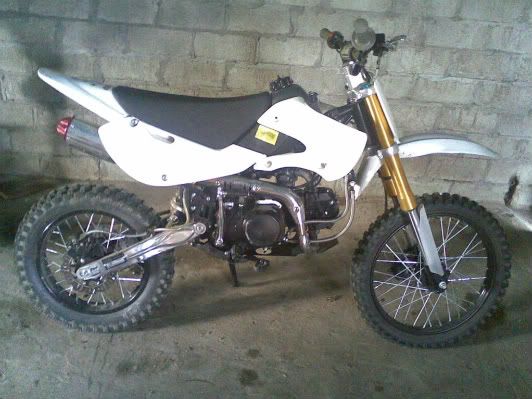
1) Get your bike (dahr)
04092009001.jpg

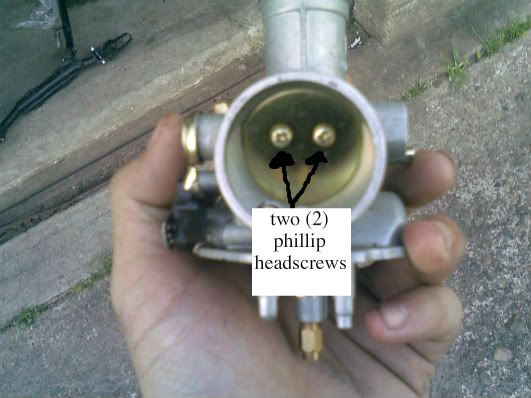
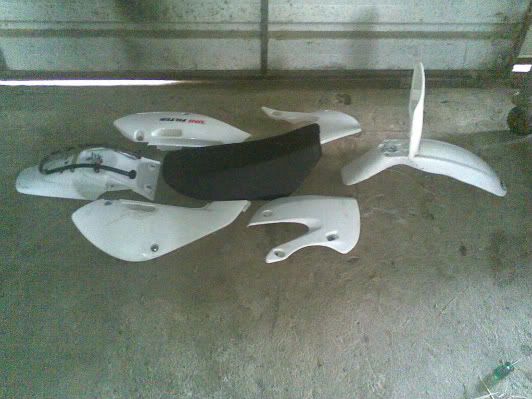
2) On KLX style plastics there should be 14 screws that are phillips head, there will be two (2) screws holding the back guards on, three (3) screws holding the front on, under the front mud guard there'll be three (3) screws holding that onto the bottom clamp, one (1) screw holding the number plate on and at the back there will be four (4) bolts (4x 8mm, might need a small shifter also) holding the back mud guard on (they'll also hold a frame on to the bike).
3)After you take the plastics off the seat should come off with out any bolts/screws holding it on, it should be a matter of pick it up and pull off. Should end up with this:
04092009002.jpg

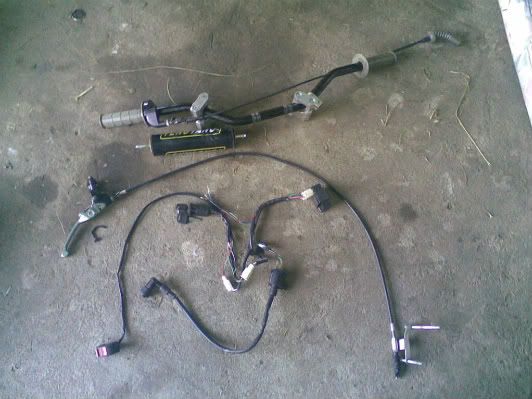
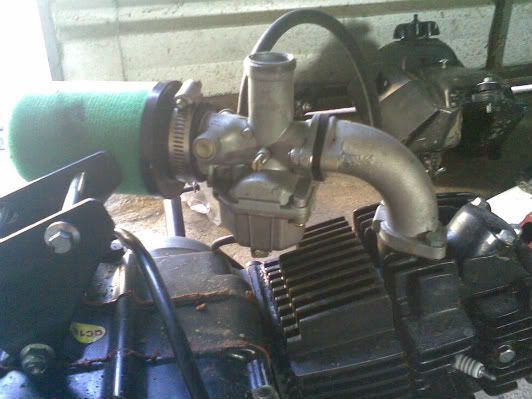
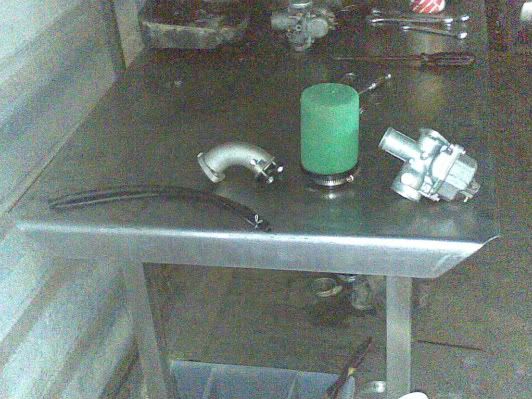
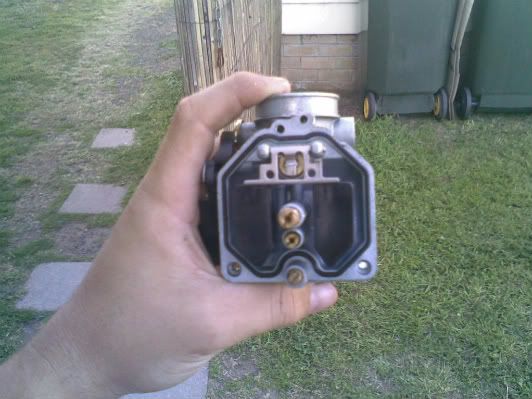
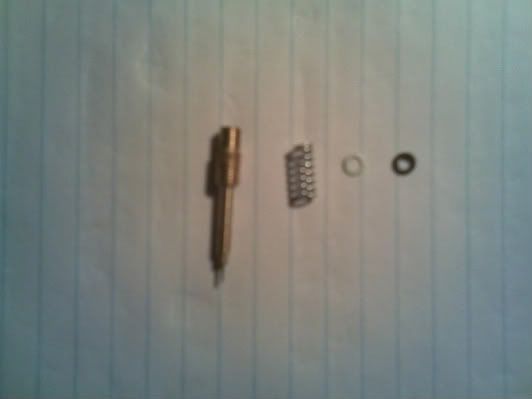
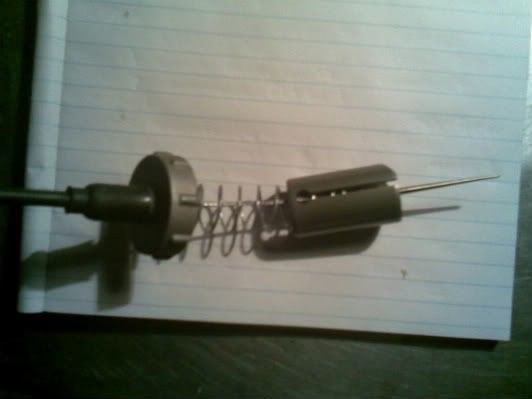
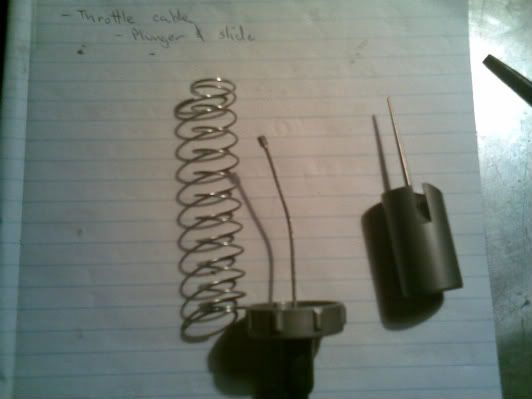
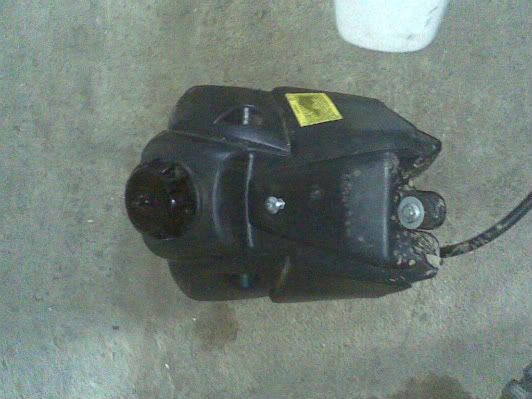
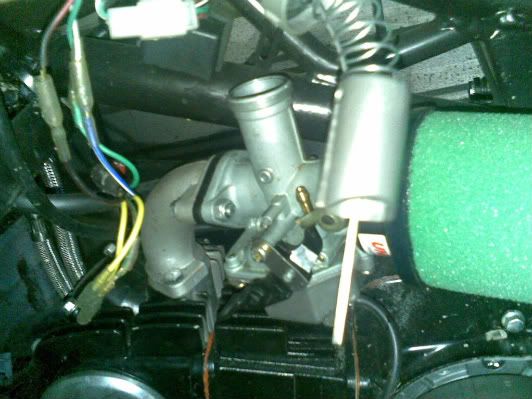
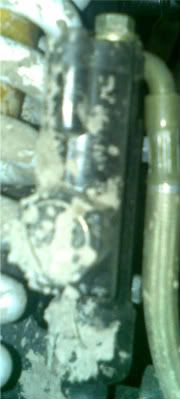
4) Next is the fuel tank (you'll want to drain this befor you do anything). There should only be two (2) bolts holding it on (2x 10mm). After you do that you'll have to take the fuel line off the carbi, just got to the fuel tap and follow that hose to the carbi and pull off or you could pull the hose off at the tap. Should end up with this:
04092009005.jpg

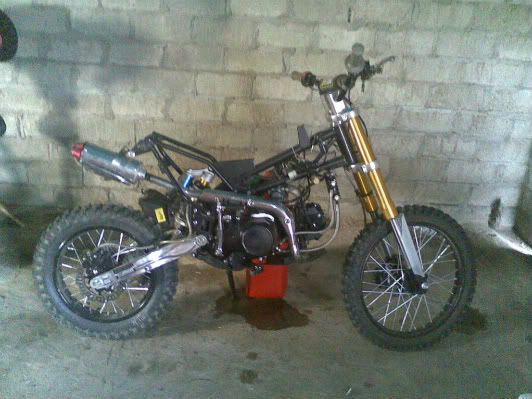
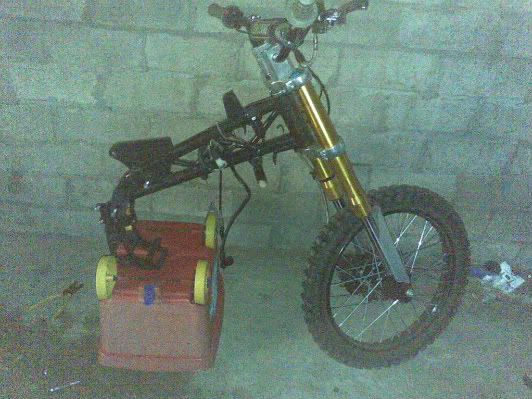
And your bike should look something like this:
04092009004.jpg

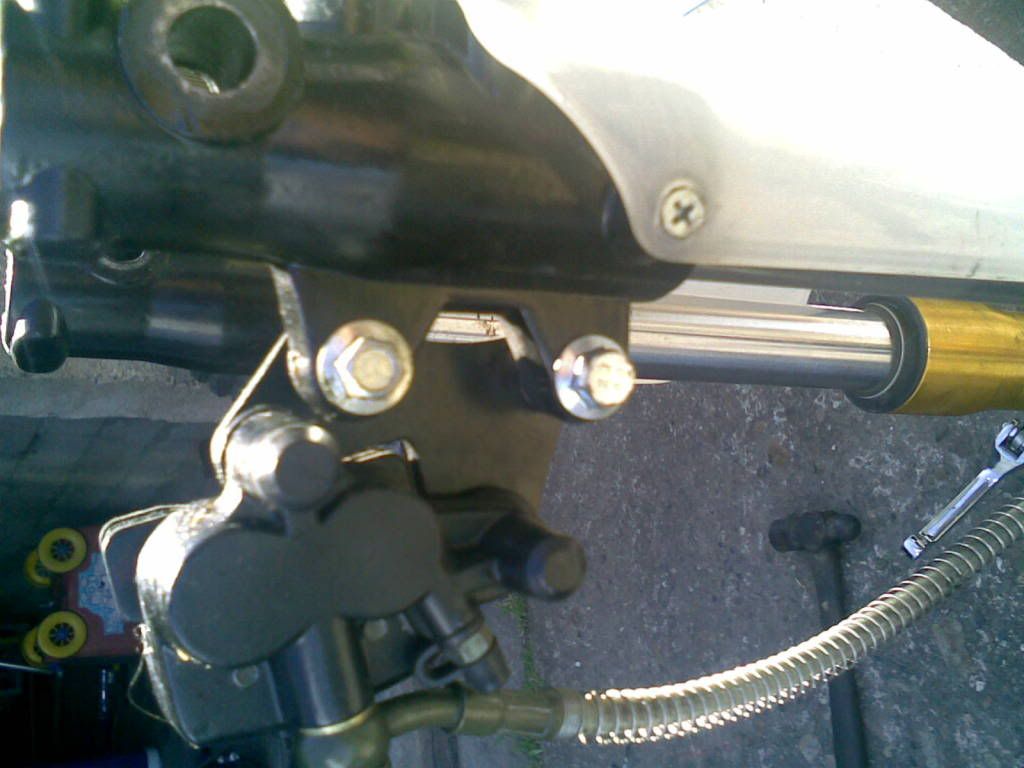
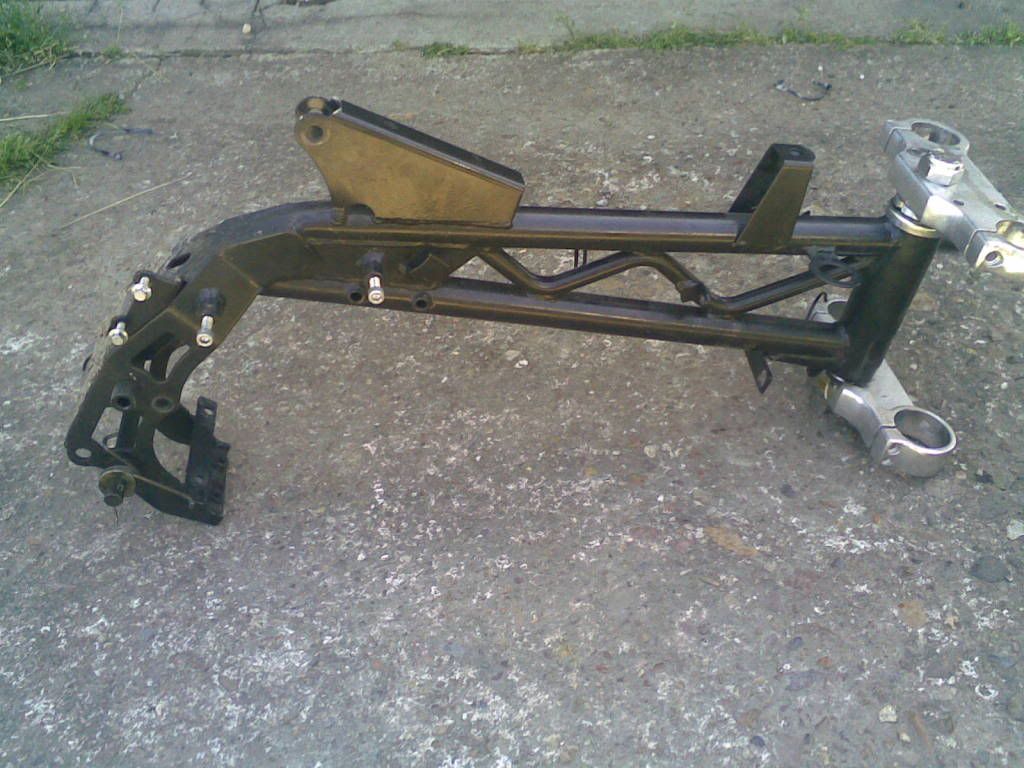
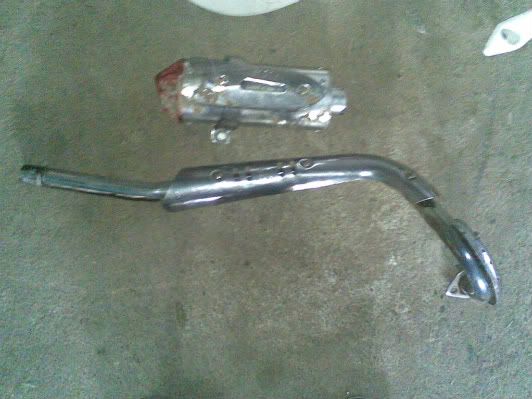
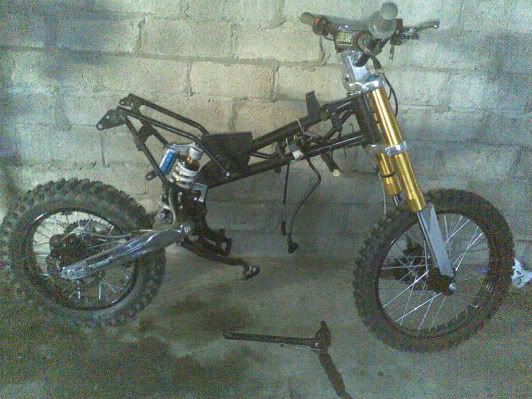
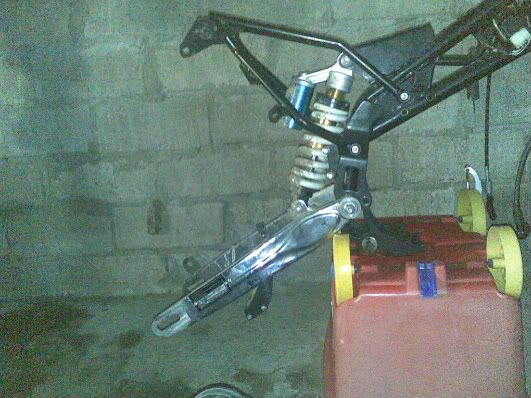
5) Now is the exhuast, there will be two (2) bolts holding the exhuast at the head (2x 13mm) and one (1) bolt holding it to the frame (1x 14mm, you might need a shifter/spaner), should have the exhuast on the floor:
04092009006.jpg


continued in next post...
 
Last edited:
6) Now to take out the motor the are some thing to do before you take it out:
-unscrew the throttle cable from carbi
04092009011.jpg

-undo all electrics to and from the engine NOTE: put masking tape around wirers and mark to rember which is which, or, get liquid paper and put a spercific amount of dots for each conecting wirer, or, zip tie the ones that were disconected to each other.
-take oil cooler off, there should be two (2) bolts holding the oil cooler to the frame (2x 7mm might need a shifter)
-spark plug cover, take it off
-flywheel cover, there should be three (3) bolts holding it onto the engine (3x 8mm), then you'll have to take the sproket off which is held on by two (2) bolts (2x 10mm) and then the chain which you can just use a phillip head screwdriver and find the link that they use to join the chain togeather and take that apart.
04092009010.jpg

-clucth mech witch is held on by two (2) bolts (2x 8mm).
04092009012.jpg

-there should be four (4) bolts holding the engine and pegs togeater (4x 12mm).
Now there should only be three (3) bolts holding your engine to your frame (3x 12mm might need shifter). After all that your engine should be free to pull out and you should end up with this:
04092009015.jpg

And your bike should look like this:
04092009013.jpg


continued in next post
 
Last edited:
7) Next is the back brake and brake pedel, there will be a split pin which you'll have to take out, get plyers straighten it out the pull out, the get a flat head screwdriver and untenstion the spring (fling it away from under the pedel), there should be one (1) bolt holding it to the frame (1x 8mm).
8) you'll then have to take this off:
04092009017-1.jpg

Which is held on by two (2) bolts (2x8mm)
9) Take off the back wheel is has 1x 14mm bolt and 1x 17mm nut (watch out for any spacers that fall out/off. This in turn will allow you to take off brake calliper of disc. Should end up like this:
04092009020.jpg

10) Next remove the sub-frame witch is held on by four (4) allen key bolts (4x size 6). Once thats removed you'll be able to accses the top of the rear shock which is held onto the frame by two (2) bolts (2x 14mm), then you can take off the swing arm which has one (1) bolt (1x 12mm, 1x 14mm nut) should have these parst off:
04092009021.jpg

Your bike should look like this:
04092009022.jpg


THATS ALL I'VE DONE ATM, WILL ADD MORE LATER TOMORROW (HOPEFULLY). SORRY NOT IN MUCH DETAIL BUT I'M A BIT TIRED,LOL.
 
I don't care what anyone says, that red bucket with yellow wheels is awsome :)


NO really, good work mate that's a huge effort.
 
Last edited:
Yeah, it was a toy bucket that we kept all the toys in for the lil ones when they came out but I wanted it so i tipped the toys out :D
 
STUCK!

Tops thread. and agree with no_crf.. The yellow wheeled red bucket is the bomb :D

More pics!(in another threads me thinks.)

Good work again on this. Why not redo it in sections?

this can be bike complete - no engine.

Next thread Engine-Internals+gearbox strip and reassembly

Another for the forks

Finally a refill of all oils and service

the other option is once this thread is completed, I will remove every post bar yours..and then lock it so it dont get spammed
 
Last edited:
STUCK!

Tops thread. and agree with no_crf.. The yellow wheeled red bucket is the bomb :D

More pics!(in another threads me thinks.)

Good work again on this. Why not redo it in sections?

this can be bike complete - no engine.

Next thread Engine-Internals+gearbox strip and reassembly

Another for the forks

Finally a refill of all oils and service


I tryed to post in the "how to section" but it din't let me?

Thanks for the stickie

yeah i might do it in different threads but tomorrow I'll pull the forks off handle bars and front wheel and that'll be that done in this thread then in the next thread I'll strip the forks and shock, then the engine (I'll be splitting the casing soo thats going to be a big thread :( lol), then carbi.
 
no worries mate, will move it across for ya..

like I said (edited) I'll clean it up and lock it so it diosnt get spammed and its there for referance :) good stuff :)
 
it means splitting the cases of the engine (but just for you motovert24 "to pull the engine apart and the internals")
 
and the brand/make/stickerkit should not matter so much.. its the steps how to.. and whats going on, some things may or may not apply to your particular bike.. :rolleyes:

I was also thinking, you should have a running parts needed list.. It would also be a good idea to get some masking tape and a decent marker and labeling the wires upon removal. (it will make the reinstall go ALOT easier)- add some Heat Shirnk to your shopping list about $5. a bag at gheycar..gaayrss.. mayb buttings..etc ;) lol it will keep water out and keep your wires nice n tight later on... more on that later anyway.. back to bulldog :D

Chit chat will be removed tomorrow..
 
Last edited:
Sorry i don't know what brand it is, I brought it second hand but it has a zongshen 150 engine in it. As metioned by darren89, splitting the case invovles: taking the clutch out, head off, barrel off,remove all the gaers and shit inside of the clutch case then its opening the gearbox up yadda yadda.

Thanks coolie that would be much appreciated. I'll wark the wirers out and pull the out and I might see if i can make a diagram thats easyer to under stand, thats if i understand how they go myself:rolleyes:. What do you mean by running parts list? Could you hold up on the locking as i still got the front end to take off :) Thanks everyone.
 
11) Now its time to take off your handle bars, I took off the bar pad holder first witch is held on by to clamps with one (1) bolt each (2x Allenkey size 5). Next is the clutch lever which is held on by two (2) bolts (2x 8mm). Smae as the clutch is the front brake lever (2x 8mm), now the front brake hasn't been disconected from the wheel so let it dangle. Then its the kill switch witch is held on by two (2) phillip head screw (small) be carefull that you don't pull out the wirers or cut them. Now you can take the handle bars off, they are held the by two (2) clamps which have two (2) bolts in them each (4x size 6 allenkey, 4x 1/2" nut). after all that you should have this:
06092009003.jpg

-Bar pad
-Handle bars
-Electrics
-Clutch leave
-Throttle cable
-2x Handle bar clamps

12)Now you should take off the front wheel, this is held on by one (1) bolt (14mm bolt, 17mm nut). Watch out for the spacers as they'll fall out. Now take of your fronte brake calliper, this is held on by three (3) bolts (2x 10mm, 1x philliphead screw and nut, use a small shifter).
06092009007.jpg

13) The forks are held on by six (6) allenkey bolts (2x size 6 top clamp, 4x size 5 bottom clamp).
06092009006.jpg

After all of this you should have:
-front brake calipper
-front wheel and
-forks
06092009009.jpg

What you frame looks like:
06092009008.jpg

Note i did not take off clamps for stem as i was unsure on how to do it.
Threads done. What should the next thread be? engine, carbi, forks?
 
i need all that done to my bike

....then instead of spamming up this thread, and then posting questions about it in page sixty-seventeen in "edumacating motovert25", get of you a$$ and go an do it!!! ;)
 
ahh.. you might want to check who is offering to do the clean up there bulldog ;)

havnt seen coolie post in here yet :LOL:

A running parts list, maybe your sig would eb a good place then you can put a link to the thread to..

basically:
NEEDED: Heatshrink, Exhaust Gasket, New CDI required etc...
 
Ok, so I've decided to keep all of my pull down tuts in the same thread for general viewing.

Carby pull down (jing ke)

With step one (1) you have a chioce do it the way I have or you can take air fillter off first then carby and last the manifold.

1) There are two (2) bolts that hold the manifold onto the engine (2x 10mm)
09092009001.jpg


2)Next there are 2 bolts and nuts holding the manifold onto the carbie (2x 8mm bolts, 2x 10mm nuts). After you undo that you’ll have the manifold off the engine, a rubber gasket which has an o’ring in it, there will be an o’ring in the carbi where the manifold bolts up to the carbie (if you kept the fuel hoses on the carbi there should be two [2]).

3)Air filter there’ll be one (1) flat head screw on an O’clamp. Should have all this after the last three (3) steps:
09092009006.jpg


4)The carbie bowl, (bottom of carbie) will have three or four, (3-4) little Phillip head screws depending on carby type. After you undo those four (4) screws you’ll see the floats and jets, mine has three (3) bolts (watch out for the Float bowl gasket/ring).
09092009028.jpg


5)To take out the float there’ll be a pin, push that out (carefully) you can pull the float out of the carbie. There will be a pin, the “Float Needle”, that’s hanging off the float.
09092009012.jpg

09092009014.jpg
 
6)After you take out the float you can take out the jets. There are two (2) jets, the Main jet and Pilot jet. You can undo both of them with either a flat head screwdriver, or a small socket. You should have the main jet, and pilot jet. The main jet is smaller, with a hole going through to the carby.
09092009016.jpg

09092009018.jpg


7)Choke. There is only one (1) Phillip head screw that holds the choke, selector and washer on. After you take that off you can undo the two (2) Phillips head screws out that hold the plate on the pin that selects what choke you want (full, half, none), and then you should be able to push the pin out. (Please note this is typical of “butterfly-valve” type chokes only).
09092009020.jpg

09092009021.jpg

09092009023.jpg
 
8)Next is the idle screw which is a flat head screw, which consists of the screw and a spring. It is located on the side of the carbie.
09092009026.jpg

09092009025.jpg


9)Next is the air/fuel screw which is located on the bottom of the carbi, which is a flat head screw which consists of the screw, a spring, washer and an o’ring.
09092009028-1.jpg

09092009027.jpg


10)The top of the carby will include a cap and slide. Push the throttle cable through the slot on the slide, which will allow you to take out the spring and dis-connect the slide from the cable. Inside the slide is a spring clip. Take that out with a pair on needle nose pliers, which in turn will allow you to take out the needle jet. When taking out the needle jet, be careful of where the e-clip is on the needle, and what notch it’s in.
09092009030.jpg

09092009031.jpg
 

Latest posts

Back
Top