


Okay, here's a step by step "diary" of my engine modding process. I chose a lifan 138cc engine and upgraded a few things.
First up I wanted a stroker crank. I thought the engine needed some "Fun" torque
I chose to use the 3mm offset pin for the jialing crank because it was a cheap and easy stroker which didn't need spacer plates (the chinese bearings were replaced with NACHI bearings).
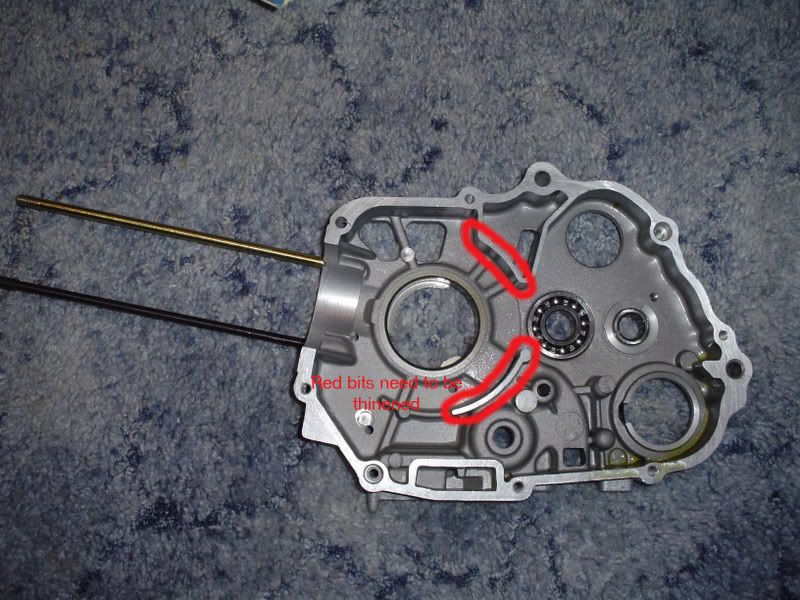
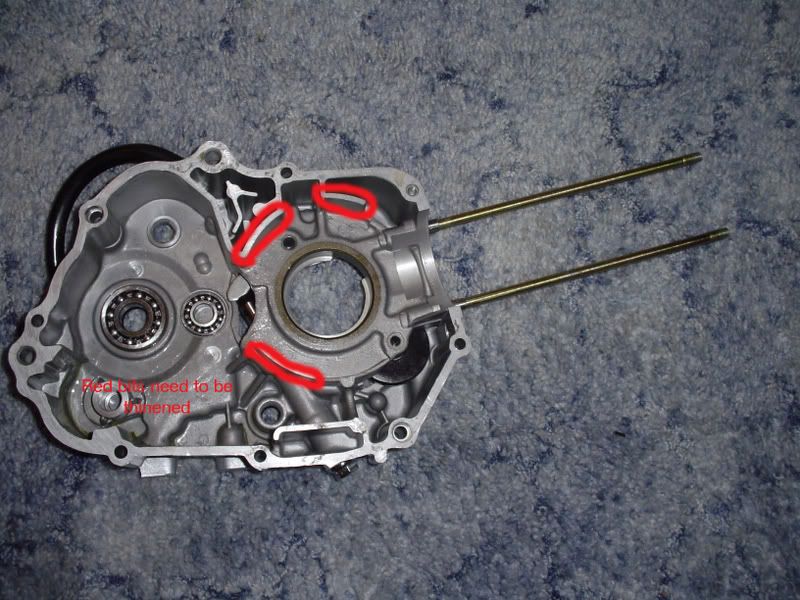
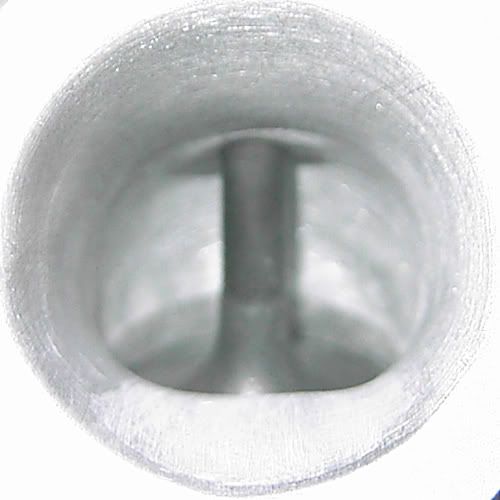
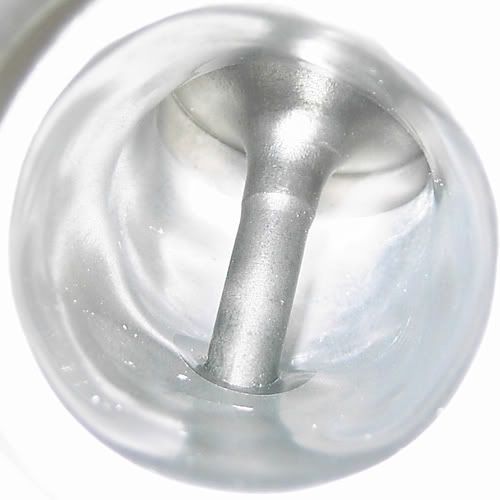
Fitting the 60.5mm stroker crank (3mm offset pin) required the most work because it required disasembly of the bottom end.
When the bottom end was apart, some places had to be turned down for the conrod to clear. This can be done carefully with a dremel by hand. (i did it in the mill)
These area's need to be trimmed down about 1.5mm for the crank to clear
See picture 1 & 2
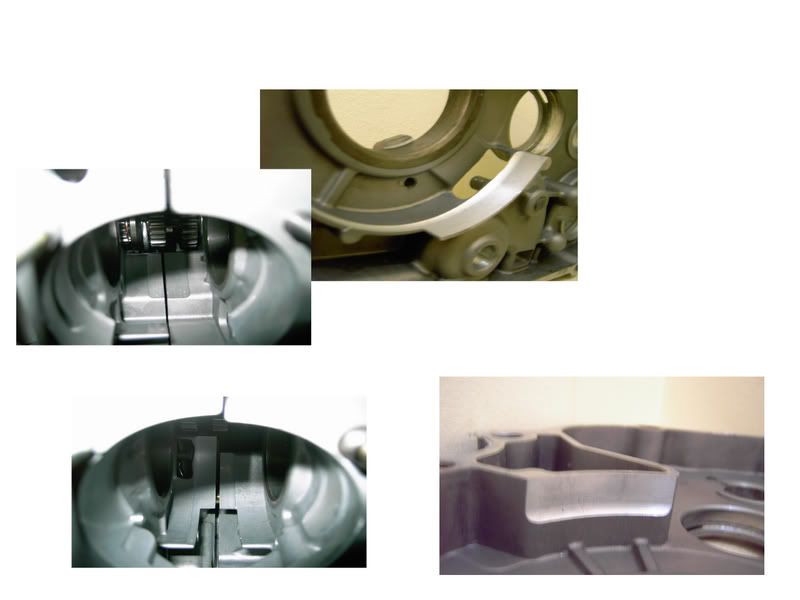
This is what my cases ended up looking like (notice they are still thick enough not to break)
See Picture 3
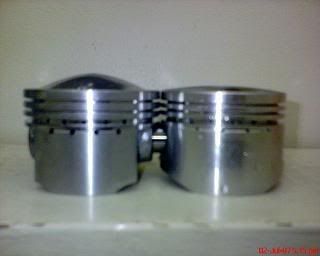
The next step was to fit the 56mm Akunar piston. As you can see in picture 4, the akunar piston has a much higher dome then the standard lifan 138cc piston (it also weighs less).
See Picture 4
This caused a problem because the the piston would not clear without hitting the valves. It also stuck out about .5mm using a paper base gasket and the lifan 140cc gasket.
To fix this, I used a 1mm aluminium base gasket from Akunar, 2 standard paper base gaskets and a head gasket off of the lifan 140cc
Using silicon gasket glue i stuck the two paper base gaskets onto the aluminium one (one on each side). Placed it on the crank case, cylinder on, head gasket on.
This gave me a PERFECT deck height with the piston level with the cylinder (still gave me more compression then i wanted).
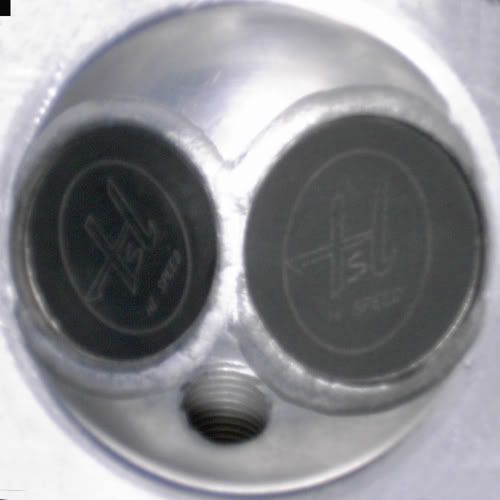
Next step was to upgrade the valves because most of the power is produced in the head. I used akunar's 28/24 valves with their Inner and outer valve spring set (they've held up fine with no binding on the tb300 cam)
See picture 5
The valves were pretty much a direct drop in. I sent them to a local machine shop to be opened up 1mm and walla. The valve reliefs in picture 5 were done using a dremel and a round carbide cutter bit. I protected the valve seats by putting the standard 27/23 valves in and cutting around them with the tool secured against the valves.
Next step was to port the head. Using a series of carbide cutters, I removed the valve guides on the intake and exhaust side.
Then using 80 grit sanding drum on the dremel, i cleaned up intake and exhaust ports trying to "taper" the intake port from big to small.
On the intake port I then filled up the base of the port using JB weld to get a D shape/ squished oval shape port. The surface was finished off by HAND using 80 grit sand paper.
See Picture 6
The exhaust port was pretty straight foreward, starting with 80 grit gradually increasing to 240 grit, and finishing with 400 grit + turtle wax. (all done by hand) to achieve the polished surface
See Picture 7
Finally a Tb300 race cam was installed with Akunar inner and outter valve springs. Set at 0.04" clearence
An OKO 28mm flatside (Keihin pwk28) was fitted using a 102 main jet and 40 pilot jet, 1.5 turns out on A/F screw and 2nd to top notch on the needle. (this carby is REALLY difficult to jet, and i'd reccomend going 26mm rather then 28mm)
See Picture 8 (just to show you the size diffrence between the 28 and the 22mm mikuni copy)
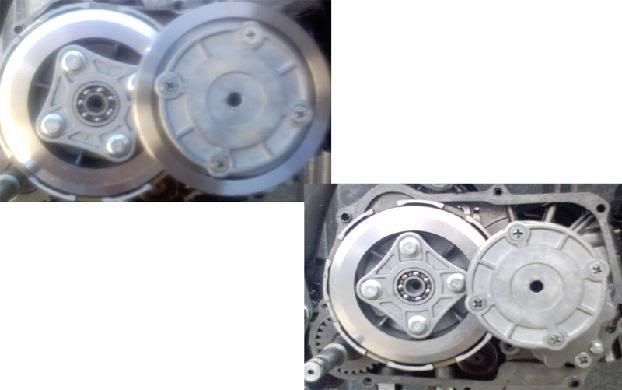
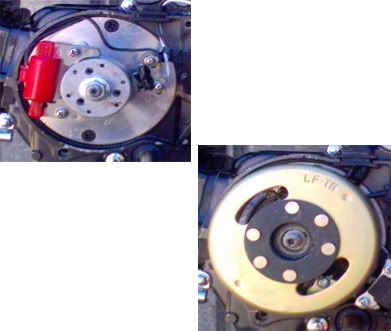
To finish off, I decided to take some weight off the crank by fitting an inner rotor and aluminium oil sling.
(Standard oil slinger weighs 743g where the aluminium one only weighs 160g) - cheers no_crf50_here!
See Picture 9 & 10
Some other little things were changed on the engine.
- split fire ignition coil
- Larger 4 prong nut on clutch basket (so that it's the same as the oil sling)
- Magnetic oil drain bolt (Highly reccomend these!)
-3" trumpet
First up I wanted a stroker crank. I thought the engine needed some "Fun" torque
I chose to use the 3mm offset pin for the jialing crank because it was a cheap and easy stroker which didn't need spacer plates (the chinese bearings were replaced with NACHI bearings).
Fitting the 60.5mm stroker crank (3mm offset pin) required the most work because it required disasembly of the bottom end.
When the bottom end was apart, some places had to be turned down for the conrod to clear. This can be done carefully with a dremel by hand. (i did it in the mill)
These area's need to be trimmed down about 1.5mm for the crank to clear
See picture 1 & 2
This is what my cases ended up looking like (notice they are still thick enough not to break)
See Picture 3
The next step was to fit the 56mm Akunar piston. As you can see in picture 4, the akunar piston has a much higher dome then the standard lifan 138cc piston (it also weighs less).
See Picture 4
This caused a problem because the the piston would not clear without hitting the valves. It also stuck out about .5mm using a paper base gasket and the lifan 140cc gasket.
To fix this, I used a 1mm aluminium base gasket from Akunar, 2 standard paper base gaskets and a head gasket off of the lifan 140cc
Using silicon gasket glue i stuck the two paper base gaskets onto the aluminium one (one on each side). Placed it on the crank case, cylinder on, head gasket on.
This gave me a PERFECT deck height with the piston level with the cylinder (still gave me more compression then i wanted).
Next step was to upgrade the valves because most of the power is produced in the head. I used akunar's 28/24 valves with their Inner and outer valve spring set (they've held up fine with no binding on the tb300 cam)
See picture 5
The valves were pretty much a direct drop in. I sent them to a local machine shop to be opened up 1mm and walla. The valve reliefs in picture 5 were done using a dremel and a round carbide cutter bit. I protected the valve seats by putting the standard 27/23 valves in and cutting around them with the tool secured against the valves.
Next step was to port the head. Using a series of carbide cutters, I removed the valve guides on the intake and exhaust side.
Then using 80 grit sanding drum on the dremel, i cleaned up intake and exhaust ports trying to "taper" the intake port from big to small.
On the intake port I then filled up the base of the port using JB weld to get a D shape/ squished oval shape port. The surface was finished off by HAND using 80 grit sand paper.
See Picture 6
The exhaust port was pretty straight foreward, starting with 80 grit gradually increasing to 240 grit, and finishing with 400 grit + turtle wax. (all done by hand) to achieve the polished surface
See Picture 7
Finally a Tb300 race cam was installed with Akunar inner and outter valve springs. Set at 0.04" clearence
An OKO 28mm flatside (Keihin pwk28) was fitted using a 102 main jet and 40 pilot jet, 1.5 turns out on A/F screw and 2nd to top notch on the needle. (this carby is REALLY difficult to jet, and i'd reccomend going 26mm rather then 28mm)
See Picture 8 (just to show you the size diffrence between the 28 and the 22mm mikuni copy)
To finish off, I decided to take some weight off the crank by fitting an inner rotor and aluminium oil sling.
(Standard oil slinger weighs 743g where the aluminium one only weighs 160g) - cheers no_crf50_here!
See Picture 9 & 10
Some other little things were changed on the engine.
- split fire ignition coil
- Larger 4 prong nut on clutch basket (so that it's the same as the oil sling)
- Magnetic oil drain bolt (Highly reccomend these!)
-3" trumpet
Last edited:

")