CBR250RR build

Mini Dirt Bikes & Pit Bikes Forum

Help Support Mini Dirt Bikes & Pit Bikes Forum:

This site may earn a commission from merchant affiliate links, including eBay, Amazon, and others.
Haha yeah I was thinking of hoisting it to the roof, but I decided to get the stand as torpedo7 have them for $50 and the lift makes it far simpler.

I also just ordered a bunch of bits from Honda Australia:
-Pet**** filter kit
-Fork Bush Guide
-Fork Bush Slider
-A few other fasteners and hardware

Hopefully I will be able to rebuild the forks next weekend
 
There hasn***8217;t been a great deal of progress lately as I have been waiting on parts and tools to arrive. In the meantime I have been slowly getting the bodywork ready for paint.

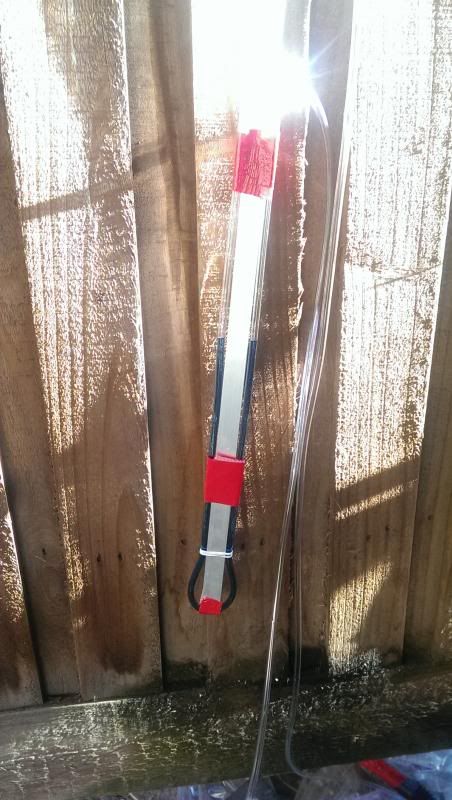
I have also used my homemade manometer to balance the carbs which has made the bike idle and rev much nicer.

Homemade manometer:


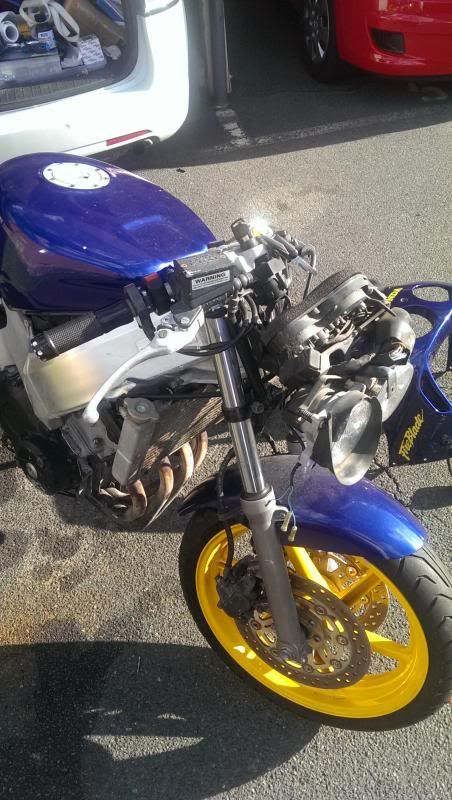
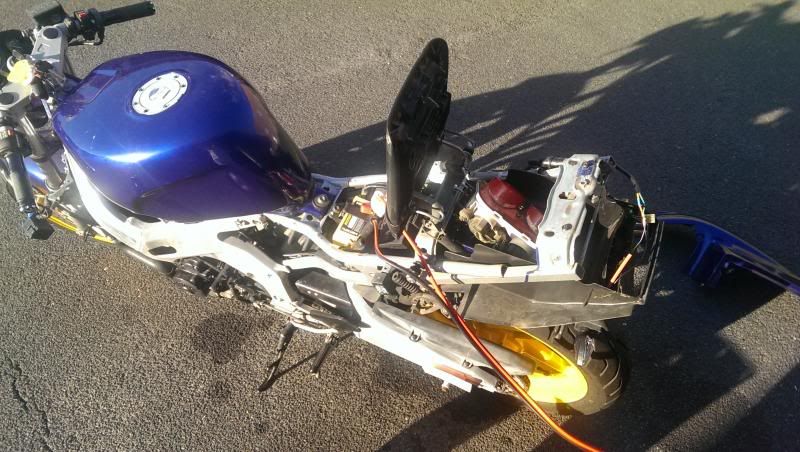
Yesterday I decided to take the front fairing off (needs to be painted also) so that I could change the lightbulbs in the dash to led***8217;s, which are far brighter and more efficient, as well as installing new grips and rear indicators. I measured all of the stickers too so that I can get new ones made up.

While I have the front fairing off I will also be tearing down and rebuilding the forks with new oil, bushings and seals.

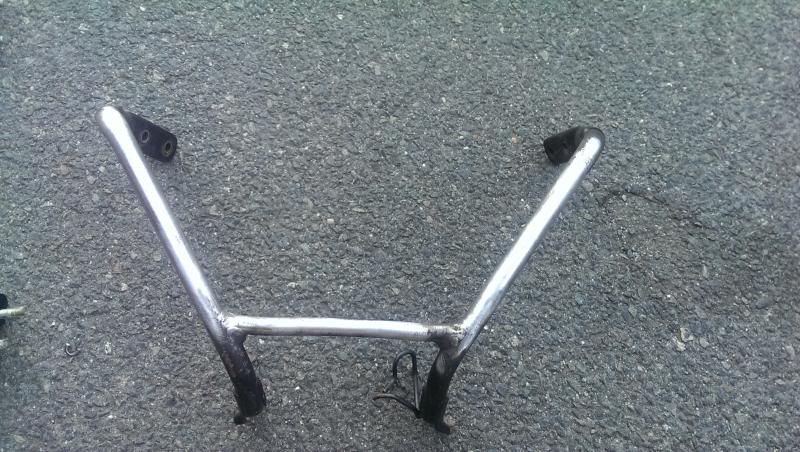
Stupidly, while removing the brace from the front fairing I managed to snap the mounts off the fairing! I have been looking for a replacement but all genuine articles are being quoted at over $200 secondhand! Either that or I can buy a brand new Chinese front fairing painted to my spec for $190 delivered, which isn***8217;t too bad.

I also went at the brace with the wire brush to remove any visible rust, I will be priming and repainting it also as it didn***8217;t look to hot with rust stains and scratched black paint.


Well all of the parts that I need for the suspension rebuild have arrived, except for my bike stands!

I ordered front and rear stands from Torpedo7 3-weeks ago and only the front stand arrived! They have agreed to dispatch a new rear stand asap but it has still put me 3 weeks behind.

In the meantime I have installed some new levers:


I also took the tank off to start work on the paint, and to my amazement there is only a tiny rust patch:


I also have a new petc0ck filter to install as the current one looks to be 20 years old:


Just to be safe I have a new fuel line to install with a clear inline filter.

Next steps while getting the tank ready for paint and waiting to rebuild forks will be to replace brake fluid all around, replace oil and filter and continue to paint the fairing.

I'm also looking at installing new tyres in the near future as the ones on the bike currently are crappola
 
Started to remove the paint from the tank, all was going well until I found a large dent that had been covered with putty!

Not an issue, just means that I have to go and re-putty it!

I didn’t get a photo of the dent but I did get a photo with the first layer of putty:


I have since layered it up nicely and will proceed with sanding this week.

The fairings are all painted, except for the nosecone (which I still need to source) and my rear stand should arrive this week so I will be able to rebuild the forks!

It’s certainly moving along and looking better every day which I’m happy about, more pictures to follow.
 
there was a bit of bubbling and imperfections that I wasnt happy with since the tank is such a focal point of any bike, especially since its being painted in matte black they will show up very easily.

Plus being a steel tank it was a very easy process to remove the paint with a heat gun and wire brush
 
Pretty much, its going to have all black fairings with yellow wheels and a few anodized gold pieces.

The mounting ring for the petrol cap has also been sprayed yellow and I have some anodized black bolts to hold it on, so should look shmick :)
 
the RR is coming along nice, you have done a heap of work to it.
+ reps


use some Satin Black if you can, Matt will show too many marks.
if you rub Matt Black it turns Satin anyway, but looks too dry.

what type of paint are you using 2 Pack ?

Acrylic can soften/bubble pretty easy if you spill petrol on it.

i hope you feathered all the edges of paint out well under the bog too,
a few wet coats of primer and it will start to fry up.
 
I'm currently using the PowerPlus paint from supercheap which has turned out pretty good so far.

As this is my first road bike I didnt want to invest too much into the paint job as it's likely to get ruined pretty quickly.

I gave the paint a bit of feathering, but there was practically no paint under the bog as I removed it all
 
So while I waited for my rear stand to arrive, I decided to make myself a benchtop power supply out of an old computer so that I could use electrolysis to clean the rust from the inside of my tank. Here is the power supply as it is:


I have a bunch of goodies on the way from Jaycar so that I can clean it up and make it look nice, but they won't arrive until next week so I decided to push ahead with the electrolysis today:


After a few hours the inside of the tank should be squeeky clean. I also finished spraying the petrol cap (cant find the damn anodized bolts for it though!):


My rear stand also arrived on sunday, so today I pulled the forks off the bike, but unfortunately my 17mm allen key hasnt arrived yet so I cant disassemble the forks until I go to the hardware store and grab a bolt and 2 nuts with a 17mm head to use instead.


I have decided to grab a set of these, to pull the whole yellow and black scheme together:
http://www.ebay.com.au/itm/YELLOW-B...pt=UK_Motorcycle_Parts_13&hash=item5afc3b87a9

http://www.ebay.com.au/itm/351005777497?ssPageName=STRK:MEWAX:IT&_trksid=p3984.m1423.l2649
 
Hey if you google pro-bolt, they do anodised nuts and bolts specific to bikes and cars
 
yeah ive got a set of anodized bolts for the fuel cap but I couldnt find them when i took the picture, hopefully ill find them hiding somewhere when its time to install it
 
Well, after a lot of swearing, heating up and cooling down I managed to get the fork cap off, to find a whole lot of black, smelly fork oil:


The next step was to remove the bolt at the bottom that holds it all together. This bolt is meant to be one of the toughest bolts your ever likely to encounter and as I didnt have a bench vice, I used a spare bit of steel to hold it to a steel chair. A bit of heave-hoe with a breaker bar and out she came:


Here are the parts after a thorough clean with degreaser and brake cleaner:


I will give them another clean with brake cleaner and re-assemble with new seals and bushes
 
Top marks man, certainly going the extra mile :) How'd that electrolosis work, be keen to see some before and after pics. And well done on cracking that bottom screw the way you did, many have tried and failed, what'd you use to grab the top?
 
Thanks mate. The electrolysis is still going, generally takes around 8 hours or so depending on the current, I will post some pics when its done. If im not happy with it I might give it another crack as there was a fair amount of gunk and stuff that built up from sanding it.

I didnt need to hold the top, the internals must be shaped in a way that they don't rotate so it was as simple as holding the bottom section down and undoing it. I replaced the bolt and washer with oem ones to ensure that there is no metal fatigue that could snap the bolt down the track.

I just finished rebuilding them, replaced the bushings with oem and the seals with aftermarket. I also filled it with 15wt fork oil and added 3x20c coins to the top to increase preload. Once their back on the bike I will check the sag and add/remove coins as needed
 
Electrolysis didnt work very well, there wasnt enough load on the power supply so it kept switching off. I have a suitable resistor coming with my goodies from Jaycar so once that arrives i'll give it another go
 

Latest posts

Back
Top