This is just a basic guide (in fact my first 4S build) so don't take this as gospel and please feel free to add bits i may of missed or got wrong... Anyway lets start by pulling down the YX160.
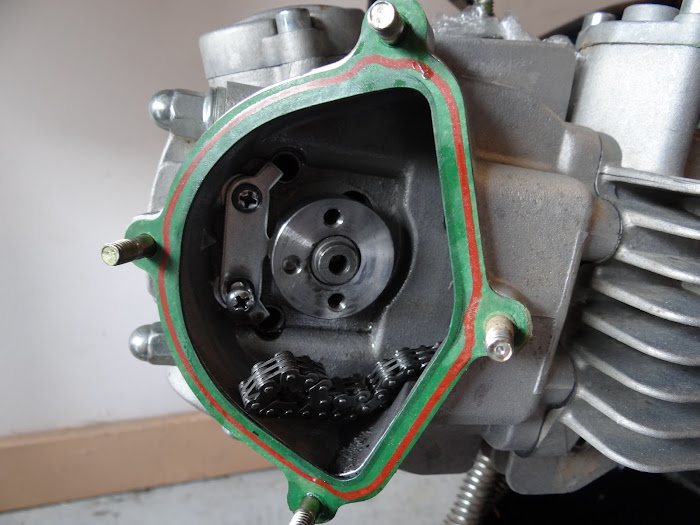
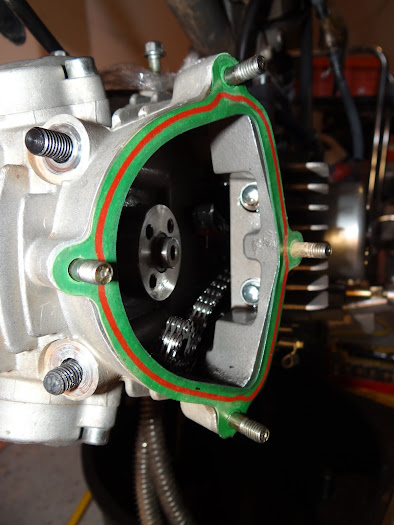
Fisrt of all i would prep the new head with the cam, rockers + tappets and arms. Start by fitting 1 rocker and 1 retainer at a time and then insert the cam (use a touch of oil on the cam and reatiners to make them slide in easier, the cam does require a bit of pressure to make it fit in place but this can be done by your fingers + have the cam set at TDC) and then bolt in the cam plate, which will only fit in one way, making sure the plate locks the arms from spinning as shown here
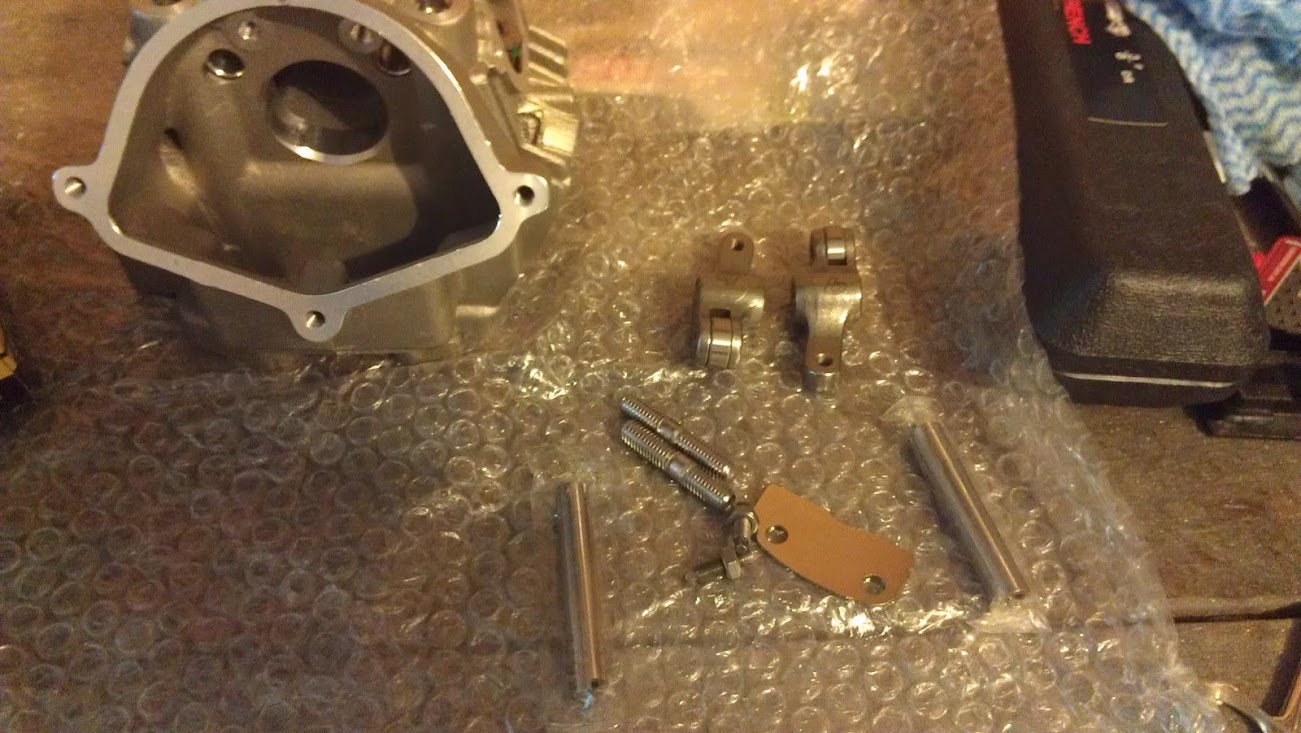


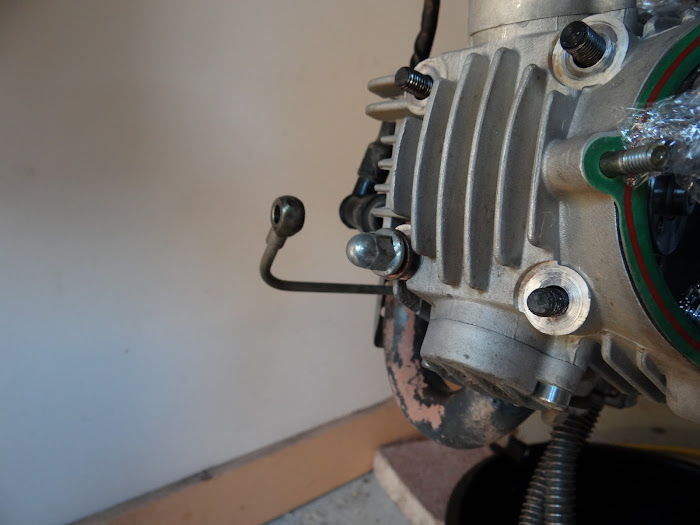
the extra bits we need (the decomp part) i will discus later (such as this pic shows)
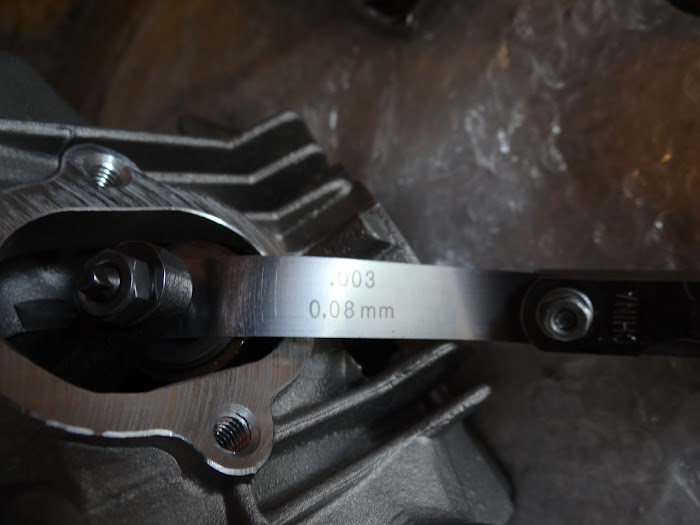
Then set your clearances 0.003 inlet and 0.004 exhaust
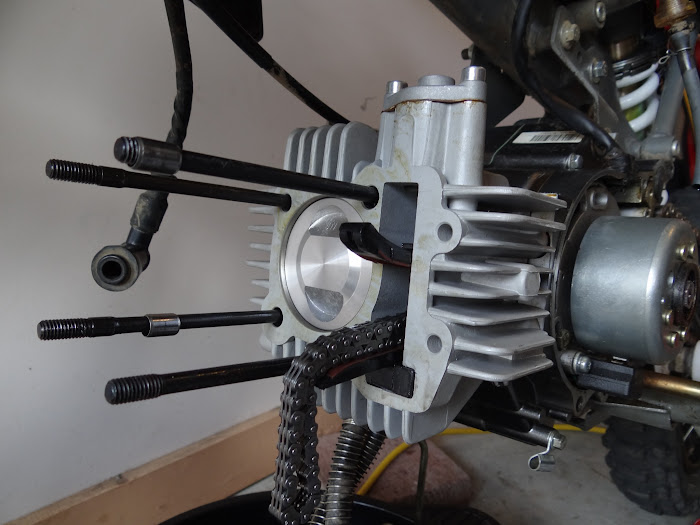
And last (but deffinatley not least) install the exhaust studs by locking 2 8mm nuts together on one end of the stud (the longer end) then using the top nut to screw into place, then loosen the 2 nuts, remove and then do the same on the other side
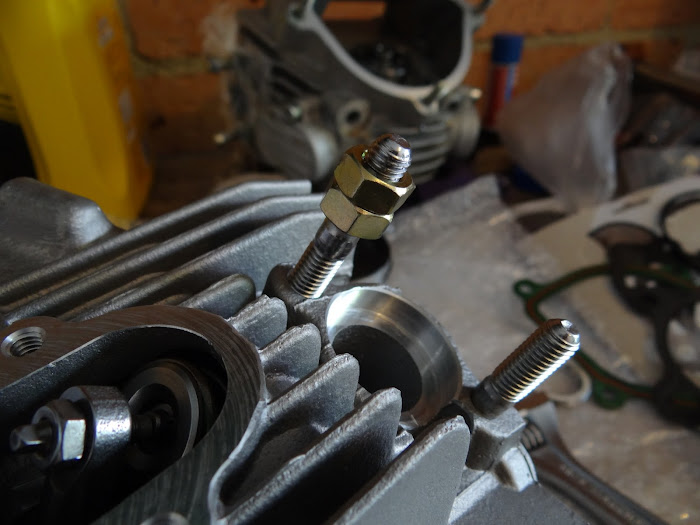
(Tip for YX160 owners... the new exhaust studs are lager than the originals so you will have to drill out the holes in your exhaust flange, ALSO you will have to remove approx 10mm of the end of the exhaust for it to fit)
1) Drain the oil
2) Remove the bash plate, oil cooler and inlet port including the carbie + throttle cable (not a bad idea to cover the inlet port with something to stop carp falling into it)
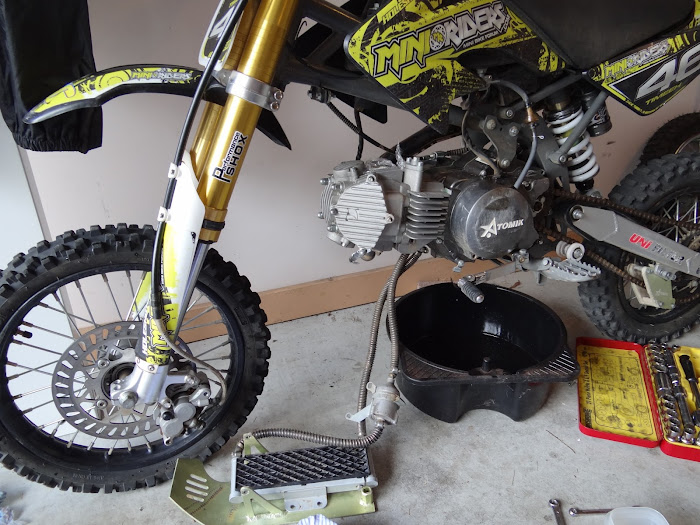
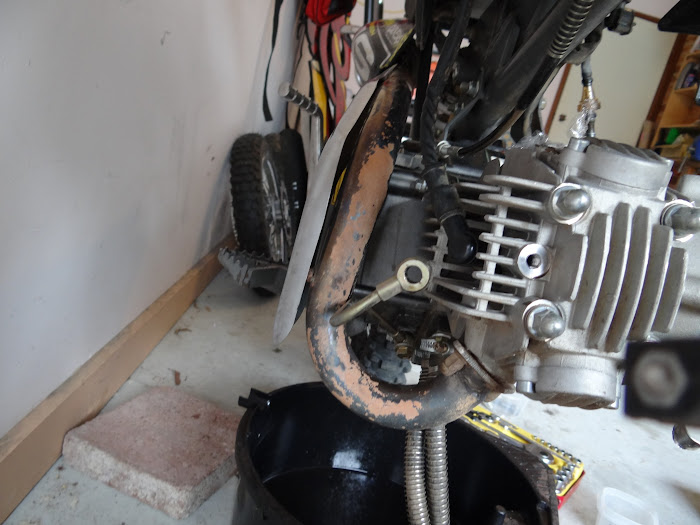
3)Remove the oil line from the head and also remove the exhuast (undo the head side first)
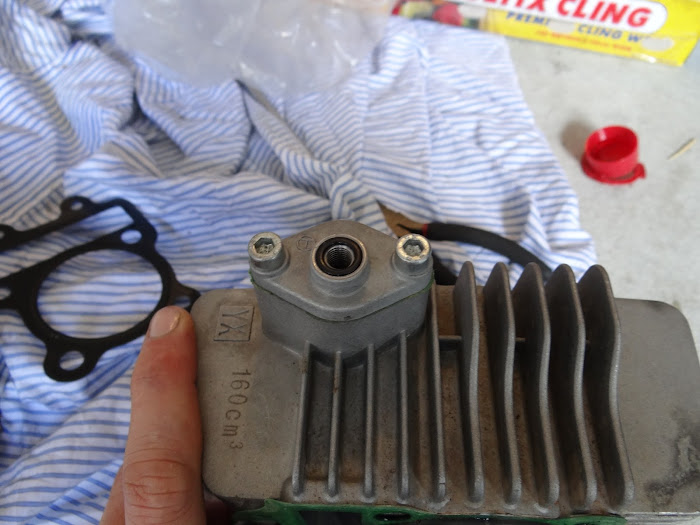
4)Remove the stator and cam cover and set the engine to TDC
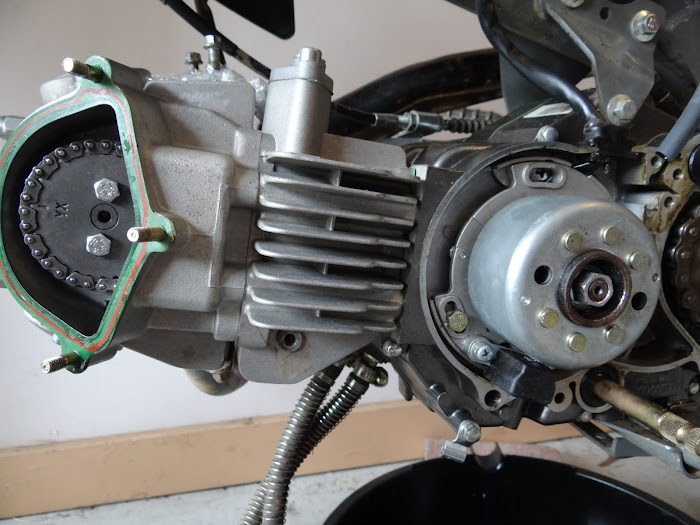
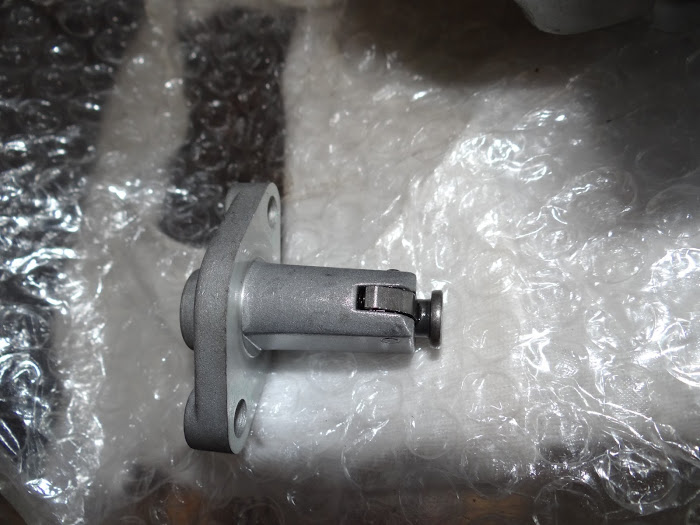
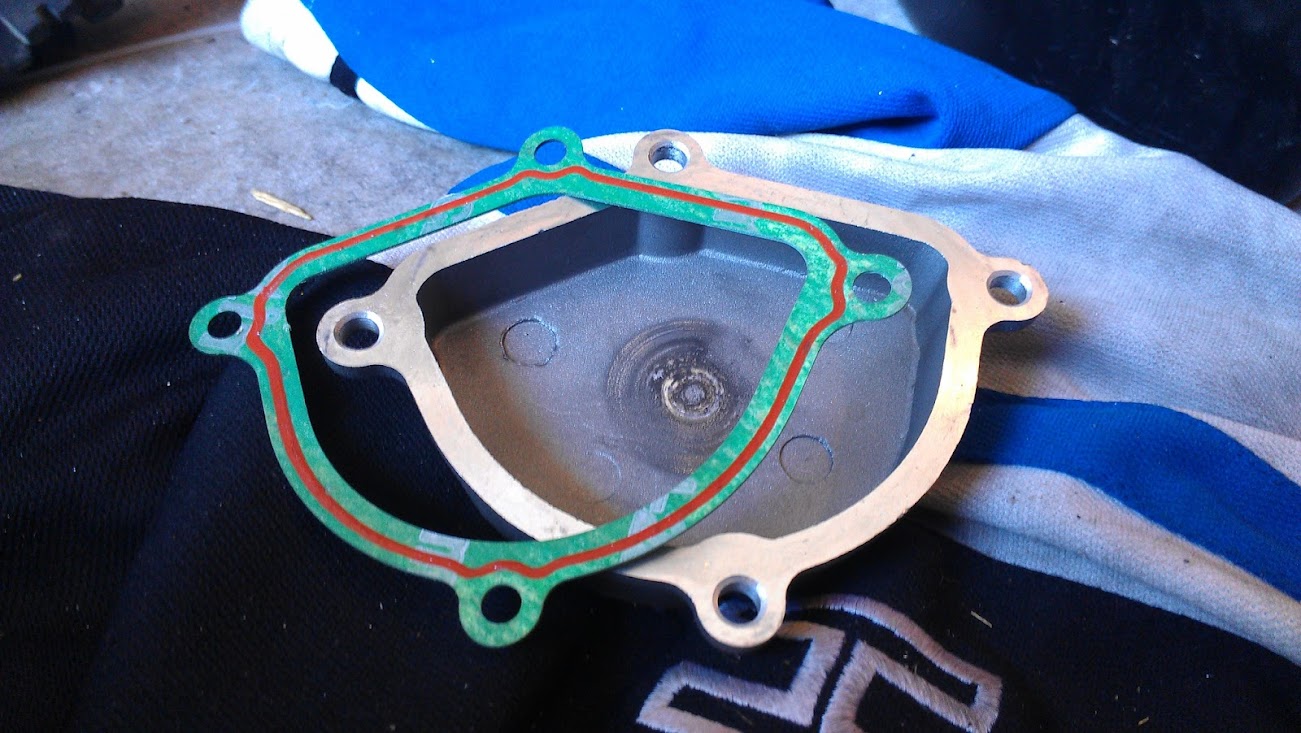
5)Remove the cam tensioner (just the center bolt and watch the spring) then the 2 bolts from the cam gear and then remove the gear (look after the gasket you see here as they are not supplied in the rebuild kit)
6)Remove the 4 head nuts remembering which one has the brass washer on it
7)Then remove the 2 bolts that sit inside the cam cover
8)Now the head should slide off (a little prying may be needed) and then the barrell, take note of where the locator sleeves are, don't loose these as you will need them. Also the bottom cam guide will slide out with the barrel. Keep this in a clean safe place")
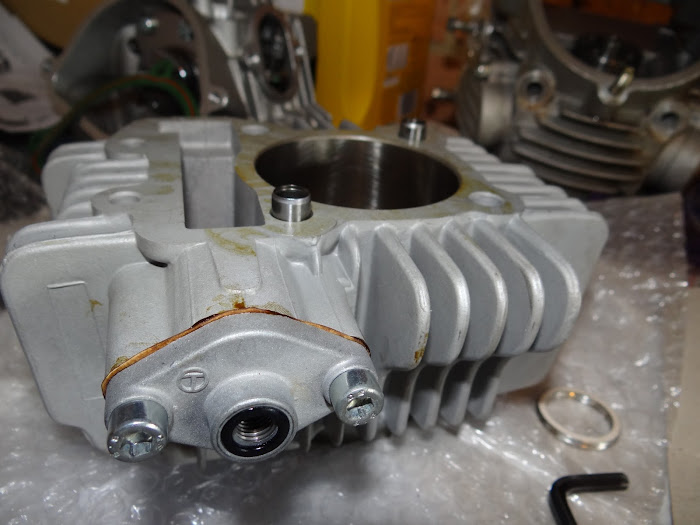
9)With the barrel removed you can now remove the cam tensioner housing by removing the 2 bolts holding it in place. Now you will need a new gasket for the new head so just cut one out of gasket paper, then reset the cam adjuster (push the lock in and slide into itself) then install into the new head with the new gasket.
10)Now its time to remove the piston. You need to remove one of the circlips from either side of the wrist pin (this can be done with a pair of pointy nose pliers), then slide the pin out and remove the piston. (sorry no pics of this)
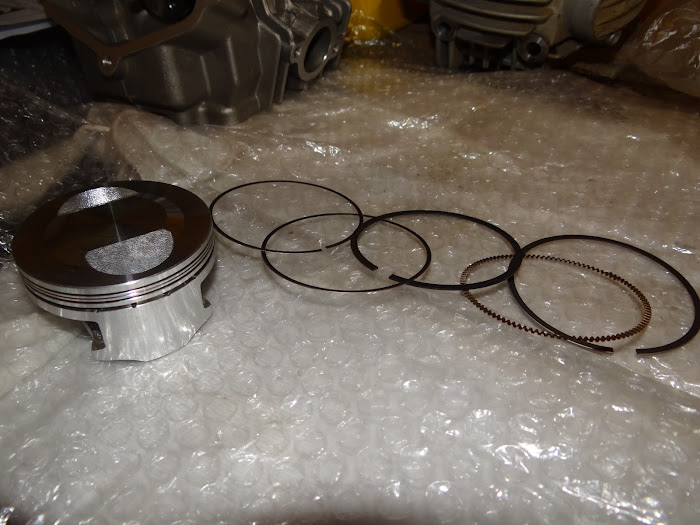
11)Install new rings on new piston. We'll start with the bottom housing first (the one closest to the bottom end). Start with 1 of the 2 thin ones and slide it on (the 2 closest to the piston in the picture), next is the wavy shaped (the 4rth furthest away in the picture) which will sit underneath it then the second thin one should just fit underneath it leaving the wavy one in the middle of the 2 thin ones (this may require a little bit of playing as these sit very tightly. Next place the middle ring in the middle slot (this should be a darker colour to the top ring). And lastly insert the top ring. Also at this step make sure none of the ring gaps align and also keep them away from the exhaust.
12)Install the new piston by first installing 1 of the circlips into the piston to hold the wrist pin in place. Then place the piston over the conrod and slide the wrist pin into place, then install the 2nd circlip so the wrist pin cannot fall out
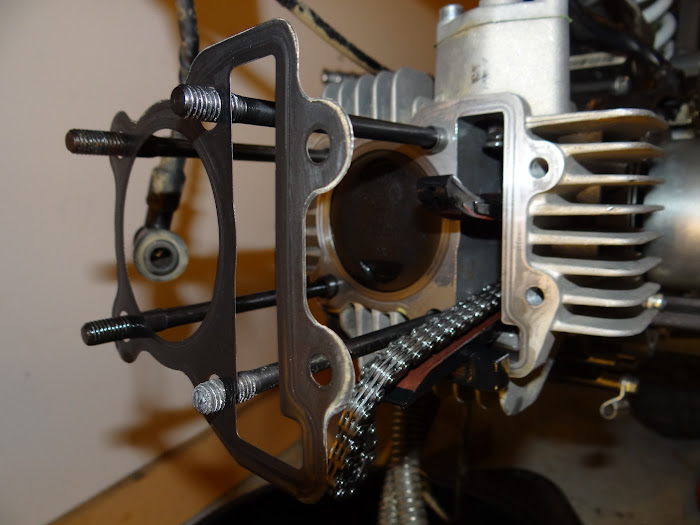
13)Now it's time to install the new barrell. Make sure the new gasket is in place (the green paper one) and the 2 locator sleeves, then slide the barrel down to meet the piston (use a touch of oil aroudn the outside of the piston/rings to make it slide in a bit easier). Once there you will have to "massage" the rings ever so slightly to fit into the head as your sliding it down (or if you have a ring compressor you would use it now, but im a bum) until it slots neatly into the bottom end (make sure you dont hit/snap off the cam guide and also make sure you have moved your chain...) Once in place you can re-insert your lower cam guide, and the next 2 locator sleeves.
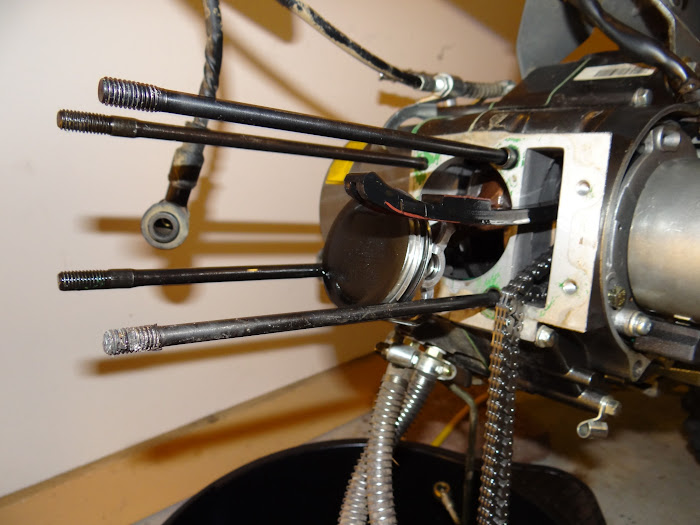
14)Now its time to install the head, first place the new gasket in (the metal one) then slide the head over the bolts, again carefull of the cam chain and guides, making sure it sits flush with the barrell. (ignore the 2 bolts in this pic, they are part of the next step)
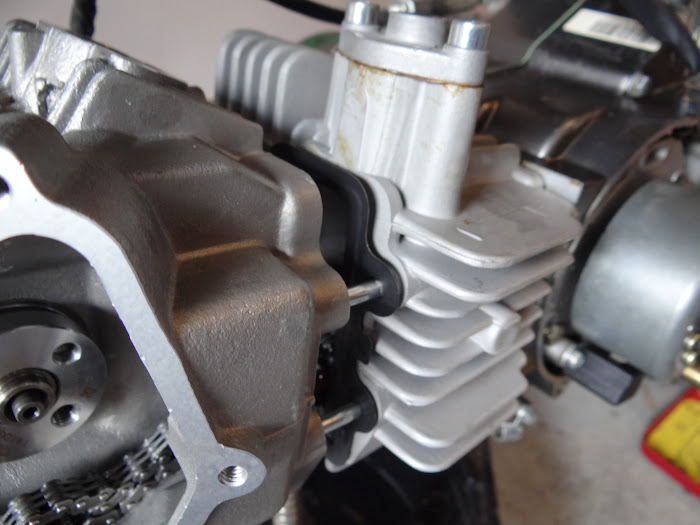
15)Put the 4 head nuts back in place (remembering to put the one with the brass washer back on the same bolt) and tension them to 20ft tourque. Then replace the 2 bolts from inside the cam cover (as in the picture above)
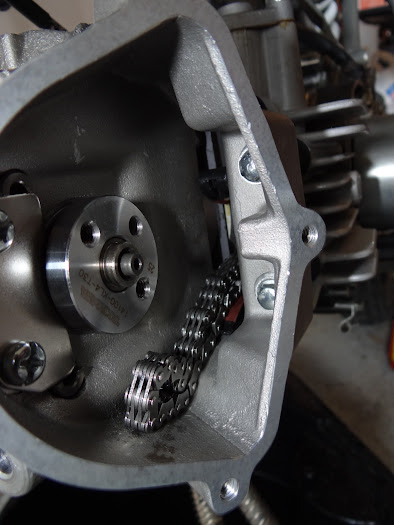
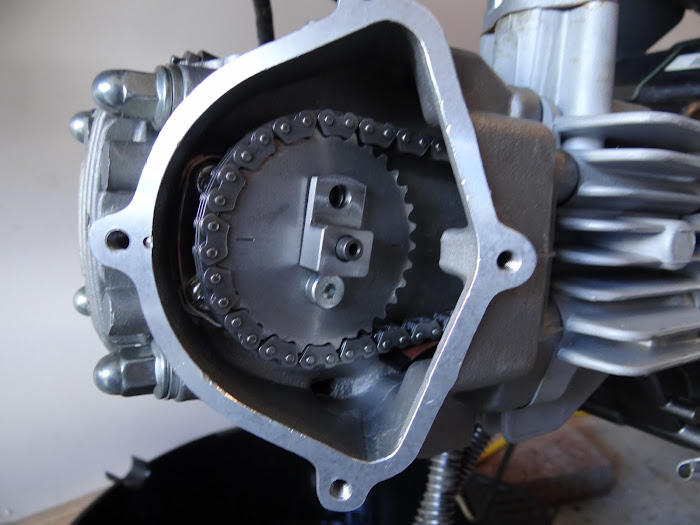
16)Now re-install the cam gear by installing the chain around it first and getting it as close to TDC as you can then slot back onto its lug/housing (this may take a bit of pressure and possibly swearing...)then swivel thegear back and foward until the holes line up then, bolt it in using the smaller of the 2 supplied bolts, into the bottom hole (at this stage check the engine can be turned over by hand, just to make sure nothing is hitting or stuck)

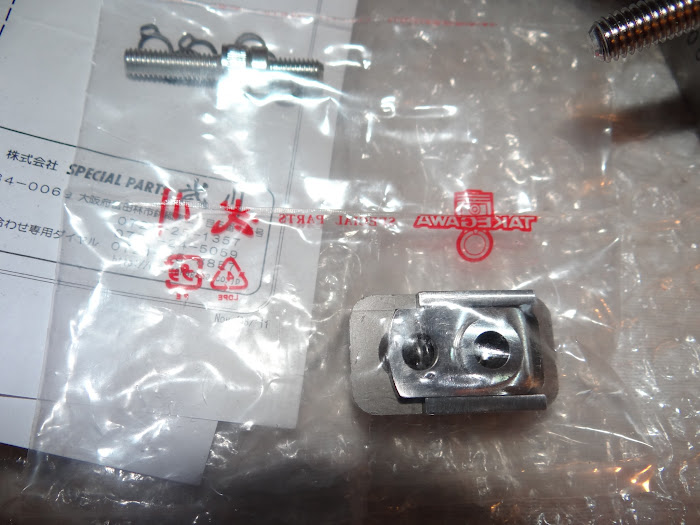
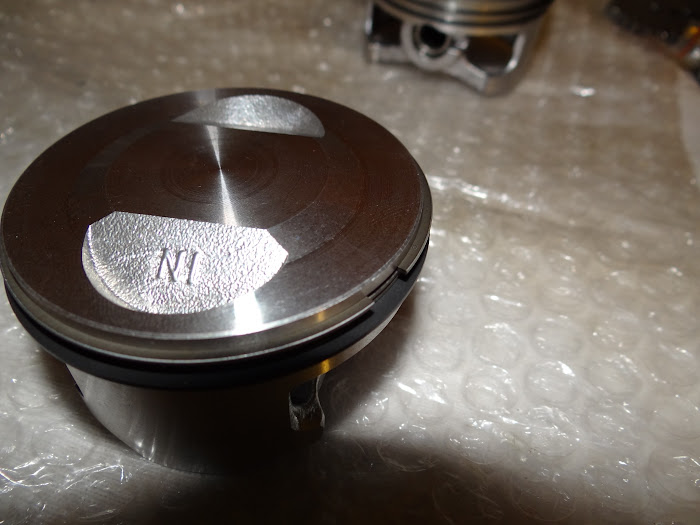
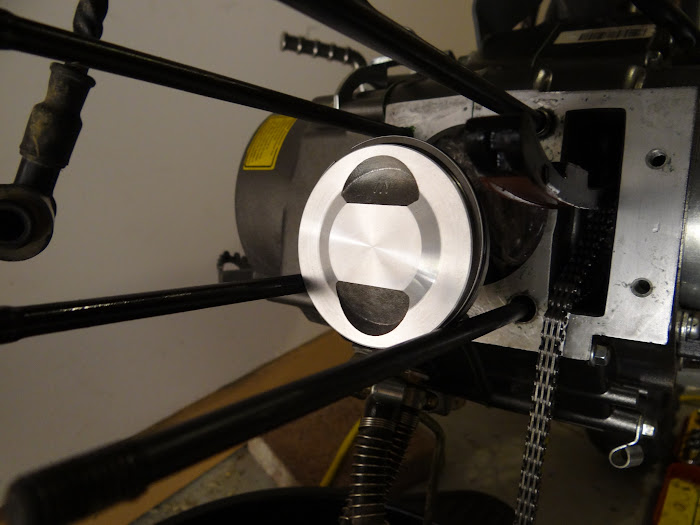
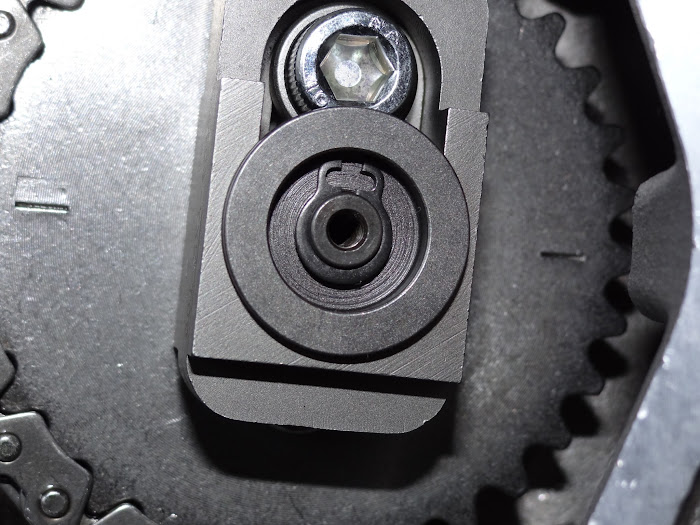
17)Now we install the auto-decomp part of the cam. First we install the main lug (as per pic 1) then using the 2nd bolt (the longer of the 2 mentioned above) bolt it into the upper hole (as per pic 2 and 3, ignore the thumb screw and collar for now)
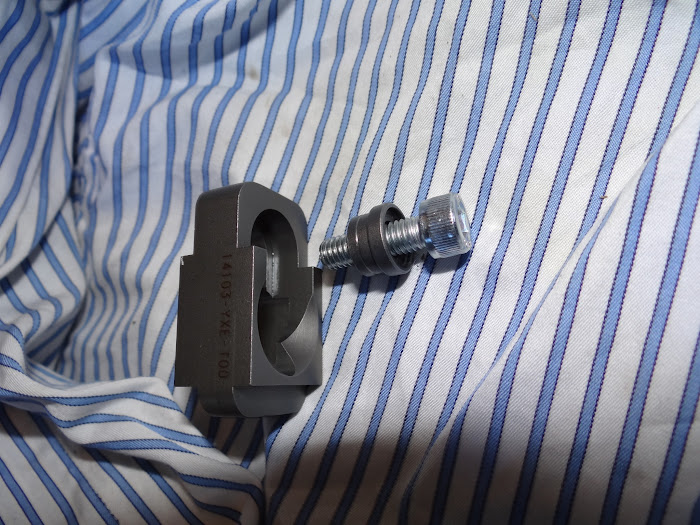
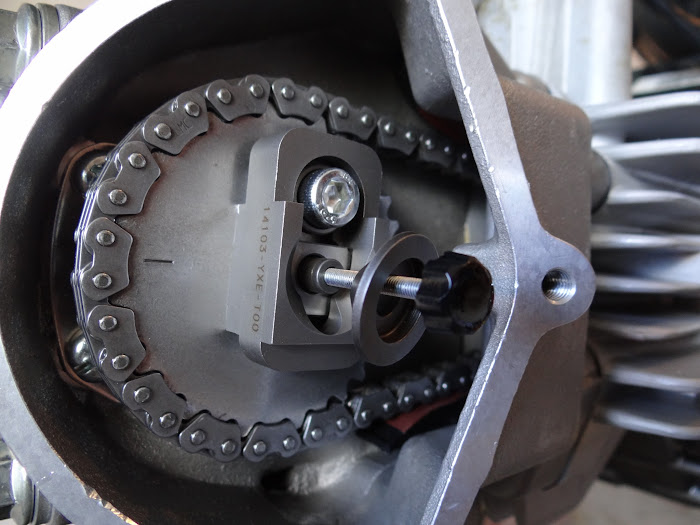
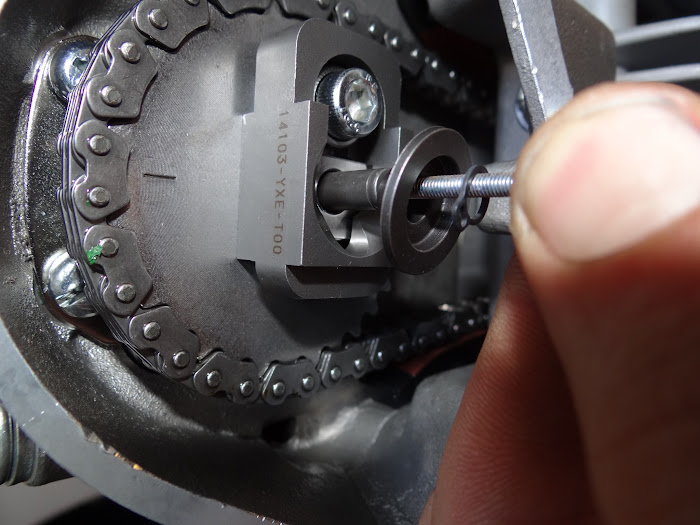
18)Now using the thumb screw, place the round collar and one of the mini cirlips that come withe the cam (Takegwawa include 5 but you only need one....Not many get it right the first time) over the screw then screw it into the centre of the cam, enough times to get a good grip on it and then get out your circlip removers or point nose pliers. With the collar pushed against the cam and the centre piece of the cam pulled out you will see a tiny housing for the cirlip, fit this in place and the job is done, then simply unscrew the thumb screw. When doing this the circlip should not be able to be moved by hand, if it can put a new one on.
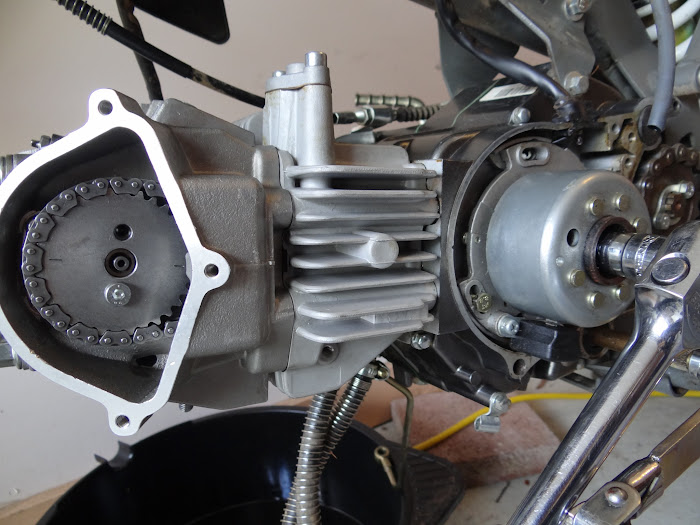
19) Now you can re-install the spring from the cam tensioner and put the covers back on your cam cover (i installed this by using 4 new 6mm bolts, otherwise you need to remove the studs from the old head = dont forget your gasket) your valve covers (from your old head) your oil line (b4 putting this back on fill it with oil as to get oil to the new head sooner) and your exhaust (which you've modified as you read the start of this....didn't you?) You could also at this time reattach your oil cooler and bash plate (but i didn't)
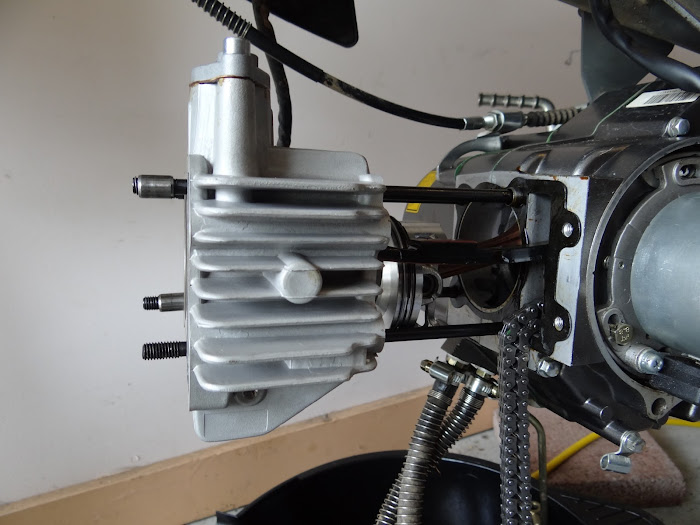
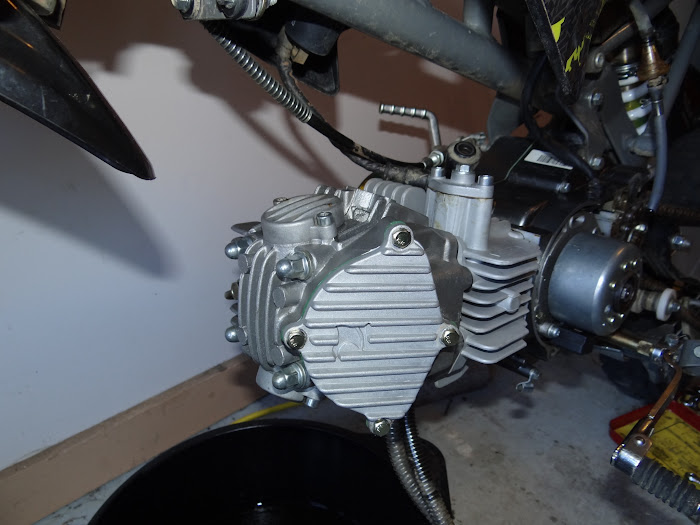
EDIT: This is also where you install your new cam cover as the original does not fit with the auto-decomp block now attached to the cam gear. It looks like this,
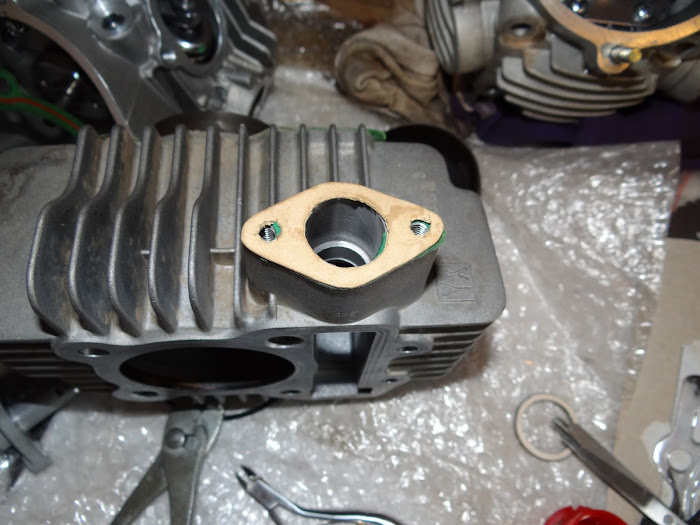
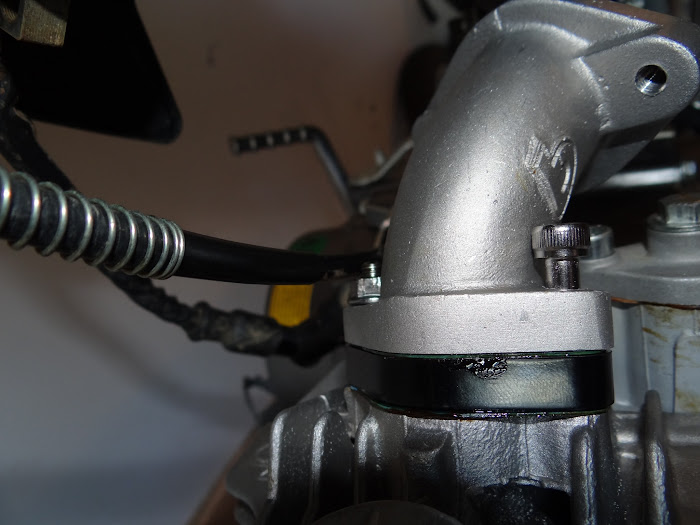
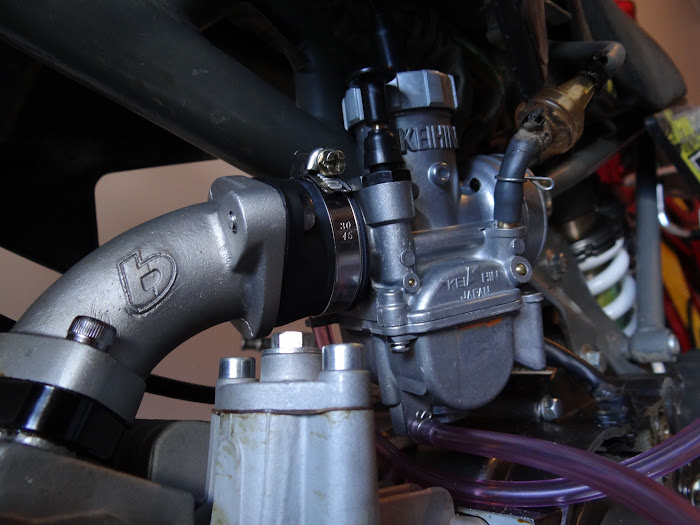
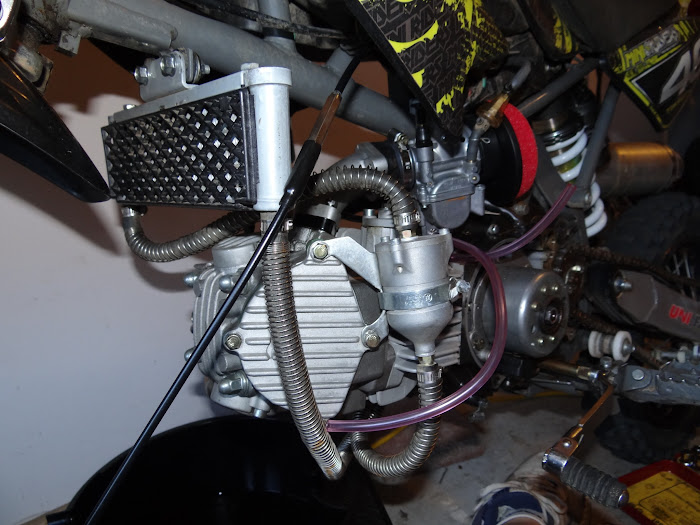
20) Now lastly install the inlet manifold and carbie, i am running a PE28mm with a TB manifold. First you need to install the throttle cable (carbie side first then throttle), then install the stud which attaches to the clutch side of the engine (this could be replaced by a bolt but i couldn't find one to fit...) then install one gasket then the plastic riser, another gasket and then the inlet manifold, rubber adapter plate then carbie (inc air filter) and lastly the fuel line and about 900ml of oil
That is pretty much it i think. Anything i missed please let me know
Fisrt of all i would prep the new head with the cam, rockers + tappets and arms. Start by fitting 1 rocker and 1 retainer at a time and then insert the cam (use a touch of oil on the cam and reatiners to make them slide in easier, the cam does require a bit of pressure to make it fit in place but this can be done by your fingers + have the cam set at TDC) and then bolt in the cam plate, which will only fit in one way, making sure the plate locks the arms from spinning as shown here
the extra bits we need (the decomp part) i will discus later (such as this pic shows)
Then set your clearances 0.003 inlet and 0.004 exhaust
And last (but deffinatley not least) install the exhaust studs by locking 2 8mm nuts together on one end of the stud (the longer end) then using the top nut to screw into place, then loosen the 2 nuts, remove and then do the same on the other side
(Tip for YX160 owners... the new exhaust studs are lager than the originals so you will have to drill out the holes in your exhaust flange, ALSO you will have to remove approx 10mm of the end of the exhaust for it to fit)
1) Drain the oil
2) Remove the bash plate, oil cooler and inlet port including the carbie + throttle cable (not a bad idea to cover the inlet port with something to stop carp falling into it)
3)Remove the oil line from the head and also remove the exhuast (undo the head side first)
4)Remove the stator and cam cover and set the engine to TDC
5)Remove the cam tensioner (just the center bolt and watch the spring) then the 2 bolts from the cam gear and then remove the gear (look after the gasket you see here as they are not supplied in the rebuild kit)
6)Remove the 4 head nuts remembering which one has the brass washer on it
7)Then remove the 2 bolts that sit inside the cam cover
8)Now the head should slide off (a little prying may be needed) and then the barrell, take note of where the locator sleeves are, don't loose these as you will need them. Also the bottom cam guide will slide out with the barrel. Keep this in a clean safe place
9)With the barrel removed you can now remove the cam tensioner housing by removing the 2 bolts holding it in place. Now you will need a new gasket for the new head so just cut one out of gasket paper, then reset the cam adjuster (push the lock in and slide into itself) then install into the new head with the new gasket.
10)Now its time to remove the piston. You need to remove one of the circlips from either side of the wrist pin (this can be done with a pair of pointy nose pliers), then slide the pin out and remove the piston. (sorry no pics of this)
11)Install new rings on new piston. We'll start with the bottom housing first (the one closest to the bottom end). Start with 1 of the 2 thin ones and slide it on (the 2 closest to the piston in the picture), next is the wavy shaped (the 4rth furthest away in the picture) which will sit underneath it then the second thin one should just fit underneath it leaving the wavy one in the middle of the 2 thin ones (this may require a little bit of playing as these sit very tightly. Next place the middle ring in the middle slot (this should be a darker colour to the top ring). And lastly insert the top ring. Also at this step make sure none of the ring gaps align and also keep them away from the exhaust.
12)Install the new piston by first installing 1 of the circlips into the piston to hold the wrist pin in place. Then place the piston over the conrod and slide the wrist pin into place, then install the 2nd circlip so the wrist pin cannot fall out
13)Now it's time to install the new barrell. Make sure the new gasket is in place (the green paper one) and the 2 locator sleeves, then slide the barrel down to meet the piston (use a touch of oil aroudn the outside of the piston/rings to make it slide in a bit easier). Once there you will have to "massage" the rings ever so slightly to fit into the head as your sliding it down (or if you have a ring compressor you would use it now, but im a bum) until it slots neatly into the bottom end (make sure you dont hit/snap off the cam guide and also make sure you have moved your chain...) Once in place you can re-insert your lower cam guide, and the next 2 locator sleeves.
14)Now its time to install the head, first place the new gasket in (the metal one) then slide the head over the bolts, again carefull of the cam chain and guides, making sure it sits flush with the barrell. (ignore the 2 bolts in this pic, they are part of the next step)
15)Put the 4 head nuts back in place (remembering to put the one with the brass washer back on the same bolt) and tension them to 20ft tourque. Then replace the 2 bolts from inside the cam cover (as in the picture above)
16)Now re-install the cam gear by installing the chain around it first and getting it as close to TDC as you can then slot back onto its lug/housing (this may take a bit of pressure and possibly swearing...)then swivel thegear back and foward until the holes line up then, bolt it in using the smaller of the 2 supplied bolts, into the bottom hole (at this stage check the engine can be turned over by hand, just to make sure nothing is hitting or stuck)
17)Now we install the auto-decomp part of the cam. First we install the main lug (as per pic 1) then using the 2nd bolt (the longer of the 2 mentioned above) bolt it into the upper hole (as per pic 2 and 3, ignore the thumb screw and collar for now)
18)Now using the thumb screw, place the round collar and one of the mini cirlips that come withe the cam (Takegwawa include 5 but you only need one....Not many get it right the first time) over the screw then screw it into the centre of the cam, enough times to get a good grip on it and then get out your circlip removers or point nose pliers. With the collar pushed against the cam and the centre piece of the cam pulled out you will see a tiny housing for the cirlip, fit this in place and the job is done, then simply unscrew the thumb screw. When doing this the circlip should not be able to be moved by hand, if it can put a new one on.
19) Now you can re-install the spring from the cam tensioner and put the covers back on your cam cover (i installed this by using 4 new 6mm bolts, otherwise you need to remove the studs from the old head = dont forget your gasket) your valve covers (from your old head) your oil line (b4 putting this back on fill it with oil as to get oil to the new head sooner) and your exhaust (which you've modified as you read the start of this....didn't you?) You could also at this time reattach your oil cooler and bash plate (but i didn't)
EDIT: This is also where you install your new cam cover as the original does not fit with the auto-decomp block now attached to the cam gear. It looks like this,
20) Now lastly install the inlet manifold and carbie, i am running a PE28mm with a TB manifold. First you need to install the throttle cable (carbie side first then throttle), then install the stud which attaches to the clutch side of the engine (this could be replaced by a bolt but i couldn't find one to fit...) then install one gasket then the plastic riser, another gasket and then the inlet manifold, rubber adapter plate then carbie (inc air filter) and lastly the fuel line and about 900ml of oil
That is pretty much it i think. Anything i missed please let me know
Last edited: