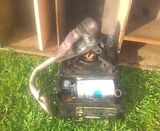
Mini Dirt Bikes & Pit Bikes Forum

Help Support Mini Dirt Bikes & Pit Bikes Forum:

This site may earn a commission from merchant affiliate links, including eBay, Amazon, and others.
the new fuel cap breather arrived yesterday too, ebay seller killer68monaro for $4 delivered
http://www.ebay.com.au/itm/22118877...NX:IT&_trksid=p3984.m1439.l2649#ht_500wt_1180


and i have ordered a set of M5 & M6 Allen head Stainless bolts for the side covers too, 6mm x 25mm long, and 6mm x 35mm long, and 5mm x 20mm long, they cost around $1.50 - $2.30 delivered for 10 bolts.
the original Yamaha philips head screws had been overtightened, and the slotted heads only just grip when using a screwdriver.

http://www.ebay.com.au/itm/14094932...X:IT&_trksid=p3984.m1439.l2649#ht_3088wt_1139
 
i welded a couple of nuts to the pipe this morning and fitted the china heat shield too.
last time Cj rode the PW, he almost burnt his leg on the dodgy pipe that was there.
the new pipe now sits inwards another 25mm, so less chance of it happening again.
i also make him wear shin guards.

 
Top job mate, you must have a pipe bender at home, that is something I would like to get myself somewhere down the track. Its looking much better, can you notice the difference in power?
 
yeah i have a 12T hydraulic press bender,
i bought it to use mainly on the buggy, they are pretty good,
but you need to use good quality steel to not get kinks etc in it,
heat can also help the bends form nicely too.
the tube bender also comes in handy when doing other jobs too.


when i made the PW50's front header pipe, the u-bend where it goes down and then back up to the head,
it had too tight a turn for the bender, i ended up doing a cut and shut on a spare pit bike pipe i had laying around.
i just used the bends that i needed, it is made up from 3 piece's joined together, butt welded and ground back.


the exhaust already sounds different with the new header pipe on it.
the old pipe was quite restricted, due to the smaller i/d pipe used, the dodgy bends, and the built up carbon/oil inside it , etc etc.
in the video of it, it's warmed up and running, there is a slight knock coming from the clutch side of the motor, it can be heard in the background if you listen carefully.
the drive gears inside the case use rubber cushioned gears to soften the drive.
i'm guessing that the rubbers may need replacing, i'll suss them in the next couple of weeks.


video of the new header pipe fitted to the expansion chamber, (chamber not cleaned out yet) and the original rear muffler fitted (also semi blocked with oil/carbon).

 
here is the PW's muffler restrictor insert, caked in 1-2mm carbon/oil, same as the inside of the pipe


and the bike running without it, no back pressure,
bike was cold too, so the fuel had evaporated in the cylinder and left the oil, check out the smoke.

 
Last edited:
and with the new custom muffler fitted, deeper sound, revs a bit quicker too?
but keep in mind, after each change in the videos, it did need some tweeking of the mixture screw too.


Sounds "tourquier"? maybe to me not quite as much sting (if that makes sense, it does in my head :p ) But either way a much nicer noise than b4 :)
 
yeah, def has a different sound happening.

next thing will be a decarbon/oil cleanout with the help of some LPG and compressed air,
and apparently we have some rain due late in the week,
that always helps to hide/dissipate some thick smoke, lol
 
it's getting there slowly.

today i swapped another carby onto the PW, to try it out.
the original PW50 carby is a Mikuni 12mm, i fitted the carby off one of my LB80 Chappy's, a Mikuni 15mm.
all it needed to run was a quick blow out, swap the throttle and choke cables over, and the main jet from the old carby into the new one.
2nd kick it fired up and ran, seems to be pretty responsive too
i'll have to give it a ride in the backyard tomorrow and see what it goes like !?
 
Saw one for sale today for 1k... And yours looks in much better nick, good stuff mate, bet the kid is stoked :)
 
thanks guys,
and yeah Timeeh, i see a few for sale locally too,
i think Cjs' is a better bike compare to later model one's i i've seen, more expensive one's, the average price they sell for here is $600-$800
it probably owes me around $380 all up so far, including the new top end rebuild, and new/used plastics
and a ship load of time (well around 15 hours?), but i cant charge myself for my own time, lol

the jets for the original Mikuni carby are not something that is stocked at Show and Go motorcycles.
i had them order in a couple for me, should be here early next week.

the Chappys' 15mm Mikuni that i have on the PeeWee atm seems to need the float level reset, it's weeping a bit of fuel atm.
and i need to find my VM26 spare jets too,
i swapped in a bigger pilot to see what that'd do, but i think i've fitted a #45 or possibly a #55 that i bought for my IT200, instead of a #15 or a #17.5
i cant read the numbers on the original one.
 
hmm, still waiting on jets for the PW.

some of the new stainless bolts arrived today,


and i have started making something else for it too ??

 
the rest of the stainless bolts and acorn nuts arrived this week


and the PW50 sticker kit came in, as well as the carby jets
the only thing wrong, is the sticker kit is the new updated version
i wanted the older style set, but it is no longer available.


now i have a bit of work to do on it.
 
Those bolts don't seem to bad for the price ay, mine rocked up this week too. And I still can't work out what you are going to make with that exhaust.
 
yeah i'm pretty happy with the stainless bolts/nuts.
the muffler project still is waiting to happen, i have run of of Argoshield Light for the welder.

i showed Cj how to fit those new bolts today, he did a good job.
i loosened the screws and he undid them, took them off and matched up the right length for each hole with the new ones.
i got him to fit the spring washer, then flat washer, then he fitted the bolts onto the motor, screwing them in by fingers first
and finally tightening them all up with the cordless driver.

he's had plenty of experience with the cordless driver,
when he was 2 years old, he'd go outside and play, he used to grab it and find some screws he could undo.
i had to constantly refit screws all the time on my cars and bikes etc,
he'd loosen the side indicators, grilles, tail lights and a lot of interior bits and pieces. lol


anyway, i burnt the carbon and oil out of the expansion chamber today, just to see it it runs any better.
luckily there was a bit of wind around, even a few spots of rain.
i used the portable gas burner/barbeque, the compressed air, and the LPG bottle with a hose and torch on the end.
it took a bit over an hour to do, i made some video's on my phone, hopefully they look ok, loading them up now.
i got the pipe hot sitting it on the burner and it started smoking, i blew some low pressure air through it to burn out the carbon/oil mix
then once most of it had burnt out, i fired up the lpg torch and got the last few bits red hot and smoking.
it is easy enough to tell once the carbon has burnt off the inside of the pipe, as it burns the paint of the outside too.
i blew the old paint of with the compressor, any places that it was still stuck to, i cooked again.

the expansion chamber is maybe 200 grams lighter now, so the insides must have been pretty clogged up.
 
here are a few videos to give you an idea of how to clean an expansion chamber.
you can see the smoke etc, there is a lot more than what shows up though


the sparks are bits of burning solid carbon/oil that spits out as you blow it through.


Latest posts

Back
Top