The Legend of Chang Mai and her rebirth

Mini Dirt Bikes & Pit Bikes Forum

Help Support Mini Dirt Bikes & Pit Bikes Forum:

This site may earn a commission from merchant affiliate links, including eBay, Amazon, and others.
O.K.

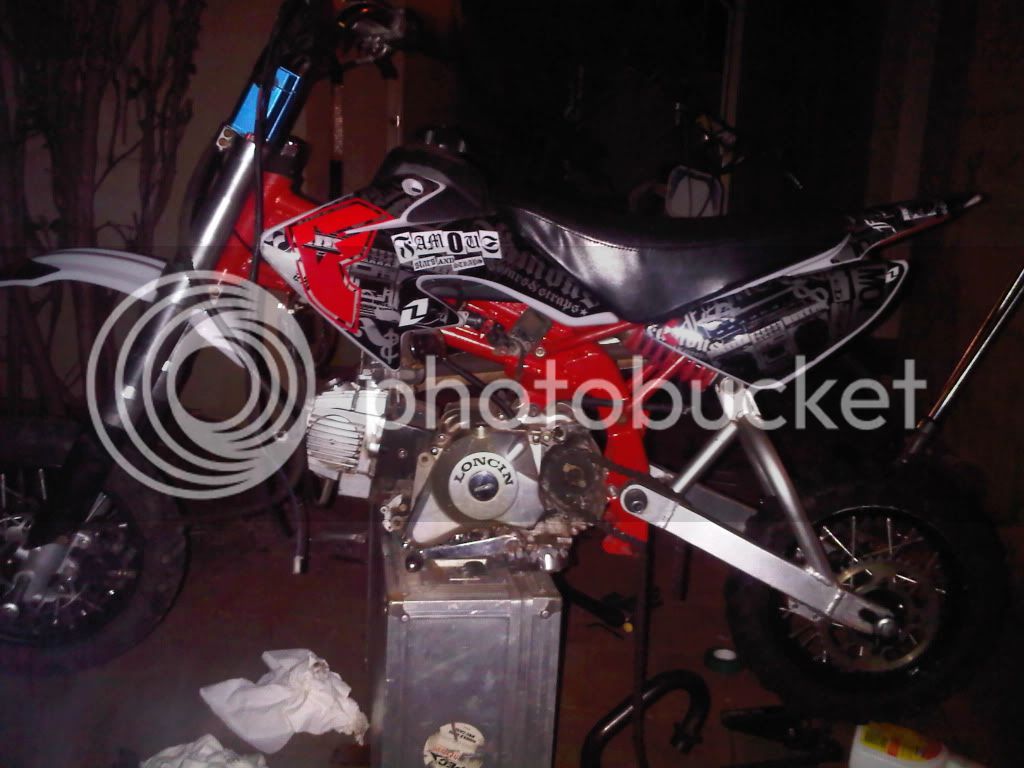
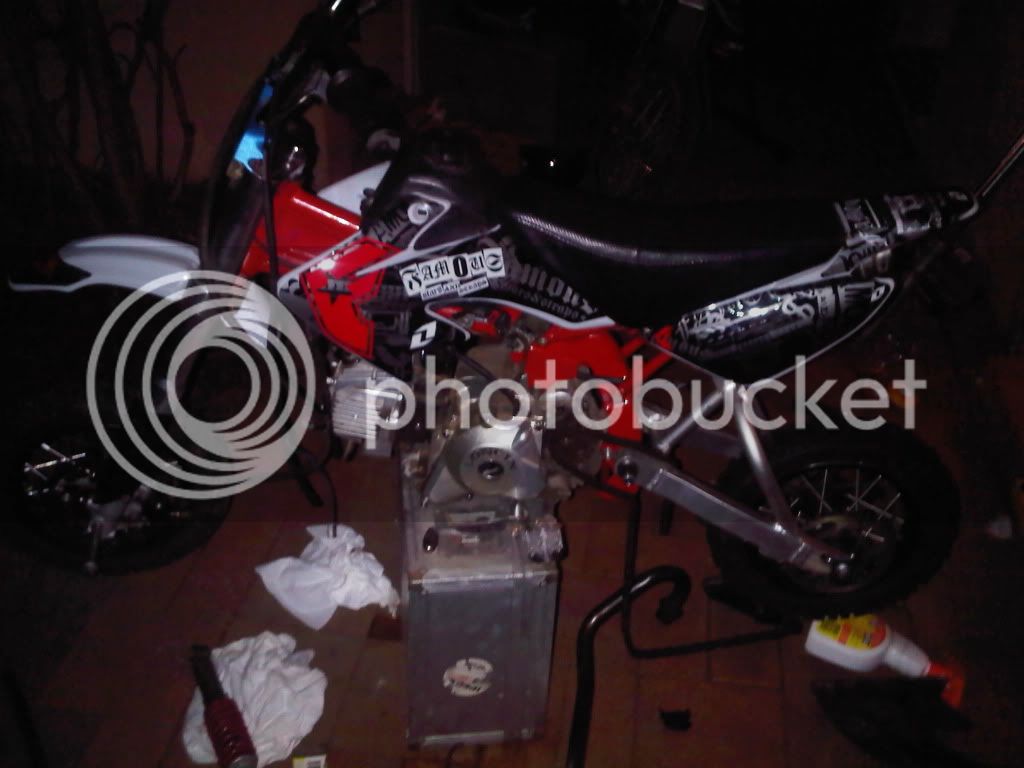
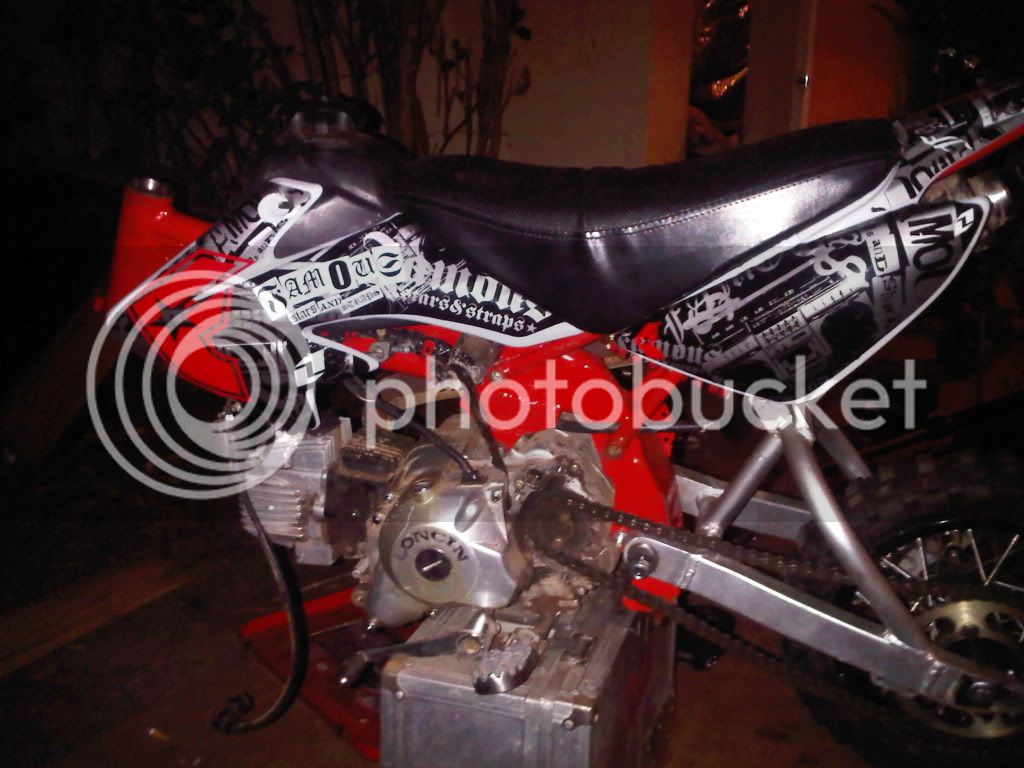
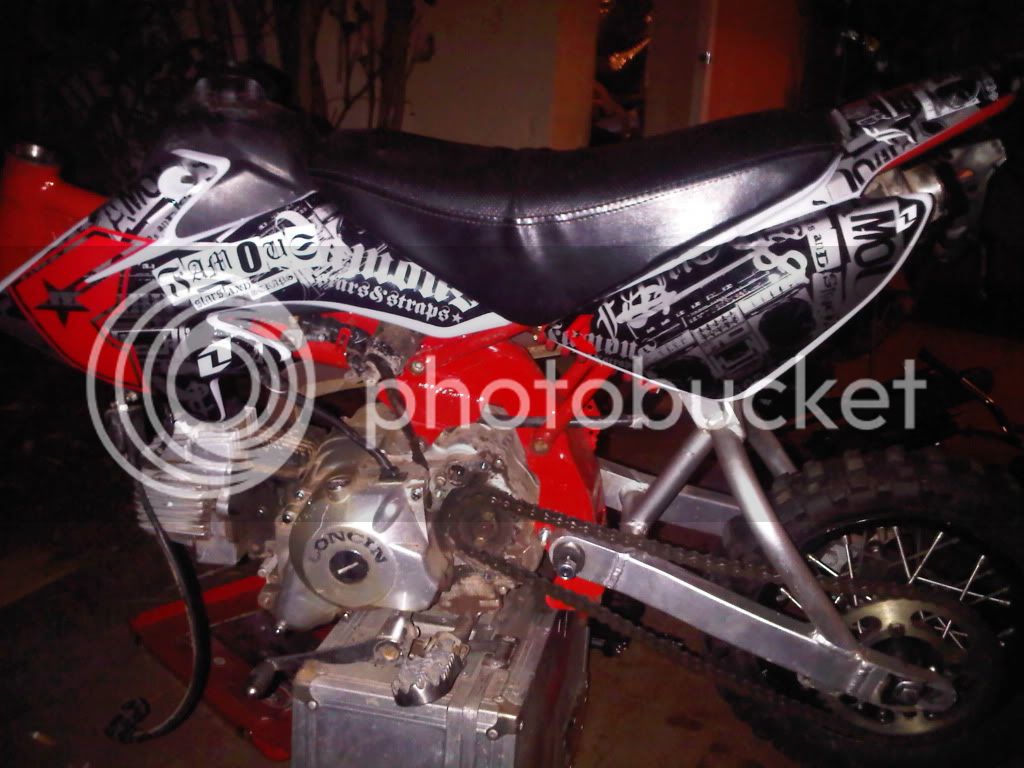
I decided to swap the frame as well. Mainly due to their being no bracket on the existing frame for my rear disc brakes.

This would have appeared to be a fairly easy thing to do. But alas, no.

MF was kind enough to send me the original cups and bearings from the red frame.

I pulled Chang Mai apart and had bits all over the place.

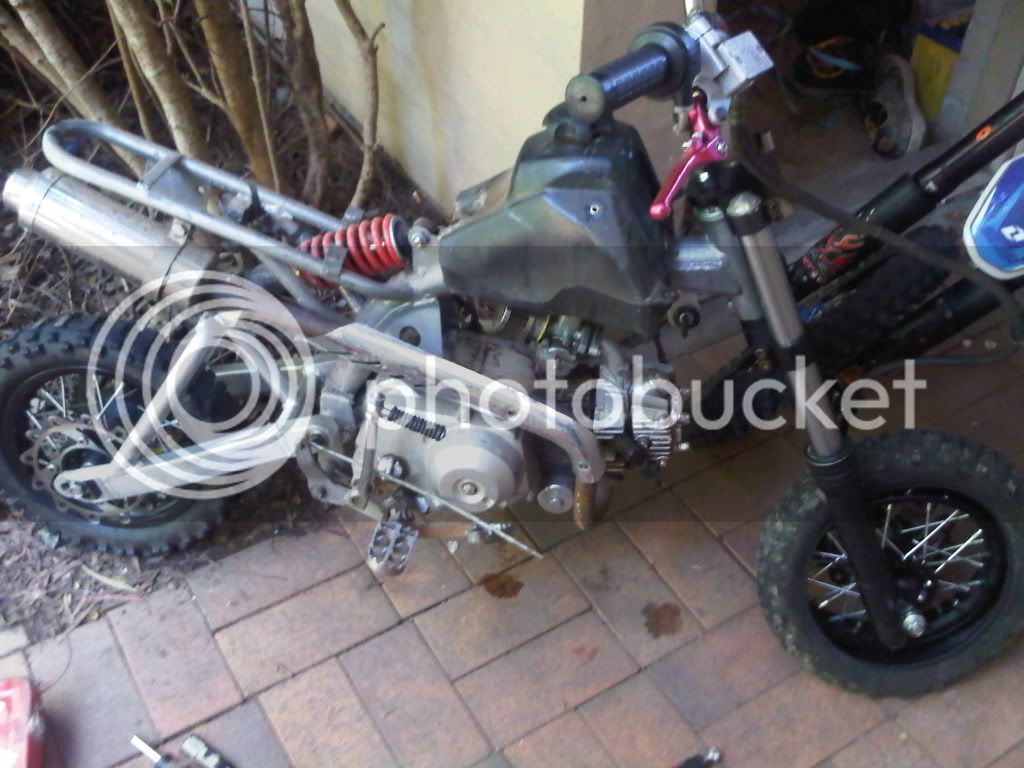
One real problem though. The headstem for the new forks/triples was not long enough. I had another headstem but it was too large for the bearings. Bloody wonderful.

Another visit to DHZ was in order. I was able to get another headstem but needed to buy the bottom part of the triples as well, their press wasnt large enough to remove the headstem.

I took this to another mechanics and they were able to press it out for me. Problem is it is just the tiniest bit too big to fit into the lower triples from the other forks.

Anyone know of a place in Sydney that could lathe a small amount from the bottom of the headstem?

Or if anyone is able to do this, please let me know as I would like to get this part done as soon as possible.

This is getting annoying.

I was very tempted to just buy another bike when I was at DHZ today and let you all marvel at the transformation I had made to Chang Mai. However, that would have been dishonest.

logic
 
Last edited:
I had the same problem on a bike i was putting together. Being impatient and a tight arse i ended up chucking my drill into the vice, wrapped some elec tape around the threads on the headstem tube to protect the threads and put it in the chuck of my drill. Then i taped drill trigger of the drill on and held a file lightly against the area to be shaved down, it takes time but it worked, sorta like a "Ghetto Lathe".
 
Theres no way this thing would fit in my drill. But I like the way you think.

When I realised I needed a hydraulic press to get the head stem out. My car jack had never looked so useful. HMMMM, now what can I use to give the jack a solid surface to work from.

Anyway.

I thought I would throw up a couple of pictures to keep it semi interesting. There are a couple of other things I need as well. The original frame was a basic CRF50 style frame being one single fat tube all the way through. The red frame is a twin tube frame and as such has a great deal less clearance which means I will also need a carby spinner so my carby will fit.

Chang Mai undressed. As you can see she is a little worse for wear and needs to bathe more regularly.

utf-8BSU1HMDAxMTgtMjAxMTA1MTgtMTEzNC5qcGc.jpg


I put everything else I had on Chang so I could at least get an idea of how she would look and the dimensions of her with the other frame.

This is Chang minus the front end. Yes, I am still to clean the motor. I will get there. Sorry about the quality of the pics, it was getting dark and I used my blackberry.

utf-8BSU1HMDAxMjEtMjAxMTA1MTgtMTc0OC5qcGc.jpg


utf-8BSU1HMDAxMjAtMjAxMTA1MTgtMTc0OC5qcGc.jpg


utf-8BSU1HMDAxMTktMjAxMTA1MTgtMTc0Ny5qcGc.jpg


To assist my sanity I may be using a different front end on her as I just cant be bothered stuffing around with the stem etc. I am the most impatient person you will ever meet (if we ever meet) and also lose interest in things quite quickly. I need to get things done when I want to get them done otherwise they will just sit there for all eternity. I know, I am flawed.

logic
 
O.K.

Today I returned the other headstem and lower triples to DHZ. I also returned the pitster pro bar risers and Ken was kind enough to take it all back. I think he is amused by my lack of knowledge and my attitude that everything will fit if I will it to fit.

A different front end is in order. This will be collected on the weekend. There should be no issue with the fit as this front end is the original from this frame. That said, just wait. Something is bound to go wrong:)

I bought my chain breaker today and some more fork oil. I also got a few more breathers as they seem to leap off the bike as I am riding.

All things being equal I should have her finished by the end of the weekend.

I will update pics as soon as progress is made.

logic
 
This thread is as amusingly educational as my Freshmen Physics professor/farmer/stand-up comedian. Well done, Sir.
 
Well, as I said. Something was sure to go wrong.

I tried to install the new forks this morning and found the head stem to be a fair bit too small. Of course it was.

After much thought and the occasional swear word I decided to consult with my friend and confidant, THE GRINDER. :)

We spoke harshly to the bottom of the top clamp and it became far more reasonable in its efforts to work as part of the team after our chat.

The forks are installed. Still not perfectly but they are on there and I dont think they will fall off any time real soon.

Another dummied up bike with lots of stuff still needing to be done.

utf-8BSU1HMDAxMzAtMjAxMTA1MjItMTgxNi5qcGc.jpg


The above was taken using my phone so excuse the quality.

I need to get some more spacers for the front end and also the rear. I need to use a shorter front brake cable, which I have. The front tube was done today. Record time for me, 13 minutes including getting the dreadful bent valve through the rim.

I need to rig up a kill switch as I destroyed the ignition system trying to remove it from the last frame.

I also installed the carby spinner today. Not quite as simple as some of those ads would lead one to believe. In theory it is a fantastic idea. In practice though, it can be substantially more troublesome.

The carby spinner bolted to the head without issue. The manifold however would not fit between the bolts used to hold the spinner in place. I tried a couple of hardware stores to see if I could find sunken head m6 bolts. This was not to be. GRINDER time again:)

I ground off the edges of the manifold and this made it all fit together nicely.

There are still a few other things to do but at least we are starting to get somewhere now.

Chang may also have a new name. I am not sure what it will be yet but she is looking a little more Eurasian than Asian. Possibly even Eastern European. She is looking sexy but she has that weird angry thing about her. Like a Russian or Bulgarian mail order bride.

Another Pic. Just like the first one.

utf-8BSU1HMDAxMjktMjAxMTA1MjItMTgxNS5qcGc.jpg


I will continue to update as I can and time allows.

logic
 
Looking like a bike now!!

Great work, i really think your grinder should be banished. Nothing good can come of that relationship.

But seriously, looking good Paul!
 
My grinder is the only thing that has made this build possible so far.

It is a must when building things out of bits that dont fit together.

logic
 
So, I now have the spacer issue sorted.

I couldn't be bothered driving to DHZ. It is getting a little bit embarrassing having to go there each day. I think Ken is wondering if I have a thing for him.

I dropped into a massive chain of hardware stores, who I refuse to advertise for, to check if they had some sort of pipe with the correct dimensions.

I found a piece of Galvanised pipe in the plumbing/hot water section which seemed to be about right.

Pic of the pipe with one end cut off.
utf-8BSU1HMDAxMzEtMjAxMTA1MjMtMTI1Mi5qcGc.jpg


I was going to use one of my trusty grinders to cut it to the desired level, but there was a little voice on my right shoulder saying " logic, remember what i said in your thread last night. All of this grinder use will be your undoing". I plugged in the grinder anyway trying to block out the voice, but it started again. I relented and got out the hacksaw.

I marked where I thought I should be cutting, I like estimation, and started to cut away. I had to cut the thread off first and then cut the spacer I required. I am not sure if many of you have experience with hacksaws, God knows I dont, but it was very difficult to get the cut perfectly straight.

After a couple of glasses of red, to dull the anti grinder voice, I got out the grinder and had my way with the pipe. Oh, the joy of those little sparks flying everywhere.

Needless to say I ground off too much in my state of euphoria and had to start again. This time the grinder worked out very well although I required another red to help me complete the job.

I now have my spacer system down pat and have an abundance of metal tube to make them out of. It is only about $8.00 for a 35cm piece of pipe. That will make a lot of spacers and I also tend to lose about 10 mm on either side when I use the grinder to cut.

Another hurdle has been jumped and my trusty grinder has been with me every step of the way, lifting me when I cant lift myself.

I wonder if the Bette Midler song "wind beneath my wings" was written by a man like me about his grinder. I would not be surprised one little bit.

logic

( Just for the record. I do not condone the mix of power tools and alcohol. If you are not used to using power tools or drinking please refrain from indulging in either unless in the company of an experienced user/drinker. Power tools are not toys, unless of course they are plastic and bought from toys R us)
 
Last edited:
More than welcome. I will be leaving it running though so make sure those little things are well insulated and you are wearing your rubber soled shoes.

logic.
 
i think he needs to add to his grinder collection, get a drop saw lol. nice straight cuts and cut in half the time..

but good to see this little adventure soldier on.. its looking good
 
Hmmm. A drop saw. Sounds like a plan.

So, I tried the good old chain breaker. What a piece of crap.

The pin wasnt long enough and it was impossible to get the links out.

Back to the store with that one I guess.

Today I will fit the rear brakes to get an idea of the spacers I need for the rear axle. This means I can also get my grinder out again:)

I am still waiting for my new handle bar risers to arrive. The only real things left to do are fit the chain, fit and wire the kill switch, bleed the front brakes, fit the uni filter and secure all of the plastics.

There is light at the end of the tunnel.

logic
 
chain breakers are a waste of time, grinder is the easiest & fastest way

Dont encourage him hillz lol

Chain breakers are the easiest things ever. Just you luck you got a lemon.

The one i have came all the way from china, has two adjusting points to ensure it fits all chains and even has spare pins. (Link below) And a a price you cant beat.

Universal Chain Breaker Tool for pit bike ATV quad | eBay

Cant wait to see this thing finished :)
 
I must admit the chain breaker does seem like a good idea although I am not having much luck with it.

A little bit more progress and a few more issues.

I wasnt happy with the way the carby was sitting it was sticking out too much and I am certain I would have kicked it off one day. It just wasnt right. I did think of the grinder but there was very little I could grind without destroying either the motor or the carby so I reluctantly put it away.

I had a look through all of the bits and pieces I have accumulated over the past few months(there are lots of them) to see if I could figure out another way to get the carby on in a better position. The carby spinner just didnt seem to give me as many options as I thought it would and it raised the carby up another 10mm or so. Clearance was already an issue and although I could turn it a little bit I was still very limited due to the size of the bolt heads.

Further back in the thread you will see rach gave me a box of bits and pieces rather than throw them out. There were a couple of manifolds in the box and one of them had a weird twist to it. It was almost like a bespoke manifold for my build:) Thank you rach. The carby is now on and it is sitting exactly where I pictured it would. Very happy indeed.

The silver handle bar risers arrived today, Thanks fusedminis, I need some longer bolts to attach them to the bars and then that part will be done. I am still thinking of swapping the bars over to Pro Tapers but there are other things to do first.

My chain guard rubber thingy arrived today and fit perfectly. It was a bit of an impulse buy but my estimation was O.K. The lower engine mount bolt was slightly long so it had to be removed and shortened to allow the chain guard to fit. It all on there now though.

I am getting there. It is all the fiddly bits that take time. Making the bike look like a bike with two wheels and everything else on there is really very simple. When you try to get all of the little bits on there, thats when the fun begins. It is fun though, if not a little bit frustrating at times.

The next project is to build an evil little crf50 size 125. I mean stock crf50. Its not going to be a pretty bike but it will be enjoyable.

logic
 

Latest posts

Back
Top