Reckon that sproket might be an original.... Plently of life left in it though i reckon :LolLolLolLol:
You are using an out of date browser. It may not display this or other websites correctly.
You should upgrade or use an alternative browser.
You should upgrade or use an alternative browser.
Yamaha GT80


Help Support Mini Dirt Bikes & Pit Bikes Forum:
This site may earn a commission from merchant affiliate
links, including eBay, Amazon, and others.
my67xr
Miniriders Legend and Master Spanner Spinning Mode
with that broken stud, do you have access to a mig welder ?
you could weld a nut to the stud, and undo it, the heat helps to break the rust seal
if you get stuck i can do it for you, but i'm from Brighton.
or do you have a gas torch ?
heat the stud up with the gas torch, then push an old candle against the stud, the heat will melt the wax, and it usually penetrates down the stud and the threads
then you can undo it with a pair of pliers
what i would do with the side cover screws is get a large round flat punch, around the same size as the screw head.
put the punch onto the head of the screw then give each one a firm tap with a hammer, it flattens the head off,
then find the correct sized screwdriver and give that a tap into the head of the screw.
this usually gives you enough grip to be able to undo it.
some valve grinding paste on the end of the screwdriver help it grip too.
you should be able to buy the replacement screw kit cheap, like this- 50 NEW Yamaha 6mm Case Screws AT1 CT1 DT1 RT1 JT1 GT80 | eBay
check your measurements against his.
another set, but dearer
NEW Yamaha 6mm Case Screw SET GT1 GT80 YZ80 | eBay
otherwise there is a seller on Ebay from QLD,that has some nice marine grade stainless screws too, he is pretty cheap
MARINE m6 screws | eBay
the piston look old and worn, the bore would have worn a little too.
if you tried honing it out, there might be too much clearance for the new piston and rings
i would bore the cylinder out to the next oversize, and get a new piston/rings, bearings, gudgeon,clips etc
i can give you a number of the guy that does my 2 stroke stuff, he is at Richmond.
a rebore will cost you about $50, you need to give him the new piston,rings and cylinder
and he usually take a day or so to do it.
Sadly, no welder or oxy set. Might try an easy out as timeeh suggested.
Haha no punch either but that's easy enough to buy at Bunnings.
Yeah the number would be great. Know any shops around Adelaide that I might be able to get a quote for the motor rebuild from?
Haha no punch either but that's easy enough to buy at Bunnings.
Yeah the number would be great. Know any shops around Adelaide that I might be able to get a quote for the motor rebuild from?
my67xr
Miniriders Legend and Master Spanner Spinning Mode
you can buy a little refillable butane gas burner torch from Supercheap for about $6.
that will be enough to heat it up to flow some wax down the stud.
my Machinist i use for cylinder boring etc might know someone, i build my own.
if there is enough clearance you may just be able to tap the head of the screw flat with a hammer by itself.
be careful not to hit the engine covers/casing though
Last edited:
Will try the gas torch to remove the stud.
If you could ask him that'd be great mate.
Hmm think I musunderstand you. With the punch your talking about making a clean groove in the screw heads that I can use a flat to undo. How does tapping the head flat help?
If you could ask him that'd be great mate.
Hmm think I musunderstand you. With the punch your talking about making a clean groove in the screw heads that I can use a flat to undo. How does tapping the head flat help?
my67xr
Miniriders Legend and Master Spanner Spinning Mode
nah, a big round flat headed punch like this


find one with a slightly bigger head than the screw, sit it over the philips head and hit it with a hammer, it will flatten down the head of the screw a bit,
then hit your big philips head screwdriver into the philips slots of the screw, it sort of repairs the slots
usually enough to enable you to remove the screw
i can take a couple of pics showing you how to if you need.
my67xr
Miniriders Legend and Master Spanner Spinning Mode
hard enough for it to flatten the head a bit, it just peens the burrs etc back into the slots
dodgy screw head,
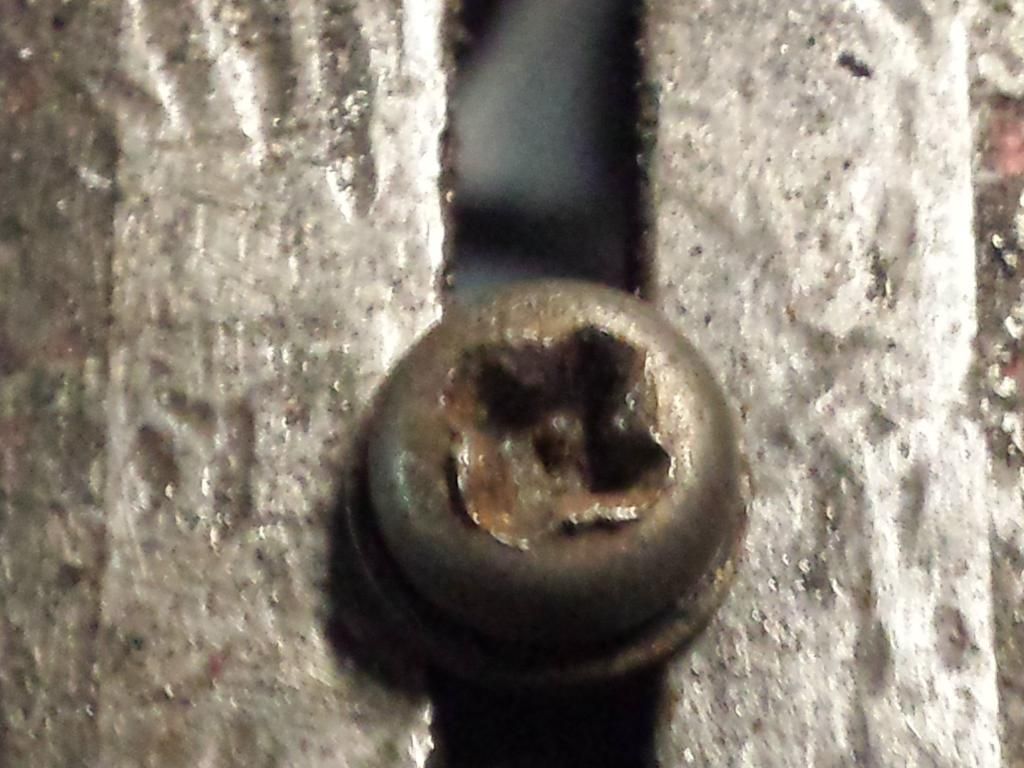
after a hit with a hammer,
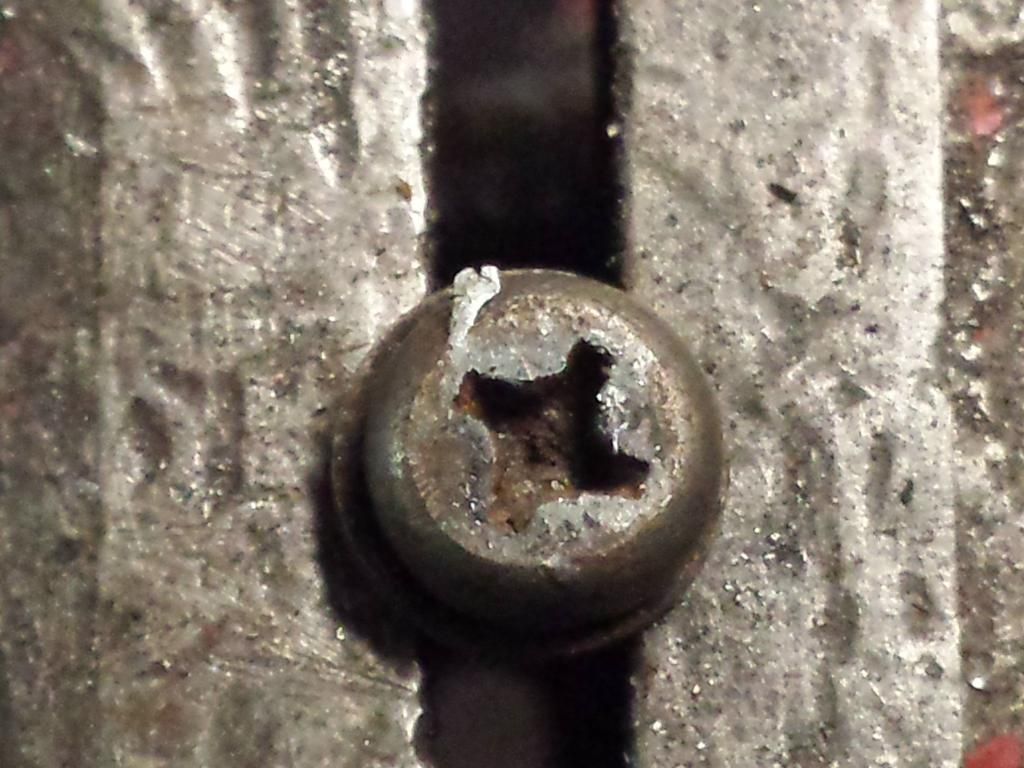
and then after a hit with the screwdriver,
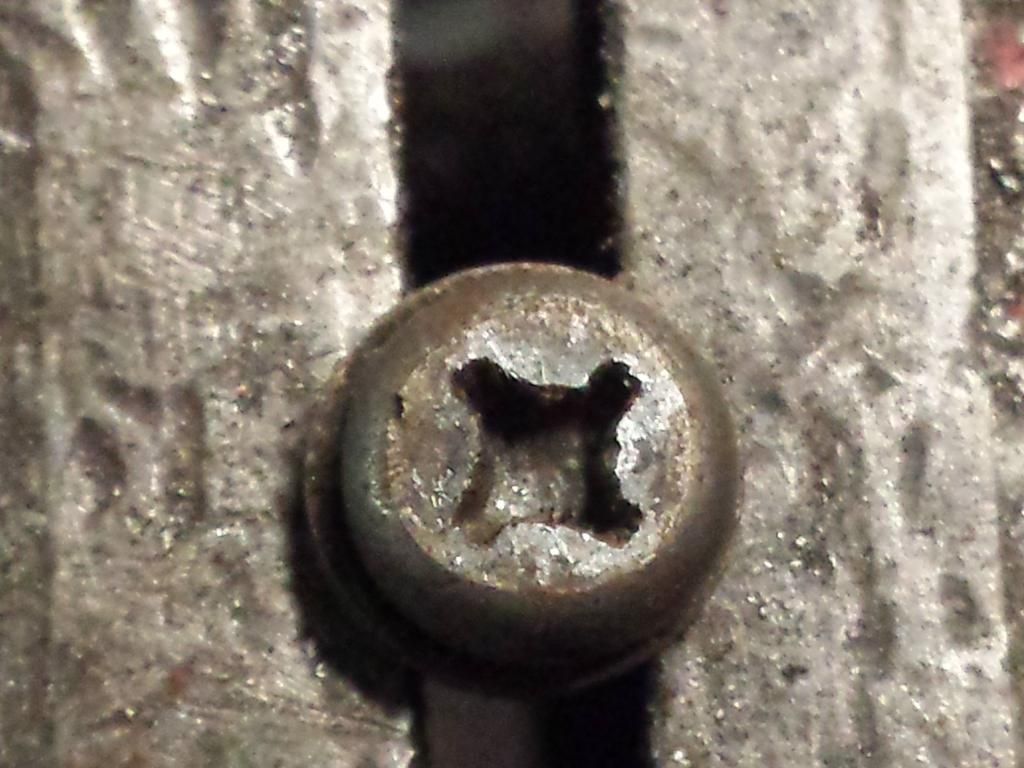
the shock from the hits also helps to break the rust seal in the threads too
i use this method a lot in Panel Beating cars etc
i found the best size screwdriver is from my Stanley Screwdriver set, the second from biggest one.
Ahh yep, excellent photos mate. Can certainly see how it would work. And yes I imagine just the shock alone could help to break most rust seals.
As per your advice, just went out and pulled carby apart after watching a few videos. Fairly clean on the inside, only one of the needles was blocked.
Although the needle and seat (unsure if correct name) had a bit of wear on the outside of the seat. It's the part at end of accelerator cable if that helps? By wear I mean scuff, similar to the scuff on the piston. Think I'll need to replace that?

Just a picture of the carby before I started cleaning. As you can see, it's filthy.

Comparison between a hastily cleaned half and the uncleaned half.
As per your advice, just went out and pulled carby apart after watching a few videos. Fairly clean on the inside, only one of the needles was blocked.
Although the needle and seat (unsure if correct name) had a bit of wear on the outside of the seat. It's the part at end of accelerator cable if that helps? By wear I mean scuff, similar to the scuff on the piston. Think I'll need to replace that?
Just a picture of the carby before I started cleaning. As you can see, it's filthy.
Comparison between a hastily cleaned half and the uncleaned half.
my67xr
Miniriders Legend and Master Spanner Spinning Mode
i have just done a little searching on Ebay, and have come up with a few parts so far.
the piston is used in a few different Yamaha's, the YZ80 A,B,C models, and the Yamaha Chappy 80cc scooters too, 1975,1976, 1977, 1978
(i have a couple of Chappys, link to them in my signature)
and same piston/rings are used in the the early Yamaha MX80's
new old stock genuine Yamaha GT80 piston (1st oversize) for your engine $55.35 inc delivery from USA
Yamaha Piston 25 79 GTMXF 77 MX80 Chappy 74 YZ80 74 76 GT80 367 11635 11 | eBay
and some new old stock Rings (1st oversize) for $44 inc delivery
Yamaha 1st Over Piston Rings YZ80 YZ 80 1974 75 492 11635 00 00 | eBay
a Genuine Piston/Rings set (1st oversize) for $52 including delivery
Yamaha 1st Over Piston Rings YZ80 YZ 80 1974 75 492 11635 00 00 | eBay
another Genuine Piston/Rings set for $91 inc delivery
Yamaha Piston Rings 1st OS GT GTMX TY LB YZ 80 367 11635 11 367 11610 10 | eBay
some new old stock Genuine 2x gudgeon clips, $11.05 inc delivery
Yamaha YG1 JT1 LB80 RD60 LS2 RD125 YAS1 YAS2 YAS3 Piston PIN Clip X2 Circlip | eBay
so what you need to do is to clean the top of the piston up, to see what size it is.
use some degreaser and a rag, or fine steel wool etc
but don't go getting any down inside the engine, stuff a rag down there
or remove the piston from the rod to clean it
on the top there might be a marking, std, .25, .5, .75 etc this is the size of the bore
it could still be standard bore ?
and there will also be an arrow on the exhaust side of the piston too
my67xr
Miniriders Legend and Master Spanner Spinning Mode
the carby looks a bit like what is on my Yamaha Chappy 80 too.
the cylinder part on the end of the throttle cable is called the carby slide.
in the bottom of the carby you will see 2x brass jets, one in the centre, and the other is smaller, towards the inlet manifold side
unscrew them, and check that you can see right through them,
the smaller one might have some tiny holes across through the side of the jet too
they can block up easily
also where the smaller jet screw into, if you shine a torch through the intake manifold side of the carby, and look into the smaller jet threaded hole, you should be able to see light
that hols can block up too.
there's a few other places to look too.
do you have an air compressor and blow gun ?

All the jets are clear and look surprisingly clean inside. There was remnants of fuel inside the carby when I pulled it apart which considering it hasn't been started in years, that's a good sign for carby health to me.
Dad's got an air comp and gun so will still give all of them a blow out anyways.
Dad's got an air comp and gun so will still give all of them a blow out anyways.
my67xr
Miniriders Legend and Master Spanner Spinning Mode
yeah it's standard bore
Hey guys me again, got a screw holding something on to the frame I'm having a bit of trouble getting off, WD40'd it and have tried the obvious screwdriver, then tried vise grips on the screw head. No luck unfortunately. Any other suggestions?


my67xr
Miniriders Legend and Master Spanner Spinning Mode
what size screw is it, a 6mm or 8mm?
you could try drilling it out then using an easy out screw extractor.
Extractor Screw Sutton No2 Set 371799002 I/N 6360081 | Bunnings Warehouse
Extractor Screw Sutton No3 Set 371799003 I/N 6360082 | Bunnings Warehouse
start off with the drill bit, drill it slowly to centre the bit, and work your way through keeping it as parralel to the screw as you can.
my67xr
Miniriders Legend and Master Spanner Spinning Mode
yeah, from the outside will be the best.
watch out you don"t snap the easy out though ! otherwise it'll be a weld a nut to the screw job to get it all out.
pm'd you the machinists phone number too
watch out you don"t snap the easy out though ! otherwise it'll be a weld a nut to the screw job to get it all out.
pm'd you the machinists phone number too
my67xr
Miniriders Legend and Master Spanner Spinning Mode
nice Stubsy,
at least you are keeping the Yamaha a Yamaha by using it.
they are a neat looking tank.
so how is the strip down going on the MX80 Craig ?
did you get onto Dave about the cylinder work yet ?
at least you are keeping the Yamaha a Yamaha by using it.
they are a neat looking tank.
so how is the strip down going on the MX80 Craig ?
did you get onto Dave about the cylinder work yet ?